Ricoh IS760 Operating Instructions - Page 22
Installing the IEEE1394 Interface Board
 |
View all Ricoh IS760 manuals
Add to My Manuals
Save this manual to your list of manuals |
Page 22 highlights
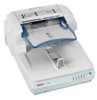
Setting up the Scanner I Fix the scanner control unit with three screws. J Removed cables must connect in former state. Installing the IEEE1394 Interface Board 2 Important ❒ Touch any metallic material before touching the IEEE interface board to re- move static from your body. Note ❒ The optional IEEE 1394 interface board is alternatively used with the USB in- terface board. A Turn OFF the power to this product and disconnect all cables connected to the product, including the power cable. B Remove the three screws on the lower back surface of the product. ADC009S C Pull out the scanner control unit by pulling the black ribbon on the center of the board. ADC010S Important ❒ The control unit is heavy. Please take care not to drop it when pulling it out. 18
-
 1
1 -
2
-
3
-
4
-
5
-
6
-
7
-
8
-
9
-
10
-
11
-
12
-
13
-
14
-
15
-
16
-
 17
17 -
 18
18 -
 19
19 -
 20
20 -
 21
21 -
 22
22 -
 23
23 -
 24
24 -
 25
25 -
 26
26 -
 27
27 -
28
-
29
-
30
-
31
-
32
-
33
-
34
-
35
-
36
-
37
-
38
-
39
-
40
-
41
-
42
-
43
-
44
-
45
-
46
-
47
-
48
-
49
-
50
-
51
-
52
-
53
-
54
-
55
-
56
-
57
-
58
-
59
-
60
-
61
-
62
-
63
-
64
-
65
-
66
-
67
-
68
-
69
-
70
-
71
-
72
-
73
-
74
-
75
-
76
-
77
-
78
-
79
-
80
-
81
-
82
-
83
-
84
-
85
-
86
-
87
-
88
-
89
-
90
-
91
-
92
-
93
-
94
-
95
-
96
 |
 |
