Ryobi RYi4022X Operation Manual - Page 18
Operation
 |
View all Ryobi RYi4022X manuals
Add to My Manuals
Save this manual to your list of manuals |
Page 18 highlights
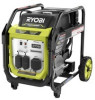
OPERATION WARNING: Do not allow familiarity with this product to make you careless. Remember that a careless fraction of a second is sufficient to inflict serious injury. WARNING: Do not use any attachments or accessories not recommended by the manufacturer of this product. The use of attachments or accessories not recommended can result in serious personal injury. NOTICE: This product is equipped with a spark arrestor that has been evaluated by the USDA Forest Service; however, product users must comply with Federal, State, and local fire prevention regulations. Check with appropriate authorities. Contact customer service or a qualified service center to purchase a replacement spark arrestor. NOTICE: Before each use, inspect the entire product for damaged, missing, or loose parts,such as screws, nuts, bolts, caps, etc. Tighten securely all fasteners and caps and do not operate this product until all missing or damaged parts are replaced. Please contact customer service or a qualified service center for assistance. APPLICATIONS This generator is designed to supply electrical power for operating compatible electrical lighting, appliances, tools, and motor loads. BEFORE OPERATING THE UNIT n Only use OUTSIDE and at least 20 feet away from windows, doors, and vents as recommended by the U.S Department of Health and Human Services Centers for Disease Control and Prevention. Your specific home and/ or wind conditions may require additional distance. n NEVER use inside a home or garage, EVEN IF doors and windows are open. n Always position the generator on a flat firm surface. SPECIAL REQUIREMENTS: There may be General or State Occupational Safety and Health Administration (OSHA) regulations, local codes or ordinances that apply to the intended use of the generator. Please consult a qualified electrician, electrical inspector, or the local agency having jurisdiction: In some areas, generators are required to be registered with local utility companies. If the generator is used at a construction site, there may be additional regulations which must be observed. CHECKING/ADDING LUBRICANT See Figure 7. NOTICE: Attempting to start the engine before it has been properly filled with lubricant will result in equipment failure. NOTE: If a separate engine manual is provided for this product, please follow the instructions provided in the engine manual instead of the information listed below. Engine lubricant has a major influence on engine performance and service life. For general, all-temperature use, SAE 10W-30 is recommended. Always use a 4-stroke motor lubricant that meets or exceeds the requirements for API service classification SJ. This engine comes with a feature that will shut off the engine when a specific lubricant level is not maintained. The engine will not restart until an appropriate lubricant level is reached. NOTE: Non-detergent or 2-stroke engine lubricants will damage the engine and should not be used. n Unscrew the oil cap/dipstick and remove. n Wipe dipstick clean and re-seat in hole; do not re-thread. n Remove dipstick again and check lubricant level. Lubricant level should fall between the minimum and maximum marks on the dipstick. n If level is low, add engine lubricant until the fluid level rises between the minimum and maximum marks on the dipstick. n Replace and secure the oil cap/dipstick. USING FUEL STABILIZER Fuel gets old, oxidizes, and breaks down over time. Adding a fuel stabilizer (not included) extends the usable life of fuel and helps prevent deposits from forming that can clog the fuel system. Follow fuel stabilizer manufacturer's directions for correct ratio of stabilizer to fuel. Mix fuel stabilizer and gasoline prior to filling the tank by using a gas can or other approved fuel container and shaking gently to combine. NOTE: To control the amount of fuel stabilizer being added to the engine, always mix fuel stabilizer with gasoline before fueling the tank rather than adding fuel stabilizer directly into the generator's fuel tank. n Replace and secure the fuel tank cap. n Start and run the engine for at least 5 minutes to allow stabilizer to treat the entire fuel system. 14 - English
-
 1
1 -
2
-
3
-
4
-
5
-
6
-
7
-
8
-
9
-
10
-
11
-
12
-
 13
13 -
 14
14 -
 15
15 -
 16
16 -
 17
17 -
 18
18 -
 19
19 -
 20
20 -
 21
21 -
 22
22 -
 23
23 -
24
-
25
-
26
-
27
-
28
-
29
-
30
-
31
-
32
-
33
-
34
-
35
-
36
-
37
-
38
-
39
-
40
-
41
-
42
-
43
-
44
-
45
-
46
-
47
-
48
-
49
-
50
-
51
-
52
-
53
-
54
-
55
-
56
-
57
-
58
-
59
-
60
-
61
-
62
-
63
-
64
-
65
-
66
-
67
-
68
 |
 |
