Samsung CLX-9352NA Installation Guide Easy Manual Ver.3.00 (English) - Page 17
Installing the imaging units
 |
View all Samsung CLX-9352NA manuals
Add to My Manuals
Save this manual to your list of manuals |
Page 17 highlights
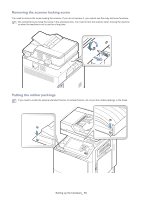
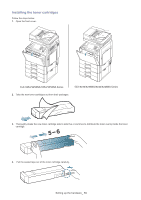
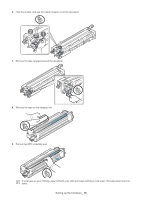
Installing the imaging units Follow the steps below: CLX-9252/9352 Series 1. Squeeze the left/right locking levers and push outward at the same time. Then remove the waste toner container. 2. Squeeze and push down the lever, and open the inner cover. Setting up the hardware_ 16
-
 1
1 -
2
-
3
-
4
-
5
-
6
-
7
-
8
-
9
-
10
-
11
-
 12
12 -
 13
13 -
 14
14 -
 15
15 -
 16
16 -
 17
17 -
 18
18 -
 19
19 -
 20
20 -
 21
21 -
 22
22 -
23
-
24
-
25
-
26
-
27
-
28
-
29
-
30
-
31
-
32
-
33
-
34
-
35
-
36
-
37
-
38
-
39
-
40
-
41
-
42
-
43
-
44
-
45
-
46
-
47
-
48
-
49
-
50
-
51
-
52
-
53
-
54
-
55
-
56
-
57
-
58
-
59
-
60
-
61
 |
 |
Setting up the hardware
_ 16
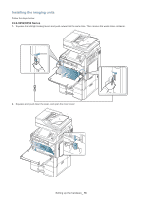
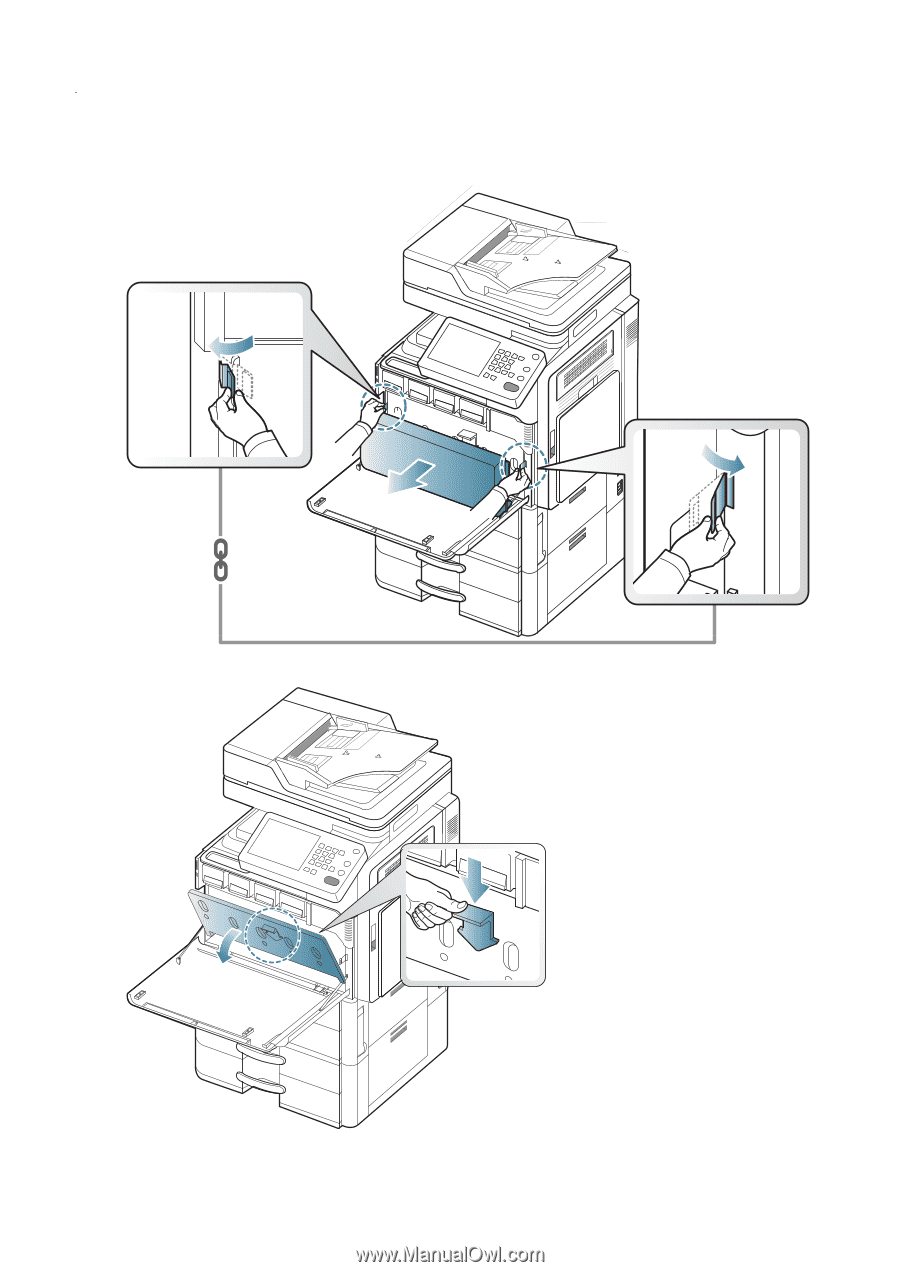
Installing the imaging units
Follow the steps below:
CLX-9252/9352 Series
1.
Squeeze the left/right locking levers and push outward at the same time. Then remove the waste toner container.
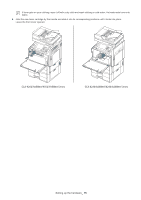
2.
Squeeze and push down the lever, and open the inner cover.