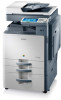
Samsung CLX-9352NA Installation Guide Easy Manual Ver.3.00 (English) - Page 6
Setting up the hardware - toner
 |
View all Samsung CLX-9352NA manuals
Add to My Manuals
Save this manual to your list of manuals |
Page 6 highlights
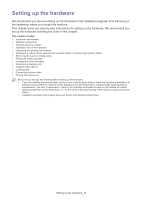
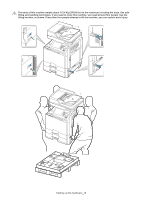
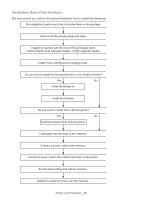
Setting up the hardware 1. We recommend you leave to setting up the hardware to the installation engineer from Samsung or the dealership where you bought the machine. This chapter gives you step-by-step instructions for setting up the hardware. We recommend you set up the hardware following the order in this chapter. This chapter includes: • Installation environment • Machine configuration • Optional goods by models • Installation flow of the hardware • Unpacking and placing the hardware • Installing the cabinet stand, optional dual cassette feeder or optional high capacity feeder • Removing the scanner locking screw • Putting the rubber packings • Installing the toner cartridges • Installing the imaging units • Installing other options • Loading paper • Connecting a printer cable • Turning the machine on Be sure to go through the following before setting up the hardware: • If you are installing the machine after moving it from a cold to warm location, leave the machine unpacked for at least two hours so that the machine is fully adapted to the site temperature, avoiding image faults caused by condensation (The term "condensation" refers to the formation of droplets of water on the surface of a metal object brought from cold to warm place, i.e., as the result of the rapid cooling of the moisture (vapor) around the object). • Installation engineer must prepare the screw drivers and diagonal-cutting pliers. Setting up the hardware_ 5
-
 1
1 -
 2
2 -
 3
3 -
 4
4 -
 5
5 -
 6
6 -
 7
7 -
 8
8 -
 9
9 -
 10
10 -
 11
11 -
 12
12 -
13
-
14
-
15
-
16
-
17
-
18
-
19
-
20
-
21
-
22
-
23
-
24
-
25
-
26
-
27
-
28
-
29
-
30
-
31
-
32
-
33
-
34
-
35
-
36
-
37
-
38
-
39
-
40
-
41
-
42
-
43
-
44
-
45
-
46
-
47
-
48
-
49
-
50
-
51
-
52
-
53
-
54
-
55
-
56
-
57
-
58
-
59
-
60
-
61
 |
 |