Samsung DVD-V4600 User Manual (user Manual) (ver.1.0) (Spanish) - Page 11
Black Level, TV Aspect Ratio, Dynamic Compression, PCM Down Sampling - parts
 |
View all Samsung DVD-V4600 manuals
Add to My Manuals
Save this manual to your list of manuals |
Page 11 highlights
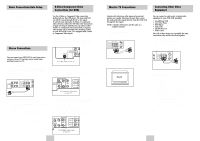
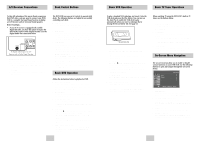
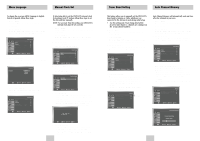
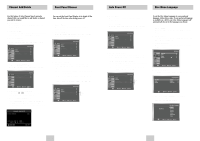
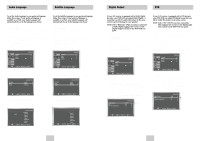
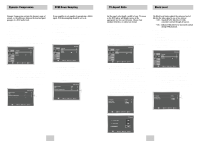
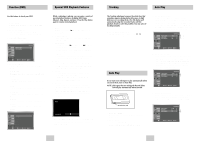
Dynamic Compression PCM Down Sampling Dynamic Compression restrains the dynamic range of sounds, i.e. the difference between the loud and quiet passages of a DVD audio track. 1 Open "MENU" Press the MENU button while the DVD is in Stop mode. 2 Select "DVD" Use the UP/DOWN buttons to highlight "DVD" then press the ENTER button. 3 Select "Audio" Highlight "Audio", then press the ENTER button. If your amplifier is not capable of reproducing a 96kHz signal, PCM downsampling should be set to on. 1 Open "MENU" Press the MENU button while the DVD is in Stop mode. 2 Select "DVD" Use the UP/DOWN buttons to highlight "DVD " then press the ENTER button. 3 Select "Audio" Highlight "Audio", then press the ENTER button. TV Aspect Ratio Black Level Set the aspect ratio (length x width) of your TV screen so the DVD player will display movies at the appropriate size for your television. Choose from standard, letterbox, or widescreen format. 1 Open "MENU" Press the MENU button while the DVD is in Stop mode. 2 Select "DVD" Use the UP/DOWN buttons to highlight "DVD" then press the ENTER button. 3 Select "Display" Highlight "Display", then press the ENTER button. The Black Level feature adjusts the reference level of black in the video signal to one of two choices: • Off - Standard NTSC black level. Yields consistent contrast through all sources. • On - Enhanced black level, for increased contrast during DVD playback. 1 Open "MENU" Press the MENU button while the DVD is in Stop mode. 2 Select "DVD" Use the UP/DOWN buttons to highlight "DVD " then press the ENTER button. 3 Select "Display" Highlight "Display", then press the ENTER button. 4 Set "Dynamic Compression" Highlight "Dynamic Compression", then press the RIGHT button to select one of the following options: • On - This will compress the total dynamic range of the DVD audio, making quiet passages in the audio signal louder and loud passages softer. • Off - This will preserve the original dynamic range. On On On PCM Down Sampling : Onff Off 4 Set "PCM Down Sampling" Highlight "PCM Down Sampling", then press the RIGHT button to select one of the following options: • On - When a 96K audio disc is played, 96K will be downsampled to 48K and outputted. • Off - When a 96K disc is played, 96K will be outputted. PCM Down Sampling : On On Off 4 Set "TV Aspect" Highlight "TV Aspect" then press the RIGHT button to select one of the following options: • Widescreen - This method allows you to view the full 16:9 picture on a widescreen television. • Letterbox - This method displays the full width of the widescreen movie on a standard 4:3 television. As a result, black bars will appear at the top and bottom of the screen. • Pan-Scan - The familiar way of watching DVD and VHS movies, this method selectively crops (by panning and scanning to keep the most important part of the picture visible) wide screen movies to fit a standard 4:3 television screen. Display Setup 4 Set "Black Level" Highlight "Black Level," then press the RIGHT button to select one of the following options: • On - This will enhance the Black Level for increased brightness/contrast when viewing DVDs. • Off - This is the Standard NTSC reference Black Level for consistent brightness/contrast across all sources. Display Setup On On Off ENG-18 ENG-19
-
 1
1 -
2
-
3
-
4
-
5
-
 6
6 -
 7
7 -
 8
8 -
 9
9 -
 10
10 -
 11
11 -
 12
12 -
 13
13 -
 14
14 -
 15
15 -
 16
16 -
17
-
18
-
19
-
20
-
21
-
22
-
23
-
24
-
25
-
26
-
27
-
28
-
29
-
30
-
31
-
32
-
33
-
34
-
35
-
36
-
37
-
38
-
39
-
40
 |
 |
