Samsung SCH-U640 User Manual (user Manual) (ver.f10) (English) - Page 75
Creating and Sending Voice Messages
 |
View all Samsung SCH-U640 manuals
Add to My Manuals
Save this manual to your list of manuals |
Page 75 highlights
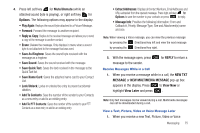
• Press left soft key for Save to save the recording. • Press to send the recording in a video message. • Press right soft key for Erase to erase the video. 7. Press the Directional key down to highlight the Subject field. In the Subject field, compose your message using the keypad. 8. Press the Directional key down to highlight the Name Card field. Press left soft key for Add to select My Name Card or an entry from your Contacts list. Follow the prompts and press to insert. 9. Press to SEND the video. Creating and Sending Voice Messages You can send voice messages to another mobile phone or to an email address. 1. From the home screen, press left soft key for Message. 2. Press for New Message ➔ Message. for Voice 70 3. Press to record your message. Once the recording has been stopped or has finished it is automatically saved and inserted into the message. 4. In the To: field: • By default the entry mode is Abc so that you can enter a phone number, contact name or email address of the recipient. If you have contacts stored in the Contact List, you will see a list of partially matched names in the drop down box. Use the directional arrows to select a contact and press . • Press left soft key , to change Entry Mode. Choose from T9 Word, Palabra, Abc, ABC, 123, Symbols and Domain Extensions. 5. Press right soft key for Add to add a recipient From Contacts, Recent Calls, Groups, or To Contacts. Note: Once you have entered a recipient(s) in the To: field the remaining fields are optional. 6. Press to highlight the Voice field. Your voice recording is shown. Press right soft key for Options to display additional options: • Preview: Plays the voice recording. • Save As Draft: Save the message to your Draft folder. • Priority Level: Send the message with a High or Normal priority.
-
 1
1 -
2
-
3
-
4
-
5
-
6
-
7
-
8
-
9
-
10
-
11
-
12
-
13
-
14
-
15
-
16
-
17
-
18
-
19
-
20
-
21
-
22
-
23
-
24
-
25
-
26
-
27
-
28
-
29
-
30
-
31
-
32
-
33
-
34
-
35
-
36
-
37
-
38
-
39
-
40
-
41
-
42
-
43
-
44
-
45
-
46
-
47
-
48
-
49
-
50
-
51
-
52
-
53
-
54
-
55
-
56
-
57
-
58
-
59
-
60
-
61
-
62
-
63
-
64
-
65
-
66
-
67
-
68
-
69
-
 70
70 -
 71
71 -
 72
72 -
 73
73 -
 74
74 -
 75
75 -
 76
76 -
 77
77 -
 78
78 -
 79
79 -
 80
80 -
81
-
82
-
83
-
84
-
85
-
86
-
87
-
88
-
89
-
90
-
91
-
92
-
93
-
94
-
95
-
96
-
97
-
98
-
99
-
100
-
101
-
102
-
103
-
104
-
105
-
106
-
107
-
108
-
109
-
110
-
111
-
112
-
113
-
114
-
115
-
116
-
117
-
118
-
119
-
120
-
121
-
122
-
123
-
124
-
125
-
126
-
127
-
128
-
129
-
130
-
131
-
132
-
133
-
134
-
135
-
136
-
137
-
138
-
139
-
140
-
141
-
142
-
143
-
144
-
145
-
146
-
147
-
148
-
149
-
150
-
151
-
152
-
153
-
154
-
155
-
156
-
157
-
158
-
159
-
160
-
161
-
162
-
163
-
164
-
165
-
166
-
167
-
168
-
169
-
170
-
171
-
172
-
173
-
174
-
175
-
176
-
177
-
178
-
179
-
180
-
181
-
182
-
183
-
184
-
185
-
186
 |
 |
