Samsung SCX-4300 User Manual (ENGLISH) - Page 41
Replacing the toner cartridge, Consumable and replacement parts
 |
UPC - 635753611021
View all Samsung SCX-4300 manuals
Add to My Manuals
Save this manual to your list of manuals |
Page 41 highlights
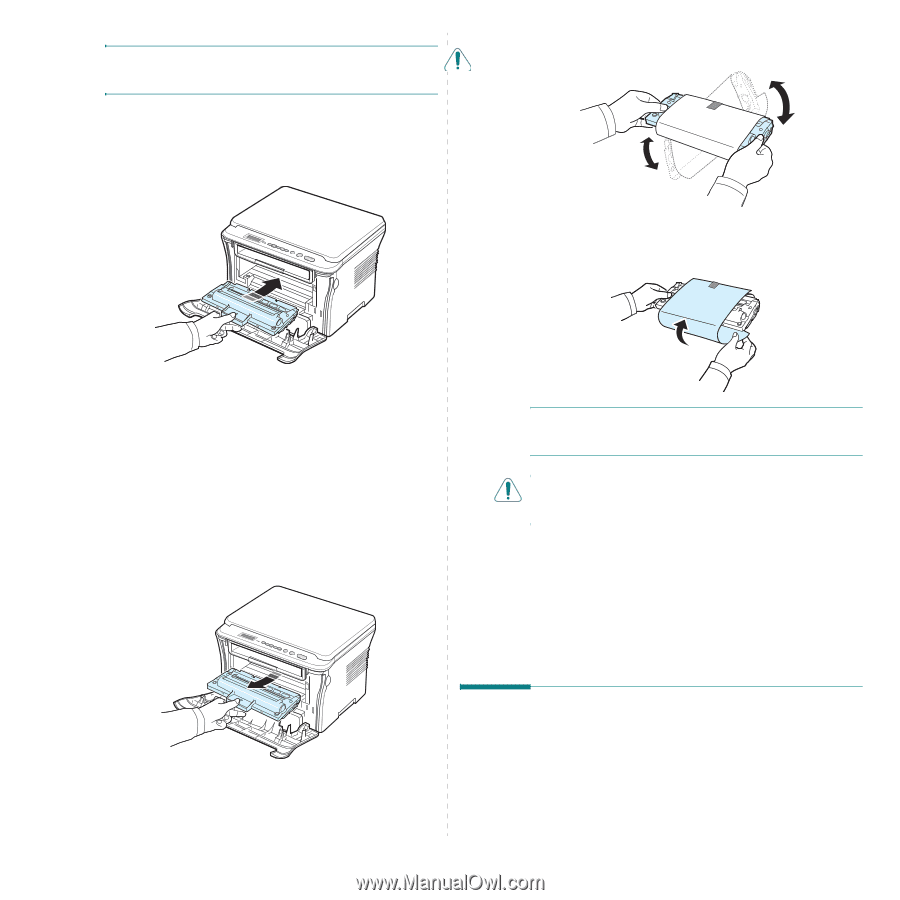
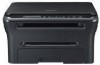
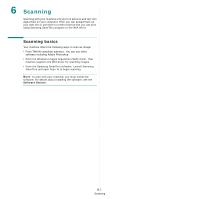
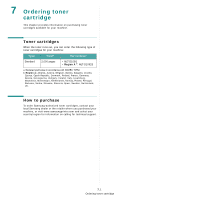
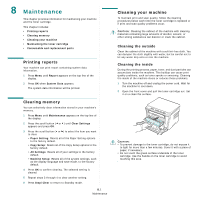
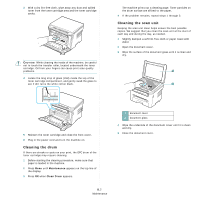
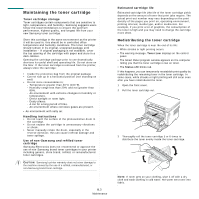
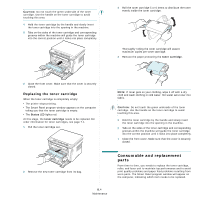
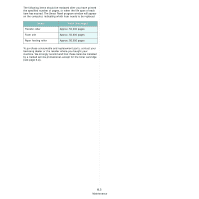
CAUTION: Do not touch the green underside of the toner cartridge. Use the handle on the toner cartridge to avoid touching this area. 4 Hold the toner cartridge by the handle and slowly insert the toner cartridge into the opening in the machine. 5 Tabs on the sides of the toner cartridge and corresponding grooves within the machine will guide the toner cartridge into the correct position until it locks into place completely. 3 Roll the toner cartridge 5 or 6 items to distribute the toner evenly inside the toner cartridge. Thoroughly rolling the toner cartridge will assure maximum copies per toner cartridge. 4 Remove the paper protecting the toner cartridge. 6 Close the front cover. Make sure that the cover is securely closed. Replacing the toner cartridge When the toner cartridge is completely empty: • The printer stops printing. • The Smart Panel program window appears on the computer telling you that the toner cartridge is empty. • The Status LED lights red. At this stage, the toner cartridge needs to be replaced. For order information for toner cartridges, see page 7.1. 1 Pull the toner cartridge out. NOTE: If toner gets on your clothing, wipe it off with a dry cloth and wash clothing in cold water. Hot water sets toner into fabric. CAUTION: Do not touch the green underside of the toner cartridge. Use the handle on the toner cartridge to avoid touching this area. 5 Hold the toner cartridge by the handle and slowly insert the toner cartridge into the opening in the machine. 6 Tabs on the sides of the toner cartridge and corresponding grooves within the machine will guide the toner cartridge into the correct position until it locks into place completely. 7 Close the front cover. Make sure that the cover is securely closed. 2 Remove the new toner cartridge from its bag. Consumable and replacement parts From time to time, you needs to replace the toner cartridge, roller, and fuser unit to maintain top performance and to avoid print quality problems and paper feed problems resulting from worn parts. The Smart Panel program window will appear on the computer, indicating which item needs to be replaced. 8.4 Maintenance
-
 1
1 -
2
-
3
-
4
-
5
-
6
-
7
-
8
-
9
-
10
-
11
-
12
-
13
-
14
-
15
-
16
-
17
-
18
-
19
-
20
-
21
-
22
-
23
-
24
-
25
-
26
-
27
-
28
-
29
-
30
-
31
-
32
-
33
-
34
-
35
-
 36
36 -
 37
37 -
 38
38 -
 39
39 -
 40
40 -
 41
41 -
 42
42 -
 43
43 -
 44
44 -
 45
45 -
 46
46 -
47
-
48
-
49
-
50
-
51
-
52
-
53
-
54
-
55
-
56
-
57
-
58
-
59
-
60
-
61
-
62
-
63
-
64
-
65
-
66
-
67
-
68
-
69
-
70
-
71
-
72
-
73
-
74
-
75
-
76
-
77
-
78
-
79
-
80
-
81
-
82
-
83
-
84
-
85
-
86
-
87
-
88
-
89
-
90
-
91
-
92
-
93
-
94
-
95
-
96
-
97
 |
 |