Samsung SCX-4300 User Manual (ENGLISH) - Page 80
Scanning, Scanning Using Samsung SmarThru
 |
UPC - 635753611021
View all Samsung SCX-4300 manuals
Add to My Manuals
Save this manual to your list of manuals |
Page 80 highlights
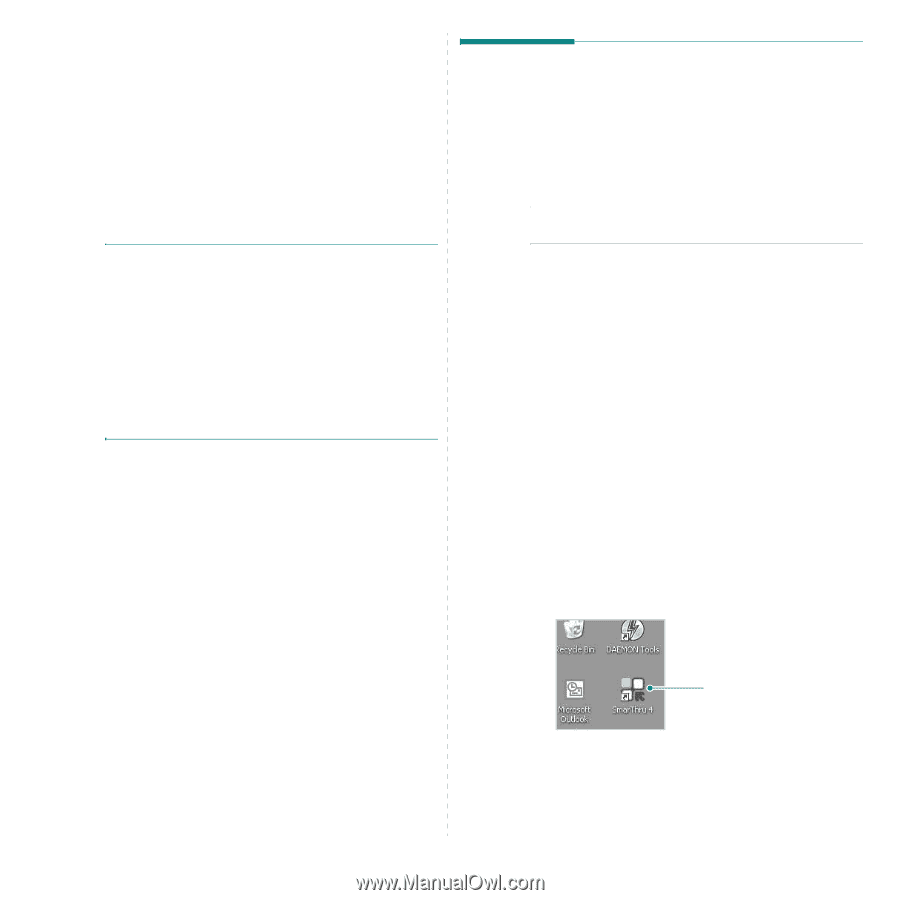
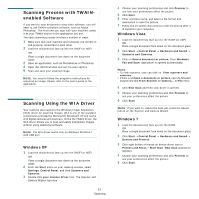
6 Scanning Scanning with your machine lets you turn pictures and text into digital files on your computer. Then you can fax or e-mail the files, display them on your web site or use them to create projects that you can print using Samsung SmarThru software or the WIA driver. This chapter includes: • Scanning Using Samsung SmarThru • Scanning Process with TWAIN-enabled Software • Scanning Using the WIA Driver NOTES: • Check the Operating System(s) that are compatible with your printer. Please refer to the OS Compatibility section of Printer Specifications in your Printer User's Guide. • You can check your printer name in the supplied CDROM. • The maximum resolution that can be achieved depends upon various factors, including computer speed, available disk space, memory, the size of the image being scanned, and bit depth settings. Thus, depending on your system and what you are scanning, you may not be able to scan at certain resolutions, especially using enhanced dpi. Scanning Using Samsung SmarThru Samsung SmarThru is the accompanying software for your machine. With SmarThru, scanning is the proverbial piece of cake. Uninstalling Samsung SmarThru NOTE: Before beginning uninstallation, ensure that all applications are closed on your computer. 1 From the Start menu, select Programs. 2 Select SmarThru 4, and then select Uninstall SmarThru 4. 3 When your computer asks you to confirm, click OK. 4 Click Finish. You may be prompted to restart your computer. In this case you must shut the computer down and then restart it before the changes will be saved. Using Samsung SmarThru Follow these steps to start scanning using the SmarThru: 1 Make sure that your machine and computer are turned on and properly connected to each other. 2 Place your photograph or page on the document glass or ADF. 3 Once you have installed Samsung SmarThru, you will see the SmarThru 4 icon on your desktop. Double-click the SmarThru 4 icon. Double-click this icon. 20 Scanning
-
 1
1 -
2
-
3
-
4
-
5
-
6
-
7
-
8
-
9
-
10
-
11
-
12
-
13
-
14
-
15
-
16
-
17
-
18
-
19
-
20
-
21
-
22
-
23
-
24
-
25
-
26
-
27
-
28
-
29
-
30
-
31
-
32
-
33
-
34
-
35
-
36
-
37
-
38
-
39
-
40
-
41
-
42
-
43
-
44
-
45
-
46
-
47
-
48
-
49
-
50
-
51
-
52
-
53
-
54
-
55
-
56
-
57
-
58
-
59
-
60
-
61
-
62
-
63
-
64
-
65
-
66
-
67
-
68
-
69
-
70
-
71
-
72
-
73
-
74
-
 75
75 -
 76
76 -
 77
77 -
 78
78 -
 79
79 -
 80
80 -
 81
81 -
 82
82 -
 83
83 -
 84
84 -
 85
85 -
86
-
87
-
88
-
89
-
90
-
91
-
92
-
93
-
94
-
95
-
96
-
97
 |
 |