Sharp AX-700S AX-700S Operation Manual - Page 15
Drain Water
 |
View all Sharp AX-700S manuals
Add to My Manuals
Save this manual to your list of manuals |
Page 15 highlights
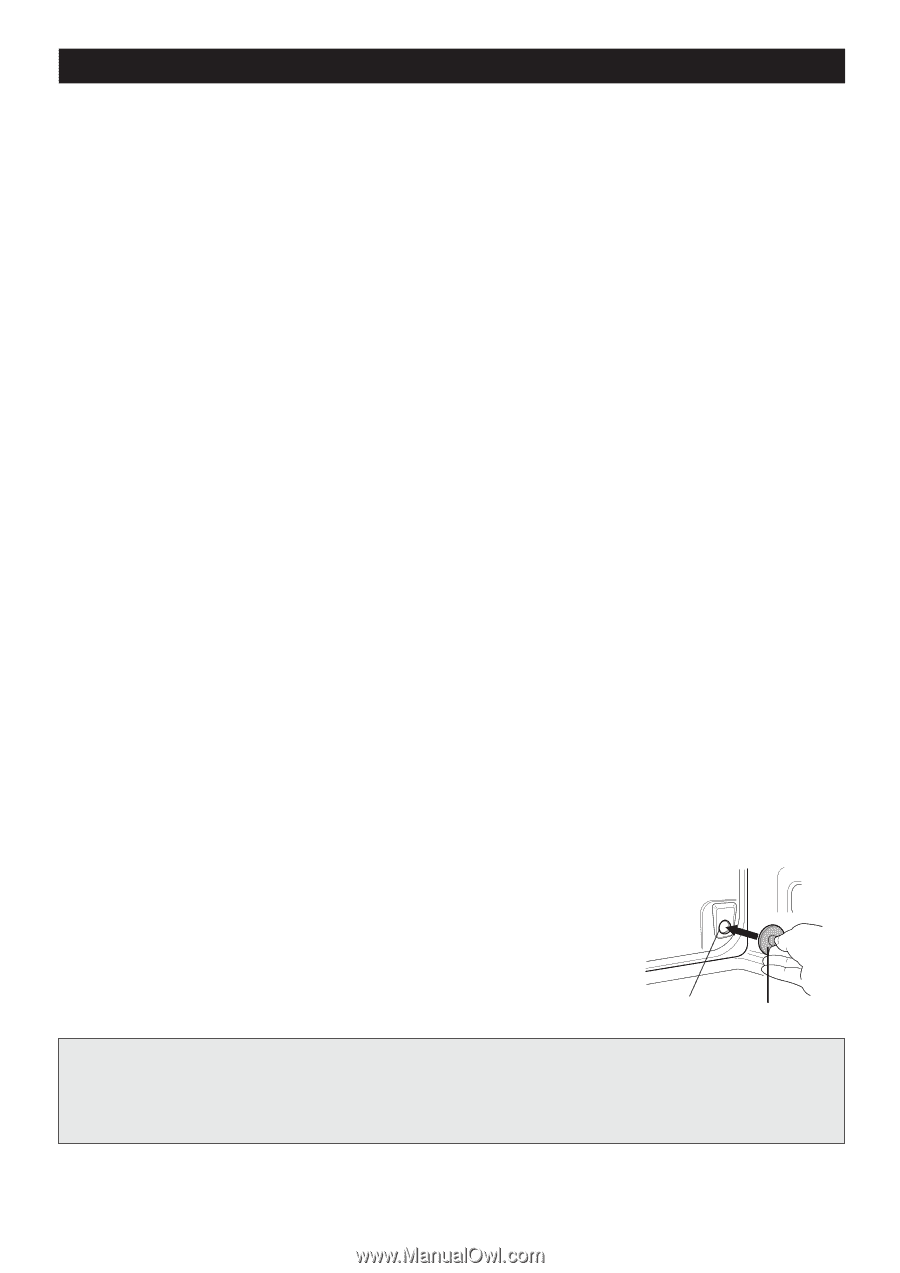
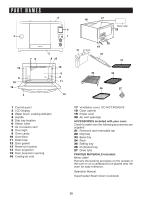
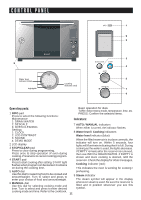
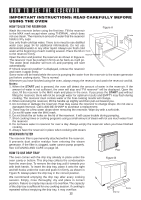
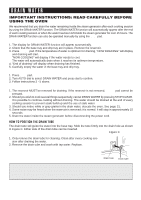
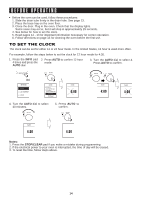
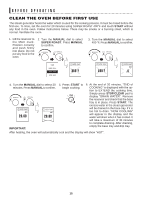
DRAIN WATER IMPORTANT INSTRUCTIONS: READ CAREFULLY BEFORE USING THE OVEN We recommend that you drain the water remaining inside the steam generator after each cooking session by using the DRAIN WATER function. The DRAIN WATER function will automatically appear after the end of each cooking session or when the water has been left inside the steam generator for over 15 hours. The DRAIN WATER function can also be operated manually by using the INFO pad. Operating DRAIN WATER function when it appears automatically 1. The display for DRAIN WATER function will appear automatically. 2. Check that the base tray and drip tray are in place. Remove the reservoir. 3. Press START pad. If the temperature of water is optimum for draining, "NOW DRAINING" will display and draining will start. "NOW COOLING" will display if the water needs to cool. The water will automatically drain when it reaches its optimum temperature. 4. "End of draining" will display when draining has finished. 5. Carefully empty the water in the base tray and drip tray. Operating DRAIN WATER function by using INFO pad 1. Press INFO pad. 2. Turn AUTO dial to select DRAIN WATER and press dial to confirm. 3. Follow instructions 2 - 5 above. Notes: 1. The reservoir MUST be removed for draining. If the reservoir is not removed, START pad cannot be pressed. 2. Should you wish to cook several things sequentially, cancel DRAIN WATER by pressing STOP/CLEAR. It is possible to continue cooking without draining. The water should be drained at the end of every cooking session to prevent scale build-up and the use of stale water. 3. Should you notice white or gray grains in the drain water, descale the oven. See page 31. 4. Some noise may be heard when the reservoir is removed; it is normal. It will stop in approximately 15 seconds. 5. Drain the water inside the steam generator before disconnecting the power cord. HOW TO POSITION THE DRAIN TUBE The drain tube will guide the water into the base tray. Slide the tube firmly into the drain hole as shown in Figure C. Either side of the drain tube can be inserted. Figure C Notes: 1. Only remove the drain tube for cleaning. Clean after every cooking ses- sion after draining the water. 2. Remove the drain tube and wash with tap water. Replace. Drain hole Drain tube • DRAIN EXCESS WATER INSIDE THE STEAM GENERATOR AFTER EACH COOKING SESSION. • DESCALE IF YOU FIND WHITE OR GRAY GRAINS IN THE DRAIN WATER. FAILURE TO DRAIN WATER AND DESCALE PERIODICALLY MAY AFFECT THE PERFORMANCE OF THIS APPLIANCE. 13
-
 1
1 -
2
-
3
-
4
-
5
-
6
-
7
-
8
-
9
-
 10
10 -
 11
11 -
 12
12 -
 13
13 -
 14
14 -
 15
15 -
 16
16 -
 17
17 -
 18
18 -
 19
19 -
 20
20 -
21
-
22
-
23
-
24
-
25
-
26
-
27
-
28
-
29
-
30
-
31
-
32
-
33
-
34
-
35
-
36
-
37
-
38
-
39
-
40
 |
 |