Sharp MX-M310 MX-PB12 Printer Expansion Kit for the MX-M260 MX-M310 - Page 17
Printing using the IPP function and the SSL function
 |
View all Sharp MX-M310 manuals
Add to My Manuals
Save this manual to your list of manuals |
Page 17 highlights
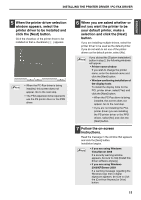
ENGLISH INSTALLING THE PRINTER DRIVER / PC-FAX DRIVER X Printing using the IPP function and the SSL function The IPP function can be used to print to the machine over a network using HTTP protocol. When the machine is in a remote location, this function can be used in place of the fax function to print a higher quality image than a fax. The IPP function can also be used in combination with the SSL (encrypted communication) function to encrypt the print data. This enables secure printing with no concern that the data will be leaked to others. Note To use the SSL function, configure the "SSL Settings" in the administrator settings of the machine. To configure the settings, see "SYSTEM SETTINGS (ADMINISTRATOR)" in the Operation Manual. When the software selection screen appears in step 6 of "OPENING THE SOFTWARE SELECTION SCREEN (FOR ALL SOFTWARE)" (page 7), perform the steps below. 1 Click the [Printer Driver] button. To install the PC-Fax driver, click the [PC-Fax Driver] button on the "Disc 2" CD-ROM. 3 When you are asked how the printer is connected, select [IPP] and click the [Next] button. *The above screen appears when using the "Disc 1" CD-ROM. 2 Click the [Custom installation] button. 4 If a proxy server is used, specify the proxy server and click the [Next] button. To specify a proxy server, select [Print via the proxy server] and then enter the [Address] and [Port number]. 15
-
 1
1 -
2
-
3
-
4
-
5
-
6
-
7
-
8
-
9
-
10
-
11
-
 12
12 -
 13
13 -
 14
14 -
 15
15 -
 16
16 -
 17
17 -
 18
18 -
 19
19 -
 20
20 -
 21
21 -
 22
22 -
23
-
24
-
25
-
26
-
27
-
28
-
29
-
30
-
31
-
32
-
33
-
34
-
35
-
36
-
37
-
38
-
39
-
40
-
41
-
42
-
43
-
44
-
45
-
46
-
47
-
48
-
49
-
50
-
51
-
52
-
53
-
54
-
55
-
56
-
57
-
58
-
59
-
60
-
61
-
62
-
63
-
64
-
65
-
66
-
67
-
68
-
69
-
70
-
71
-
72
-
73
-
74
-
75
-
76
-
77
-
78
-
79
-
80
-
81
-
82
-
83
-
84
-
85
-
86
-
87
-
88
-
89
-
90
-
91
-
92
-
93
-
94
-
95
-
96
-
97
-
98
-
99
-
100
-
101
-
102
-
103
-
104
-
105
-
106
-
107
-
108
-
109
-
110
-
111
-
112
-
113
-
114
-
115
-
116
-
117
-
118
-
119
-
120
-
121
-
122
-
123
-
124
-
125
-
126
-
127
-
128
-
129
-
130
-
131
-
132
-
133
-
134
-
135
-
136
-
137
-
138
-
139
-
140
-
141
-
142
-
143
-
144
-
145
-
146
-
147
-
148
-
149
-
150
-
151
-
152
-
153
-
154
-
155
-
156
-
157
-
158
-
159
-
160
-
161
-
162
-
163
-
164
-
165
-
166
-
167
-
168
-
169
-
170
-
171
-
172
 |
 |
