Sony BDV-N7100W Operating Instructions - Page 64
[Music Settings], [System Settings - power consumption
 |
View all Sony BDV-N7100W manuals
Add to My Manuals
Save this manual to your list of manuals |
Page 64 highlights
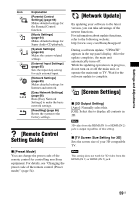
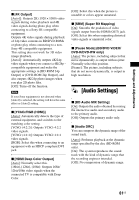
[Music Settings] Note When [Auto] is selected, only N button lights up during playback. x [Super Audio CD Playback Layer] [Super Audio CD]: Plays the Super Audio CD layer. [CD]: Plays the CD layer. x [Super Audio CD Playback Channel] [DSD 2ch]: Plays the 2-channel area. [DSD Multi]: Plays the multi-channel area. [System Settings] x [OSD Language] You can select the language you want for the system on-screen display. x [Wireless Sound Connection] You can make further settings for the wireless system. For details, see "Further Settings for the Wireless System" (page 57). You can also check the wireless transmission status. When wireless transmission is activated, [OK] appears to the right of [Status]. x [Main Unit illumination] [On]: The top panel display always is turned on, soft-touch buttons indicator are always lit and the brightness of the LED indicator is the maximum. [Auto]: The top panel display and softtouch buttons indicator are turned off and the brightness of LED indicator is reduced automatically if you do not operate the system for about 10 seconds. x [HDMI Settings] [Control for HDMI] [On]: Turns on the [Control for HDMI] function. You can operate mutually between equipment that are connected with an HDMI cable. [Off]: Off. [Audio Return Channel] This function is available when you connect the system to a TV's HDMI IN jack that is compatible with the Audio Return Channel function and [Control for HDMI] is set to [On]. [Auto]: The system can receive the digital audio signal of the TV automatically via an HDMI cable. [Off]: Off. x [Quick Start Mode] [On]: Shortens the startup time from standby mode. You can operate the system quickly after turning it on. [Off]: The default setting. x [Power Save Drive] [On]: Reduces power consumption when volume level is low. [Off]: Normal status. The system can output sound volume. x [Auto Display] [On]: Automatically displays information on the screen when changing the viewing titles, picture modes, audio signals, etc. [Off]: Displays information only when you press DISPLAY. 64US
-
 1
1 -
2
-
3
-
4
-
5
-
6
-
7
-
8
-
9
-
10
-
11
-
12
-
13
-
14
-
15
-
16
-
17
-
18
-
19
-
20
-
21
-
22
-
23
-
24
-
25
-
26
-
27
-
28
-
29
-
30
-
31
-
32
-
33
-
34
-
35
-
36
-
37
-
38
-
39
-
40
-
41
-
42
-
43
-
44
-
45
-
46
-
47
-
48
-
49
-
50
-
51
-
52
-
53
-
54
-
55
-
56
-
57
-
58
-
 59
59 -
 60
60 -
 61
61 -
 62
62 -
 63
63 -
 64
64 -
 65
65 -
 66
66 -
 67
67 -
 68
68 -
 69
69 -
70
-
71
-
72
-
73
-
74
-
75
-
76
-
77
-
78
-
79
-
80
-
81
-
82
-
83
-
84
-
85
-
86
-
87
-
88
 |
 |
