Sony CCD-FX310 Primary User Manual - Page 14
Camera, Recording, Checking, Portion, Scene, Recorded, Review
 |
View all Sony CCD-FX310 manuals
Add to My Manuals
Save this manual to your list of manuals |
Page 14 highlights
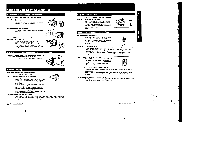
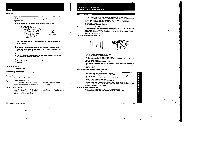
Camera Recording Checking the Last Portion of a Scene You Just Recorded (Rec Review) You can check the last portion of a scene you lust recorded without changing the setting the POWER switch using EDITSEARCH 1 Put the camcorder in the standby mode by pressing the START/STOP button. 2 Press the - go side of EDITSEARCH momentarily. The last few seconds of the recorded portion will be played back in the viewfinder. After a few seconds of playback. the camcorder goes back to the standby mode. ready for the next recording Note on using EDITSEARCH When you raise the viewfinder and use EDITSEARCH, hold the viewfinder with your thumb to prevent movement. ♦ von-seen. -CI EDITSEARCH Checking Recording in the Viewfinder (EDITSEARCH) You can check the recorded picture in the viewfinder using EDITSEARCH. Sound cannot be monitored 1 Press the small green button, and slide III' the POWER switch to CAMERA. 2 Set the STANDBY switch up. 3 Keep pressing the a or - side of EDITSEARCH to view the playback picture: side for the playback picture side for the playback picture in reverse ( °I EOITSEAPCM -m To stop playback Release EDITSEARCH To monitor the sound while viewing the playback picture in the viewfinder I Connect an earphone to them (earphone) lack 2 Press the small green button and slide the POWER switch to PLAYER 3 Press 44 to rewind the tape and mess where you want to stop. 4 Press I • to mart playback. 26 Advanced Griefs Operet21 p Re-recording on a Previously Recorded Portion (EDITSEARCH) You can reshoot a scene over the last recorded portion using EDITSEARCH The previously recorded portion will be erased. 1 Set the STANDBY switch up. 2 Look In the viewfinder and find the point from where you want to begin recording by: Keep pressing the a side of EDITSEARCH continuously to advance the picture at a normal playback speed. or the - side to reverse the picture START,STOP ' 1 el ♦ EDITSEAR. - gt) 3 At the desired point, release EDITSEARCH. 4 Press START/STOP. Recording begins from the point you released EDITSEARCH. A smooth transition between scenes can be made atter the pm-recorded portion even if STANDBY is turned down and turned up. Or even it the power is turned off and on again, provided that the tape is not removed. • START /STOP To pause recording Press START/STOP again. To stop recording Set the STANDBY switch down. Helpful Hints for Recording If the tape reaches near the end during recording The IMA indicator and the red lamp in the viewfinder and the camera recording/battery lamp on the camcorder blink slowly. When the tape reaches its end, blinking becomes rapid and beeps sound for about five seconds it BEEP is set to ON). Notes on recording • To record born the beginning of the tape. run the beginning of the tape for about 15 seconds before recording. This will avoid missing the starting point when the tape is played bad, • When moving from indoors to outdoors, or vice versa. turn STANDBY up and point the camcorder at a while object for about 10 seconds so that the white balance is properly adjusted. Note on standby mode If you leave the camcorder in the standby mode for 5 minutes or more. the camcorder will be automatically turned off To resume the standby mode. turn STANDBY down and turn it up again. To start recording, press START/STOP directly. Note on light sources If you are shooting e subject in bright conditione just after shooting in a dark place. the picture may not appear in the viewfinder. m glls case. point the camcorder in the other direction. 27 Advanced Camera Operation
-
 1
1 -
2
-
3
-
4
-
5
-
6
-
7
-
8
-
 9
9 -
 10
10 -
 11
11 -
 12
12 -
 13
13 -
 14
14 -
 15
15 -
 16
16 -
 17
17 -
 18
18 -
 19
19 -
20
-
21
-
22
-
23
-
24
-
25
-
26
 |
 |
