Sony DSC-F55 PictureGear v4.1 Lite User Guide - Page 8
Installing PictureGear
 |
View all Sony DSC-F55 manuals
Add to My Manuals
Save this manual to your list of manuals |
Page 8 highlights
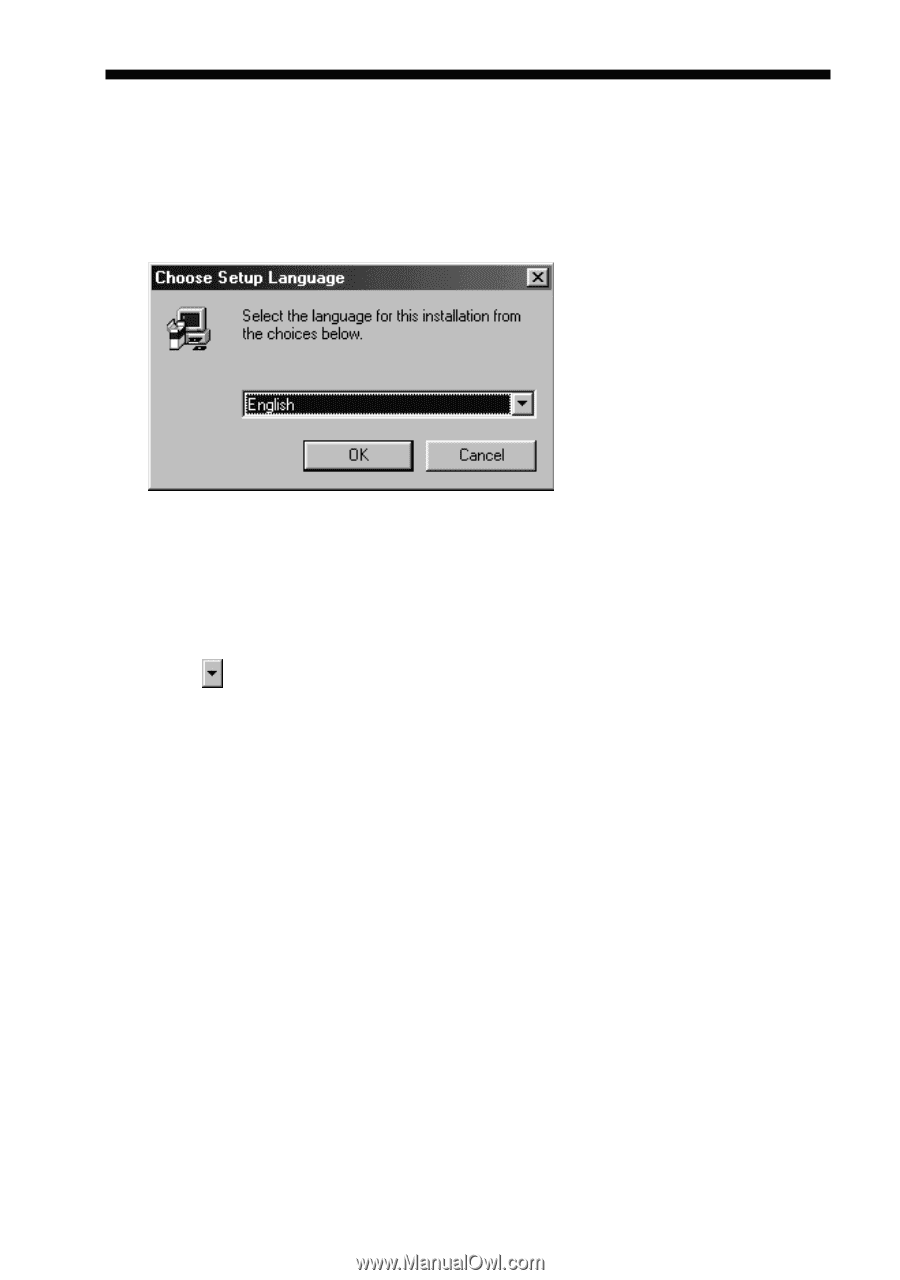
Installing PictureGear 1 Insert the PictureGear CD-ROM into the CD-ROM drive. When the CD-ROM drive access lamp turns off, the Choose Setup Language dialog box appears. Note If this dialog box does not appear when the CD-ROM is inserted, start the Windows Explorer and double click on the installation file (SETUP.EXE) on the CD-ROM. 2 Click to select the language to use from the displayed language list, and click [OK]. The Question dialog box appears. 3 Make sure all other applications are closed and then click [Yes]. The Welcome dialog box appears. 4 Click [Next]. The End User License Agreement appears. Please read it before proceeding to the next step. 5 Click [Yes] after reading the End User License Agreement and agreeing to the terms. The Choose Destination Location dialog box appears with "C:\Program Files\Sony\PictureGear4.1Lite" as the installation destination. 8 GB
-
 1
1 -
2
-
 3
3 -
 4
4 -
 5
5 -
 6
6 -
 7
7 -
 8
8 -
 9
9 -
 10
10 -
 11
11 -
 12
12 -
 13
13 -
14
-
15
-
16
-
17
-
18
-
19
-
20
-
21
-
22
-
23
-
24
-
25
-
26
-
27
-
28
-
29
-
30
-
31
-
32
-
33
-
34
-
35
-
36
-
37
-
38
-
39
-
40
-
41
-
42
-
43
-
44
-
45
-
46
-
47
-
48
 |
 |