Sony DSC-P150/LJ Operating Instructions - Page 11
Getting started, Charging the battery pack
 |
View all Sony DSC-P150/LJ manuals
Add to My Manuals
Save this manual to your list of manuals |
Page 11 highlights
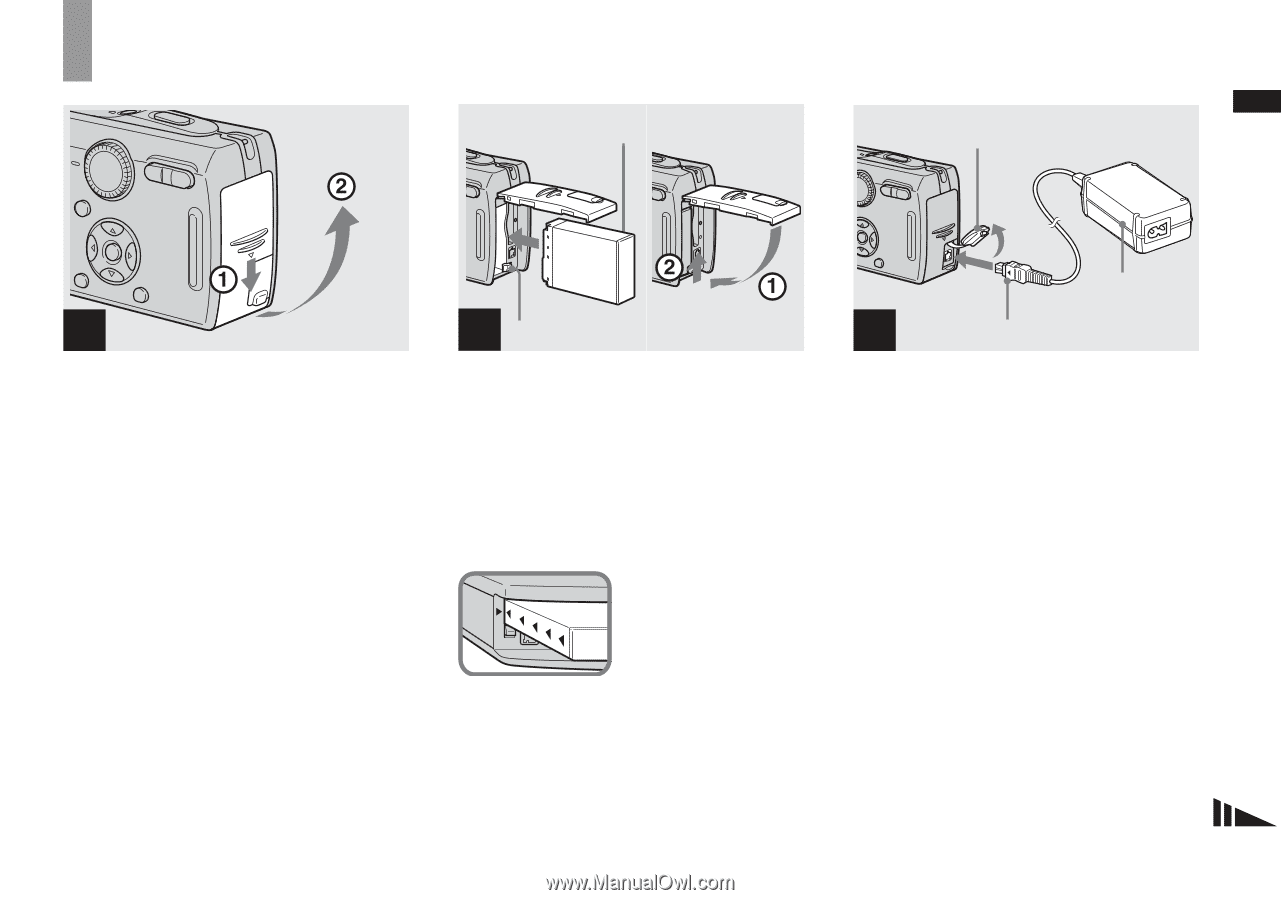
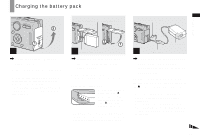
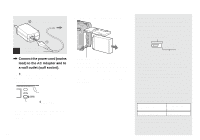
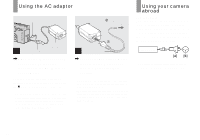
Charging the battery pack Getting started Surface with the "InfoLITHIUM" logo DC IN jack cover Getting started 1 , Open the battery/"Memory Stick" cover. Slide the cover in the direction of the arrow. • Be sure to turn off your camera when charging the battery pack (page 15). • Your camera operates with the "InfoLITHIUM" NP-FR1 battery pack (R type) (supplied). You can use only R type battery pack (page 117). 2 Battery eject lever , Install the battery pack, then close the battery/"Memory Stick" cover. Make sure the battery pack is firmly inserted all the way, then close the cover. Battery insertion slot Insert the battery pack so that the tip of the v marks on the side of the battery pack face the tip of the v mark on the battery insertion slot. • The battery pack is easily inserted by pushing the battery eject lever at the front of the battery compartment toward the front of the camera. AC Adaptor 3 DC plug , Open the DC IN jack cover and connect the AC Adaptor (supplied) to the DC IN jack of your camera. Open the cover in the arrow direction as illustrated above. Connect the DC plug with the v mark facing the LCD screen side. • Do not short the DC plug of the AC Adaptor with a metallic object, as this may cause malfunction. • Clean the DC plug of the AC Adaptor with a dry cotton bud. Do not use the dirty plug. Use of the dirty plug may not properly charge the battery pack. 11
-
 1
1 -
2
-
3
-
4
-
5
-
 6
6 -
 7
7 -
 8
8 -
 9
9 -
 10
10 -
 11
11 -
 12
12 -
 13
13 -
 14
14 -
 15
15 -
 16
16 -
17
-
18
-
19
-
20
-
21
-
22
-
23
-
24
-
25
-
26
-
27
-
28
-
29
-
30
-
31
-
32
-
33
-
34
-
35
-
36
-
37
-
38
-
39
-
40
-
41
-
42
-
43
-
44
-
45
-
46
-
47
-
48
-
49
-
50
-
51
-
52
-
53
-
54
-
55
-
56
-
57
-
58
-
59
-
60
-
61
-
62
-
63
-
64
-
65
-
66
-
67
-
68
-
69
-
70
-
71
-
72
-
73
-
74
-
75
-
76
-
77
-
78
-
79
-
80
-
81
-
82
-
83
-
84
-
85
-
86
-
87
-
88
-
89
-
90
-
91
-
92
-
93
-
94
-
95
-
96
-
97
-
98
-
99
-
100
-
101
-
102
-
103
-
104
-
105
-
106
-
107
-
108
-
109
-
110
-
111
-
112
-
113
-
114
-
115
-
116
-
117
-
118
-
119
-
120
-
121
-
122
-
123
-
124
-
125
-
126
-
127
-
128
 |
 |