Sony DSC-P150/LJ Operating Instructions - Page 93
Using “ImageMixer VCD2”, Connecting your camera to, your computer, Copying images
 |
View all Sony DSC-P150/LJ manuals
Add to My Manuals
Save this manual to your list of manuals |
Page 93 highlights
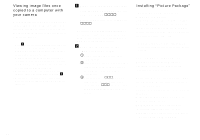
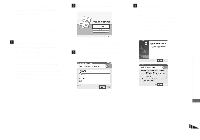
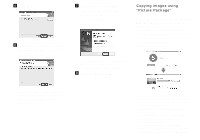
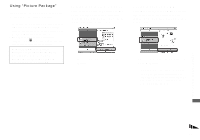
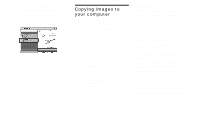
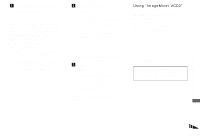
a Connecting your camera to your computer For details, see page 83. Disconnecting the cable for multiuse terminal (USB), removing the "Memory Stick," or turning off the camera during a USB connection Drag and drop the drive icon or the icon of the "Memory Stick" to the "Trash" icon, then remove the cable for multi-use terminal (USB), remove the "Memory Stick," or turn off the camera. • If you are using Mac OS X v10.0, remove the cable for multi-use terminal (USB) etc., after you have turned your computer off. b Copying images 1 Double-click the newly recognized icon on the desktop. The contents of the "Memory Stick" inserted in your camera appear. 2 Double-click [DCIM]. 3 Double-click the folder that the images you want to copy are stored. 4 Drag and drop the image files to the hard disk icon. • The image files are copied to your hard disk. For details on the storage location of the images and file names, see page 86. c Viewing the images on your computer 1 Double-click the hard disk icon. 2 Double-click the desired image file in the folder containing the copied files. The image file opens. • "Picture Package" cannot be used with Macintosh. Using "ImageMixer VCD2" "ImageMixer VCD2" is only for Macintosh (Mac OS X (v10.1.5) or later) computers. Using "ImageMixer VCD2" on the CDROM supplied with your camera, you can create a video CD using the image or movie materials that are stored in your computer. You can create an image file that is compatible with the video CD creation function of Toast by Roxio (not supplied). • When the computer is in use, shut down all other application software before you install "ImageMixer VCD2." Technical support of "ImageMixer VCD2" is provided by the Pixela User Support Center. For more information, refer to the enclosed information with the CD-ROM. Enjoying images on your computer 93
-
 1
1 -
2
-
3
-
4
-
5
-
6
-
7
-
8
-
9
-
10
-
11
-
12
-
13
-
14
-
15
-
16
-
17
-
18
-
19
-
20
-
21
-
22
-
23
-
24
-
25
-
26
-
27
-
28
-
29
-
30
-
31
-
32
-
33
-
34
-
35
-
36
-
37
-
38
-
39
-
40
-
41
-
42
-
43
-
44
-
45
-
46
-
47
-
48
-
49
-
50
-
51
-
52
-
53
-
54
-
55
-
56
-
57
-
58
-
59
-
60
-
61
-
62
-
63
-
64
-
65
-
66
-
67
-
68
-
69
-
70
-
71
-
72
-
73
-
74
-
75
-
76
-
77
-
78
-
79
-
80
-
81
-
82
-
83
-
84
-
85
-
86
-
87
-
 88
88 -
 89
89 -
 90
90 -
 91
91 -
 92
92 -
 93
93 -
 94
94 -
 95
95 -
 96
96 -
 97
97 -
 98
98 -
99
-
100
-
101
-
102
-
103
-
104
-
105
-
106
-
107
-
108
-
109
-
110
-
111
-
112
-
113
-
114
-
115
-
116
-
117
-
118
-
119
-
120
-
121
-
122
-
123
-
124
-
125
-
126
-
127
-
128
 |
 |