Sony DSC-W55/B Cyber-shot® Handbook - Page 46
Resize: Changing the image size of a recorded image
 |
View all Sony DSC-W55/B manuals
Add to My Manuals
Save this manual to your list of manuals |
Page 46 highlights
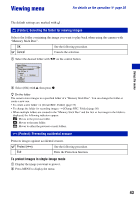
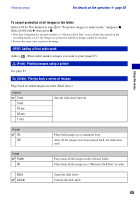
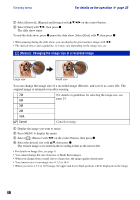
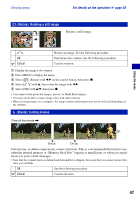
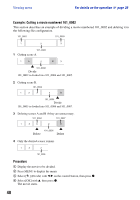
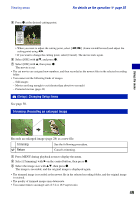
Viewing menu For details on the operation 1 page 30 1 Select [Interval], [Repeat] and [Image] with v/V/b/B on the control button. 2 Select [Start] with V/B, then press z. The slide show starts. To end the slide show, press z pause the slide show. Select [Exit] with V, then press z. • When pausing during the slide show, you can display the previous/next image with b/B. • The interval time is just a guideline, so it may vary depending on the image size, etc. (Resize): Changing the image size of a recorded image Large size Small size You can change the image size of a recorded image (Resize), and save it as a new file. The original image is retained even after resizing. 7M For details on guidelines for selecting the image size, see 5M page 24. 3M 2M VGA Cancel Cancels resizing. 1 Display the image you want to resize. 2 Press MENU to display the menu. 3 Select [ ] (Resize) with b/B on the control button, then press z. 4 Select the desired size with v/V, then press z. The resized image is recorded in the recording folder as the newest file. • For details on Image Size, see page 9. • You cannot change the size of movies or Multi Burst images. • When you change from a small size to a large size, the image quality deteriorates. • You cannot resize to an image size of 3:2 or 16:9. • When you resize a 3:2 or 16:9 image, the upper and lower black portions will be displayed on the image. 46
-
 1
1 -
2
-
3
-
4
-
5
-
6
-
7
-
8
-
9
-
10
-
11
-
12
-
13
-
14
-
15
-
16
-
17
-
18
-
19
-
20
-
21
-
22
-
23
-
24
-
25
-
26
-
27
-
28
-
29
-
30
-
31
-
32
-
33
-
34
-
35
-
36
-
37
-
38
-
39
-
40
-
 41
41 -
 42
42 -
 43
43 -
 44
44 -
 45
45 -
 46
46 -
 47
47 -
 48
48 -
 49
49 -
 50
50 -
 51
51 -
52
-
53
-
54
-
55
-
56
-
57
-
58
-
59
-
60
-
61
-
62
-
63
-
64
-
65
-
66
-
67
-
68
-
69
-
70
-
71
-
72
-
73
-
74
-
75
-
76
-
77
-
78
-
79
-
80
-
81
-
82
-
83
-
84
-
85
-
86
-
87
-
88
-
89
-
90
-
91
-
92
-
93
-
94
-
95
-
96
-
97
-
98
-
99
-
100
-
101
-
102
-
103
-
104
-
105
-
106
-
107
-
108
-
109
-
110
-
111
 |
 |