Sony GXDL52H1 Operating Instructions - Page 71
Picture Mode, Picture Mode Adjust., For PC Input - remote
 |
UPC - 027242731813
View all Sony GXDL52H1 manuals
Add to My Manuals
Save this manual to your list of manuals |
Page 71 highlights
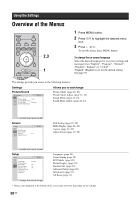
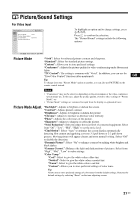
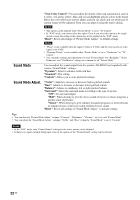
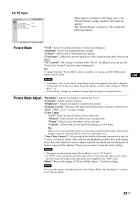
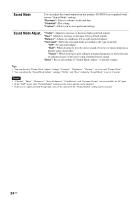
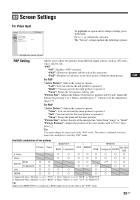
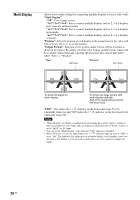
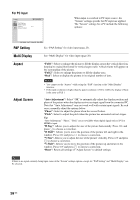
For PC Input When input is switched to a PC input source, the "Picture/Sound" settings specific to PC input are applied. The "Picture/Sound" settings for a PC include the following options: Picture Mode "Vivid": Select for enhanced picture contrast and sharpness. "Standard": Select for standard picture settings. "Custom": Allows you to store preferred settings. "Conference": Adjusts the picture quality for video conferencing under fluorescent lights. "TC Control": The setting is common with "Vivid". In addition, you can use the "True Color Control" function (after-mentioned). Tip To change from one "Picture Mode" option to another, you can also use PICTURE on the remote control instead. Notes • "Conference" may not be effective depending on the environment or the video conference system under use. In this case, adjust the picture quality, switch to other settings of "Picture Mode", etc. • "Picture Mode" settings are common for input from the display or optional devices. GB Picture Mode Adjust. "Backlight": Adjusts to brighten or darken the screen. "Contrast": Adjusts picture contrast. "Brightness": Adjusts to brighten or darken the picture. "Gamma Correct.": Balances the light and dark portions of pictures. Select from "High", "Mid", "Low" to make settings. "Color Temp." "Cool": Select to give the white colors a blue tint. "Neutral": Select to give the white colors a neutral tint. "Warm": Select to give the white colors a red tint. "Custom": Allows you to store preferred settings of color tones. Tip Allows you to store preferred settings of color tones from the default settings. Restores the default settings by selecting "Reset" on the tone adjusting screen. "True Color Control": You can adjust the details of hue and saturation for each of 4 colors : red, green, yellow, blue, and you can highlight specific colors in the image. Select the color which you want to adjust, and you can check and see which part of current image will be adjusted. Then you can adjust it using the matrix dialog. Notes • This option can be adjusted when "Picture Mode" is set to "TC Control". • In "PAP" mode, you cannot select this option. Even if you select this option in the single- picture screen, the setting of this option may not be applied in the "PAP" mode "Reset": Resets all settings of "Picture Mode Adjust." to default settings. Note You can make settings and adjustments for each "Picture Mode" but "Backlight" is common for all "Picture Mode." 23 GB
-
 1
1 -
2
-
3
-
4
-
5
-
6
-
7
-
8
-
9
-
10
-
11
-
12
-
13
-
14
-
15
-
16
-
17
-
18
-
19
-
20
-
21
-
22
-
23
-
24
-
25
-
26
-
27
-
28
-
29
-
30
-
31
-
32
-
33
-
34
-
35
-
36
-
37
-
38
-
39
-
40
-
41
-
42
-
43
-
44
-
45
-
46
-
47
-
48
-
49
-
50
-
51
-
52
-
53
-
54
-
55
-
56
-
57
-
58
-
59
-
60
-
61
-
62
-
63
-
64
-
65
-
 66
66 -
 67
67 -
 68
68 -
 69
69 -
 70
70 -
 71
71 -
 72
72 -
 73
73 -
 74
74 -
 75
75 -
 76
76 -
77
-
78
-
79
-
80
-
81
-
82
-
83
-
84
-
85
-
86
-
87
-
88
-
89
-
90
-
91
-
92
-
93
-
94
-
95
-
96
-
97
-
98
-
99
-
100
-
101
-
102
-
103
-
104
-
105
-
106
-
107
-
108
-
109
-
110
-
111
-
112
-
113
-
114
-
115
-
116
-
117
-
118
-
119
-
120
-
121
-
122
-
123
-
124
-
125
-
126
-
127
-
128
-
129
-
130
-
131
-
132
-
133
-
134
-
135
-
136
-
137
-
138
-
139
-
140
-
141
-
142
-
143
-
144
-
145
-
146
-
147
-
148
-
149
-
150
-
151
-
152
-
153
-
154
-
155
-
156
-
157
-
158
-
159
-
160
-
161
-
162
-
163
-
164
-
165
-
166
-
167
-
168
-
169
-
170
-
171
-
172
-
173
-
174
-
175
-
176
-
177
-
178
-
179
-
180
-
181
-
182
-
183
-
184
-
185
-
186
-
187
-
188
-
189
-
190
-
191
-
192
-
193
-
194
-
195
-
196
-
197
-
198
-
199
-
200
-
201
-
202
-
203
-
204
-
205
-
206
-
207
-
208
-
209
-
210
-
211
-
212
-
213
-
214
-
215
-
216
-
217
-
218
-
219
-
220
-
221
-
222
-
223
-
224
-
225
-
226
-
227
-
228
-
229
-
230
-
231
-
232
-
233
-
234
-
235
-
236
-
237
-
238
-
239
-
240
-
241
-
242
-
243
-
244
-
245
-
246
-
247
-
248
-
249
-
250
-
251
-
252
-
253
-
254
-
255
-
256
-
257
-
258
-
259
-
260
-
261
-
262
-
263
-
264
-
265
-
266
-
267
-
268
-
269
-
270
-
271
-
272
-
273
-
274
-
275
-
276
-
277
-
278
-
279
-
280
-
281
-
282
-
283
-
284
-
285
-
286
-
287
-
288
-
289
-
290
-
291
-
292
-
293
-
294
-
295
-
296
-
297
-
298
-
299
-
300
-
301
-
302
-
303
-
304
-
305
-
306
-
307
-
308
-
309
-
310
 |
 |
