Sony KLV-32U100M Operating Instructions - Page 25
DVI-HDTV-Equipped Device, To connect a device with DVI-HDTV connector, Notes on Using This Connection
 |
View all Sony KLV-32U100M manuals
Add to My Manuals
Save this manual to your list of manuals |
Page 25 highlights
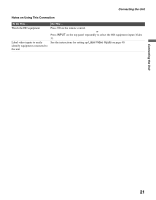
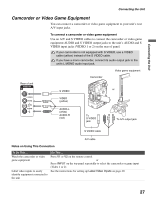
Connecting the Unit Connecting the Unit DVI-HDTV-Equipped Device To connect a device with DVI-HDTV connector If the device does not have an HDMI connector, you can connect the unit's HDMI IN connector to the device's DVI-HDTV output connector using a DVI to HDMI adapter or cable. 1 Use a DVI to HDMI adapter or cable to connect the device's DVI- HDTV output connector to the unit's HDMI IN connector on the rear panel. DVI-HDTV-Equipped Device The DVI-HDTV VIDEO connector does not provide audio, so audio cables must be connected to provide sound when a DVI to HDMI adapter or cable is used. Do not connect a PC to the unit's HDMI input. Use the PC IN (RGB) connector instead when connecting a PC. 2 Use an Audio cable to connect the device's AUDIO output jacks to the unit's AUDIO input jacks on the rear panel. Rear of unit IN 4 AUDIO IN RL Audio cable AUDIO-R (red) AUDIO-L (white) DVI to HDMI adapter or cable Notes on Using This Connection To Do This ... Watch the device Label video inputs to easily identify equipment connected to the unit Do This ... Press V4 on the remote control. or Press INPUT on the top panel repeatedly to select the DVI-HDTV-equipped device input (Video 4). See the instructions for setting up Label Video Inputs on page 40. 25
-
 1
1 -
2
-
3
-
4
-
5
-
6
-
7
-
8
-
9
-
10
-
11
-
12
-
13
-
14
-
15
-
16
-
17
-
18
-
19
-
 20
20 -
 21
21 -
 22
22 -
 23
23 -
 24
24 -
 25
25 -
 26
26 -
 27
27 -
 28
28 -
 29
29 -
 30
30 -
31
-
32
-
33
-
34
-
35
-
36
-
37
-
38
-
39
-
40
-
41
-
42
-
43
-
44
-
45
-
46
-
47
-
48
 |
 |
