Sony LBT-DJ2i Operating Instructions
Sony LBT-DJ2i - Mini Hi/fi Component System Manual
 |
UPC - 024272736948
View all Sony LBT-DJ2i manuals
Add to My Manuals
Save this manual to your list of manuals |
Sony LBT-DJ2i manual content summary:
- Sony LBT-DJ2i | Operating Instructions - Page 1
3-300-703-12(1) Mini HI-FI Component System Operating Instructions LBT-DJ2i ©2008 Sony Corporation - Sony LBT-DJ2i | Operating Instructions - Page 2
the space provided below. Refer to them whenever you call upon your Sony dealer regarding this product. Model No. Serial No. This symbol is intended to the presence of important operating and maintenance (servicing) instructions in the literature accompanying the appliance. The following FCC - Sony LBT-DJ2i | Operating Instructions - Page 3
manual could void your authority to operate this equipment. Important Safety Instructions 1) Read these instructions. 2) Keep these instructions. 3) Heed all warnings. 4) Follow all instructions time. 14) Refer all servicing to qualified service personnel. Servicing is required when the apparatus - Sony LBT-DJ2i | Operating Instructions - Page 4
in the European Union and other European countries with separate collection systems) This symbol on the product or on its packaging indicates that with an incorporated battery, this battery should be replaced by qualified service staff only. To ensure that the battery will be treated properly, - Sony LBT-DJ2i | Operating Instructions - Page 5
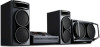
of Sony Corporation. MICROVAULT is a trademark of Sony Corporation. MPEG Layer-3 audio coding technology iPod is a trademark of Apple Inc., registered in the U.S. and other countries. About this manual The LBT-DJ2i consists of: - Unit HCD-DJ2i - Speaker System • Front speakers SS-DJ2i - Sony LBT-DJ2i | Operating Instructions - Page 6
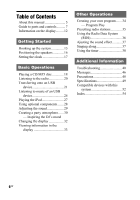
About this manual 5 Guide to parts and controls.......... 7 Information on the display......... 12 Getting Started Hooking up the system 13 Playing the iPod 27 Using optional components ....... 28 Adjusting the sound 29 Creating a party atmosphere...... 30 - Inspiring the DJ's mood Changing - Sony LBT-DJ2i | Operating Instructions - Page 7
to parts and controls Guide to parts and controls This manual mainly explains operations using the buttons on the unit, but the same operations can also be performed using the buttons on the remote having the - Sony LBT-DJ2i | Operating Instructions - Page 8
button has a tactile dot. Use the tactile dot as a reference when operating the system. 8GB E A (pages 16, 18, 42) Press to open or close the iPod 1 connector (pages 15, 27, 28) iPod 2 connector (pages 15, 27, 28) Place an optional iPod on the connector to listen to audio contents stored in the iPod - Sony LBT-DJ2i | Operating Instructions - Page 9
select a setting in OPTIONS menu. Turn to scroll up or down the iPod menus. 2) To operate the CHANNEL A functions using the remote, press and has a tactile dot. Use the tactile dot as a reference when operating the system. Q LOW (page 37) MID (page 37) HIGH (page 37) Turn Guide to parts and controls - Sony LBT-DJ2i | Operating Instructions - Page 10
the beat level. BPM CONTROL (page 30) Press to input the tempo of the audio source. BEAT SPEED (page 30) Press to change the beat speed. X Operation settings. MENU/RETURN (page 28) Press to return to previous menu of the iPod. Press to return to the parent folder. Press to exit search mode. JOG DIAL - Sony LBT-DJ2i | Operating Instructions - Page 11
Guide to parts and controls e; V/v/B/b2) (pages 17, 27, 38) Press to select the menu items. 2) (pages 17, 27, 35, 38) Press to enter the settings. ea TOOL MENU2) (page 28) Press to return to previous menu of the iPod select the play mode of CD, USB or iPod function. Press to select the tuning mode. - Sony LBT-DJ2i | Operating Instructions - Page 12
the TUNER function (pages 20, 35). I Indicator for the level of the audio source play back on CHANNEL B. J Indicator for BEAT BLEND level (page 30 for equalizer (page 37). O Indicates the type of disc or file that the system recognized. P Indicates the selected play mode (pages 19, 26). Q Lights up - Sony LBT-DJ2i | Operating Instructions - Page 13
Getting Started FM 75 COAXIAL AM Getting Started Hooking up the system Subwoofer (Rear panel) Unit (Left panel) B C GF E 4 1 To AM loop L/R jacks Use an audio cord to connect to the audio output jacks of an optional component (such as a portable audio player). AM loop antenna Continued l 13GB - Sony LBT-DJ2i | Operating Instructions - Page 14
signals transmitted by the D-LIGHT SYNC controller upon receiving music source from the system. For details on the use of the D-LIGHT SYNC controller and lighting device, refer to the operating instructions supplied with the respective device. D-LIGHT SYNC controller cord E FRONT SPEAKER terminals - Sony LBT-DJ2i | Operating Instructions - Page 15
iPod Insert the iPod Dock Adapter into the iPod 1 or 2 connector before use. For details on the supplied iPod Dock Adapters, refer to the operating instructions supplied with the iPod Dock six months. When the remote no longer operates the system, replace both batteries with new ones. • Batteries - Sony LBT-DJ2i | Operating Instructions - Page 16
Use the buttons on the unit for the operation. 1 Press "/1 to turn on the system. 2 Press CD. 3 Press A to open the disc tray and remove the disc Note Before carrying the unit, be sure to disconnect the USB device or iPod(s). Positioning the speakers You can place your speakers as shown below. A - Sony LBT-DJ2i | Operating Instructions - Page 17
cord or if a power failure occurs. To display the clock when the system is off Press DISPLAY repeatedly until the clock is displayed. The clock is displayed for a few seconds (except when iPod is connected). When an iPod is connected, the display will change to clock automatically. For details, see - Sony LBT-DJ2i | Operating Instructions - Page 18
X on the remote) again to resume playback. To Do this Select a track or file Press l or L on CHANNEL B (or . or > on the remote) repeatedly. For AUDIO CD, you can also turn JOG DIAL on CHANNEL B, then press ENTER on CHANNEL B. (TRACK SEARCH) Select a folder on Press +/- repeatedly, an MP3 disc - Sony LBT-DJ2i | Operating Instructions - Page 19
Play ("PGM" lights up) (page 34) * When playing an AUDIO CD, (SHUF) Play performs the same operation as Normal (Shuffle) folders on a disc that has MP3 files. • The system can only play back MP3 files with the extension ".mp3 problems such as cannot play back, sound interruptions and noise. 19GB - Sony LBT-DJ2i | Operating Instructions - Page 20
the unit for the operation. 1 Press TUNER/BAND repeatedly to select AM band. 2 Press "/1 to turn off the system. 3 When demonstration appears, hold down ENTER on CHANNEL B and then press "/1. The system turn on automatically. "AM 9K STEP" or "AM 10K STEP" appears in the display. When you change the - Sony LBT-DJ2i | Operating Instructions - Page 21
connecting it to the (USB) port on the unit. The audio format transferred by this system is MP3. The approximate size of the transferring is about 1 or file you want to transfer, then press HS on CHANNEL B. For Manual Transferring: Press the function button (except CD) to select the source you - Sony LBT-DJ2i | Operating Instructions - Page 22
the display. Then, transferring starts when "Don't Remove USB" appears in the display. When the transferring is completed, the disc continues to play. For Manual Transferring: Press REC TO USB. "REC" lights up in the display. Then, transferring starts when "Don't Remove USB" appears in the display - Sony LBT-DJ2i | Operating Instructions - Page 23
) REC1 Transferring Transferring Folder source name MP3 disc REC15) AUDIO CD File name Same as the transferring source2) TRACK0014) Manual Transferring Transferring Folder source name TUNER FM TUNER AM FLDR0013) LINE IN iPod File name TRACK0014) 1) In Program Play mode, the folder - Sony LBT-DJ2i | Operating Instructions - Page 24
to the (USB) port on the unit. The audio formats that can be played back by this system are as follows: MP3*/WMA*/AAC* When playback from is no volume label assigned to the USB device. "WALKMAN" appears when a Sony digital music player is connected. Note Depending on the type of USB device, it - Sony LBT-DJ2i | Operating Instructions - Page 25
) (Repeat Play) Press REPEAT on the remote repeatedly during playback until "REP 1" lights up in the display. 1) When playing an VBR (variable bit rate) audio file, the system may resume playback from a different point. 2) A file is playback repeatedly until you stop playback. Continued l 25GB - Sony LBT-DJ2i | Operating Instructions - Page 26
operation time for the USB device may vary. • If the system is turned off during Resume Play mode, when the system is turned on again playback starts from the beginning of the audio file. • This system does not necessarily support all the functions provided in a connected USB device. • The playback - Sony LBT-DJ2i | Operating Instructions - Page 27
level does not change even if adjusted on the iPod. • This iPod 1 and iPod 2 connector are designed for iPod only. You cannot connect any other portable audio players. • To use an iPod, refer to the operating instructions of your iPod. • Sony cannot accept responsibility in the event that data - Sony LBT-DJ2i | Operating Instructions - Page 28
, see the operating instructions of your iPod. To stop charging the iPod Remove the iPod. If you stop charging the iPod when the system is off, press DISPLAY repeatedly until the display is turned off (Power Saving mode). Using optional components 1 Connect a portable audio player to the LINE - Sony LBT-DJ2i | Operating Instructions - Page 29
"MP3 BOOSTER+", then press ENTER. 3 Turn JOG DIAL to select "AUTO", then press ENTER. To exit the OPTIONS menu, press OPTIONS. Note When an audio file is played back, the MP3 BOOSTER+ function is automatically activated if you have set "MP3 BOOSTER+" to "AUTO". "BOOSTER" lights up in the display - Sony LBT-DJ2i | Operating Instructions - Page 30
Creating a party atmosphere - Inspiring the DJ's mood Using the drum pads - BEAT BLEND With the drum pads, you can add percussion during playback. This effect can be used with any source. - Sony LBT-DJ2i | Operating Instructions - Page 31
the sound of the drum pad or beat pattern onto a USB device using Manual Transferring only. Using the Crossfader You can isolate the sound from CHANNEL A to the position which the percentage of audio sources you want to mix. Monitor Cue You can monitor the audio source playback on CHANNEL A or - Sony LBT-DJ2i | Operating Instructions - Page 32
Power Saving Mode: - Setting the clock (page 17). - Changing the AM tuning interval (page 20). - Turning on the system by pressing the function buttons. 3) The clock is displayed continuously while the iPod is being charged. To turn off the clock display, press DISPLAY (see "To stop charging the - Sony LBT-DJ2i | Operating Instructions - Page 33
of the current track 3 Remaining time of the current disc1) 4 Clock display (for few seconds) 5 Effect on/off (for few seconds) When playing audio files: 1 Elapsed playing time of the current file 2 Track name2) from the file information 3 Artist name3) from the file information 4 Album name4) from - Sony LBT-DJ2i | Operating Instructions - Page 34
a track: Press l or L on CHANNEL B (or . or > on the remote) repeatedly until the track number you want appears in the display. To program an audio file: Press +/- repeatedly until the folder you want appears in the display, then press l or L on CHANNEL B (or . or > on the remote) repeatedly until - Sony LBT-DJ2i | Operating Instructions - Page 35
cleared when you perform the erase operation. Tips • The program you made remains in the system's memory even after it has been played back. Press HS on CHANNEL B (or N means: - you have programmed a track in an AUDIO CD with track number exceeds 20. - the total playing time has exceeded 100 minutes. - Sony LBT-DJ2i | Operating Instructions - Page 36
FM stations.* * Not all FM stations provide RDS service, nor do they provide the same types of services. If you are not familiar with the RDS system, check with your local radio stations for details on RDS services in your area. Note RDS may not work properly if the station you are tuned in is - Sony LBT-DJ2i | Operating Instructions - Page 37
to adjust the level of high frequency band. The setting is entered automatically. Singing along You can sing along with any audio source that play back on this system. 1 Turn MIC LEVEL to MIN to reduce the microphone volume. 2 Connect an optional microphone to MIC jack. 3 Start playing the music - Sony LBT-DJ2i | Operating Instructions - Page 38
minute display (turn-off time) changes. If you select "AUTO", the system automatically turns off after the current disc or USB device stops or after 100 up to music from disc, iPod 2, tuner or optional USB device at a preset time. You can only set the Play Timer for audio source on CHANNEL B only. - Sony LBT-DJ2i | Operating Instructions - Page 39
the CROSS FADER slider is positioned at A, no sound will be recorded unless an audio source is played back on CHANNEL A. • The Play Timer may not be activated depending on the status of the connected iPod. Note on the iPod touch The Play Timer may not be activated depending on the status of the - Sony LBT-DJ2i | Operating Instructions - Page 40
are connected correctly and firmly. 2 Find your problem in the troubleshooting checklist below and take the indicated corrective action. If the problem persists after doing all of the above, consult your nearest Sony dealer. Note that if service personnel changes some parts during repair, these - Sony LBT-DJ2i | Operating Instructions - Page 41
adjust the headphone volume. • Check the headphone connection. • Check that the audio source on the selected channel is played back. There is beat sound even that the subwoofer is connected securely and correctly. • Check that the SYSTEM CONTROL jack on the unit is connected. • Check that the power - Sony LBT-DJ2i | Operating Instructions - Page 42
"LOCKED" appears in the display. • Consult your nearest Sony dealer or local authorized Sony service facility. The disc tray does not close. • Load ".mp3". • The MP3 file in format other than MPEG 1 Audio Layer 3 cannot be played back. • The system can play back to a depth of 8 folders only. • The - Sony LBT-DJ2i | Operating Instructions - Page 43
broken. Refer to operating instructions of the USB device on how to remedy this problem. Are you using a supported USB device? • If you connect an unsupported USB device, the following problems may occur. See "Compatible devices with this system" (page 52) for the supported device types. - The USB - Sony LBT-DJ2i | Operating Instructions - Page 44
recognized. • Turn off the system, then reconnect the USB device. • Connect the supported USB device (page 52). The USB device does not work properly. Refer to the USB device operating instructions for how to deal with this problem. If the problem persists, contact your nearest Sony dealer. 44GB - Sony LBT-DJ2i | Operating Instructions - Page 45
WMA files in Windows Media Audio Lossless and Professional format cannot be system supports FAT16 and FAT32, but some USB device may not support all of these FAT. For details, see the operating instructions of each USB device or contact the manufacturer. iPod There is no sound. • Make sure the iPod - Sony LBT-DJ2i | Operating Instructions - Page 46
way. • Turn on the connected component. • Refer to the operating instructions supplied with the connected component and start playing. To reset the system to factory settings If the system still does not operate properly after performing the above measures or other troubles not described above occur - Sony LBT-DJ2i | Operating Instructions - Page 47
damaged. NO STEP All of the programmed files have been erased. Not Supported An unsupported USB device is connected or the USB device is connected through an USB hub. No Track No playable audio file is loaded in the system. Not in Use You tried to perform a specific operation under conditions where - Sony LBT-DJ2i | Operating Instructions - Page 48
incorrectly • Disc containing files other than MPEG 1 Audio Layer-3 (MP3) files • Discs of non- that have labels printed using ink that feels tacky when touched Notes on discs • Before playing, wipe the disc by a qualified service facility. On placement • Do not place the system in an inclined - Sony LBT-DJ2i | Operating Instructions - Page 49
(USB) port: Type A Outputs i : accepts headphones of 8 Ω or more FRONT SPEAKER: accepts impedance of 6 Ω Disc player section System Compact disc and digital audio system Laser Diode Properties Emission Duration: Continuous Laser Output*: Less than 44.6 µW * This output is the value measurement at - Sony LBT-DJ2i | Operating Instructions - Page 50
kbps Sampling frequencies MP3 (MPEG 1 Audio Layer 3): 32/44.1/48 kHz WMA: 44.1 kHz AAC: 44.1 kHz Transfer speed Full-Speed Supported USB device Mass Storage Class Maximum current 500 mA iPod section DC5V 500 mA MAX Speakers Front speaker (SS-DJ2i) Speaker system 3-way, 3-driver, Bass reflex Speaker - Sony LBT-DJ2i | Operating Instructions - Page 51
Additional Information Subwoofer (SA-WG2i) Subwoofer system 1-way, 2-driver, Bass reflex Speaker unit Subwoofer: 180 mm HCD-DJ2i: 3.2 kg (7 lb 1 oz) Supplied accessories Remote Commander (1) R6 (size AA) batteries (2) AM loop antenna (1) FM lead antenna (1) Front speaker pads (8) iPod Dock Adapters - Sony LBT-DJ2i | Operating Instructions - Page 52
(Mass Storage). For details, refer to the operating instructions supplied with the mobile phone. • Use the USB cable supplied with the mobile phone when connecting to the system. • Some AAC audio files supported by the mobile phone are not supported by this system. • In the case that the song which - Sony LBT-DJ2i | Operating Instructions - Page 53
Additional Information iPod 5th generation (video) iPod nano 1st generation iPod 4th generation (color display) iPod 4th generation iPod mini Notes • The iPod 1 and 2 connectors are designed for iPod only. You cannot connect any other portable audio players. • Sony cannot accept responsibility - Sony LBT-DJ2i | Operating Instructions - Page 54
-USB Synchonized Transfer 21 COLD RESET 46 Compatible iPod with this system 53 Compatible USB devices with this system 52 Crossfader 31 D Demonstration 14, 32 Display 12 Display mode 32 F FM MODE 20 H Handling discs 48 Hooking up the system 13 M Manual Transferring 21 Monitor cue 31 MP3 BOOSTER+ 29 - Sony LBT-DJ2i | Operating Instructions - Page 55
- Sony LBT-DJ2i | Operating Instructions - Page 56
(1) Sony Corporation Printed in China
-
 1
1 -
 2
2 -
 3
3 -
 4
4 -
 5
5 -
 6
6 -
 7
7 -
8
-
9
-
10
-
11
-
12
-
13
-
14
-
15
-
16
-
17
-
18
-
19
-
20
-
21
-
22
-
23
-
24
-
25
-
26
-
27
-
28
-
29
-
30
-
31
-
32
-
33
-
34
-
35
-
36
-
37
-
38
-
39
-
40
-
41
-
42
-
43
-
44
-
45
-
46
-
47
-
48
-
49
-
50
-
51
-
52
-
53
-
54
-
55
-
56
 |
 |

©2008 Sony Corporation
3-300-703-
12
(1)
Mini HI-FI
Component
System
Operating Instructions
LBT-DJ2i