Sony MDS-JE470 Operating Instructions - Page 16
Erasing blank portions automatically (Smart Space/ Auto Cut), Adjusting the recording level - auto pause
 |
View all Sony MDS-JE470 manuals
Add to My Manuals
Save this manual to your list of manuals |
Page 16 highlights
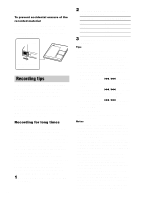
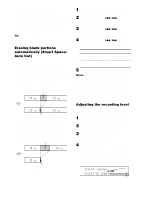
Recording tips (continued) • When recording from a DAT deck or DBS tuner connected to the DIGITAL IN connector, the deck will mark a track number whenever the sampling frequency of the input signal changes, regardless of the track marking parameter setting ("T.Mark LSyn(c)" or "T.Mark Off"). Tip You can mark track numbers even after recording has finished. See "Dividing recorded tracks" on page 27. Erasing blank portions automatically (Smart Space/ Auto Cut) The Smart Space function lets you make the blank spaces between tracks 3 seconds long automatically. If the Smart Space function is on and there is no sound input for about 3 seconds or more (but less than 30 seconds) while recording, the deck replaces this silence with a blank of about 3 seconds and continues recording. No sound input for less than 30 seconds Off On Replaced with a blank of 3 seconds and recording continues Auto Cut: When the Smart Space function is on, if there is no sound input for 30 seconds or more, the deck replaces this silence with a blank of about 3 seconds and enters recording pause. No sound input for 30 seconds or more Off On Replaced with a blank of 3 seconds and recording pauses 1 While the deck is stopped, press MENU/ NO. 2 Turn AMS (or press ./> repeatedly) until "Setup?" appears, then press AMS or YES. 3 Turn AMS (or press ./> repeatedly) until "S.Space On" appears, then press AMS or YES. 4 Turn AMS (or press ./> repeatedly) to select the setting, then press AMS or YES. To Select Turn on Smart Space S.Space On (factory and Auto Cut setting) Turn off Smart Space and Auto Cut 5 Press MENU/NO. S.Space Off Notes • Smart Space does not affect the order of the track numbers being recorded, even if the blank space occurs in the middle of a track. • Auto Cut is automatically turned on or off in tandem with Smart Space. • If the deck continues recording pause for about 10 minutes after the Auto Cut activated, recording stops automatically. Adjusting the recording level You can adjust the recording level for both analog and digital recordings. 1 Do steps 1 to 5 of "Recording to an MD" on page 11. 2 Play the portion of the program source with the strongest output. 3 Press LEVEL/DISPLAY/CHAR (or DISPLAY) repeatedly until the level of the input signal appears. 4 MDS-JE770 While monitoring the sound, turn AMS (or press LEVEL +/- repeatedly) to raise the recording level to its highest level without turning on the two rightmost indicators on the peak level meters. Avoid turning on these indicators 16
-
 1
1 -
2
-
3
-
4
-
5
-
6
-
7
-
8
-
9
-
10
-
 11
11 -
 12
12 -
 13
13 -
 14
14 -
 15
15 -
 16
16 -
 17
17 -
 18
18 -
 19
19 -
 20
20 -
 21
21 -
22
-
23
-
24
-
25
-
26
-
27
-
28
-
29
-
30
-
31
-
32
-
33
-
34
-
35
-
36
-
37
-
38
-
39
-
40
-
41
-
42
-
43
-
44
-
45
-
46
-
47
-
48
 |
 |
