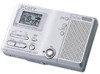
Sony MZ-B10 Operating Instructions (primary manual) - Page 24
Adding track marks while recording, Adding track marks manually - parts manual
 |
View all Sony MZ-B10 manuals
Add to My Manuals
Save this manual to your list of manuals |
Page 24 highlights
Notes • The pause function cannot be turned on or off manually during synchro-recording. • Do not switch the "SYNC REC" setting while recording. Recording may not be done properly. • You cannot change the recording mode during recording. • Even when there is no sound on the sound source, there may be cases when recording does not pause automatically during synchrorecording due to the noise level emitted from the sound source. • If a silent portion is encountered for approximately 2 seconds during synchrorecording from a sound source other than a CD or an MD, a new track mark is automatically added at the point where the silent portion ends. • Synchro-recording cannot be done if the connecting cord is not an optical cable, or if the cable is connected to the MIC (PLUG IN POWER) jack. Adding track marks while recording You can add track marks (track number) while recording to divide the material into separate parts. . • REVIEW • AMS, > • CUE • AMS MENU/ ENTER TRACK MARK Adding track marks manually 1 While the recorder is recording, press TRACK MARK. Adding track marks automatically (Auto Time Mark) Use this feature to add track marks automatically at 10-minute intervals when recording through the analog input connector or a microphone. This function is convenient when making a long recording, e.g., of a lecture or meeting. 1 While the recorder is recording or in recording pause, press MENU/ ENTER. 2 Press . or > until "REC SET" appears in the display, and then press MENU/ENTER. 3 Press . or > until "TIME MARK" appears in the display, and then press MENU/ENTER. 24
-
 1
1 -
2
-
3
-
4
-
5
-
6
-
7
-
8
-
9
-
10
-
11
-
12
-
13
-
14
-
15
-
16
-
17
-
18
-
 19
19 -
 20
20 -
 21
21 -
 22
22 -
 23
23 -
 24
24 -
 25
25 -
 26
26 -
 27
27 -
 28
28 -
 29
29 -
30
-
31
-
32
-
33
-
34
-
35
-
36
-
37
-
38
-
39
-
40
-
41
-
42
-
43
-
44
-
45
-
46
-
47
-
48
-
49
-
50
-
51
-
52
-
53
-
54
-
55
-
56
-
57
-
58
-
59
-
60
 |
 |
