Sony STR-AV900 Operating Instructions - Page 28
Using, Graphic, Equalizer
 |
View all Sony STR-AV900 manuals
Add to My Manuals
Save this manual to your list of manuals |
Page 28 highlights
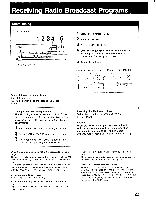
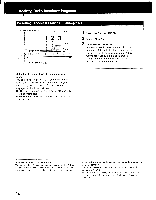
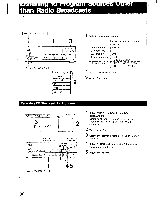
Using the Graphic Equalizer You can enjoy a music with a different equalization curve than the ones preset at the factory. Creating a New Equalization Curve SYSTEM POWER • ON 12 3 •=• 0 0=I '0 1 - 01-L1-010,L.J.L.4..100 === 0 0 0 ©03 -1[030 0" oLJJ Select SPEAKERS A or B 1 Press RTA/EQ. This switches the display to the equalizer setting. 2 Press the frequency select button for the frequency of which the level you want to raise or lower. 3 Press the LEVEL + (or -) button to raise (or lower) the level of the selected frequency. (The MANUAL indicator will light up.) 4 Repeat Steps 2 and 3 for other frequencies until you obtain the desired equalization curve. To restore the RTA (real time analyzer) display, press RTA/EQ. Adjustable frequency bands and the effect of level adjustment 63 Hz: Lowering the level will cut the ventilation 2.4 kHz: Lowering the level will reduce stridency, noise of a music hall, hum of electronic and raising will make the base sound brighter. instruments, boomy bass, etc. 6 kHz: Increasing or decreasing the brightness of Raising the level will reinforce the heavy bass the sound; for example, raising the level will make part of a pipe organ or add depth to the bass the violin sound silky smooth. sound. 14 kHz: Changing the general atmosphere rather 150 Hz: Boosting or cutting the normal bass. than the sound itself. 400 Hz: Increasing or decreasing the power, Raising the level will highlight the delicate quality spaciousness and warmth of the sound. of instrumental sound, and lowering will reduce 1 kHz: Providing more presence for vocals, and high-frequency noise such as the resonant peak moving the sound forward or into the background. of a cartridge, tape hiss, etc. Memorizing a New Equalization Curve You can store a created equalization curve into memory under any Music Index Category you select. However, note that this operation will erase the factory-preset equalization curve or the last memorized one under the selected Music Index Category. SYSTEM POWER -. ON 12 3 0 0 0 UUU CD of ▪ - C1-0-- 0 t0 c0 U U U LE U U U - 0 Select SPEAKERS A or B Before beginning the operation below, make sure that neither DEFEAT indicato? nor LINK indicator is lit. If lit, press the DEFEAT and/or PRESET EQ LINK button. 1 Create an equalization curve you want to store. 2 Press MEMORY EQ. The MEMORY indicator will light up for a few seconds. 3 Press, while the MEMORY indicator is displayed, the EQ/MUSIC INDEX CATEGORY button for the category under which you want to store the equalization curve. 28
-
 1
1 -
2
-
3
-
4
-
5
-
6
-
7
-
8
-
9
-
10
-
11
-
12
-
13
-
14
-
15
-
16
-
17
-
18
-
19
-
20
-
21
-
22
-
 23
23 -
 24
24 -
 25
25 -
 26
26 -
 27
27 -
 28
28 -
 29
29 -
 30
30 -
 31
31 -
 32
32 -
 33
33 -
34
-
35
-
36
-
37
-
38
-
39
-
40
-
41
-
42
 |
 |
