Sony STR-AV900 Operating Instructions - Page 33
Video, Editing, STR-AV1000, STR-AV900
 |
View all Sony STR-AV900 manuals
Add to My Manuals
Save this manual to your list of manuals |
Page 33 highlights
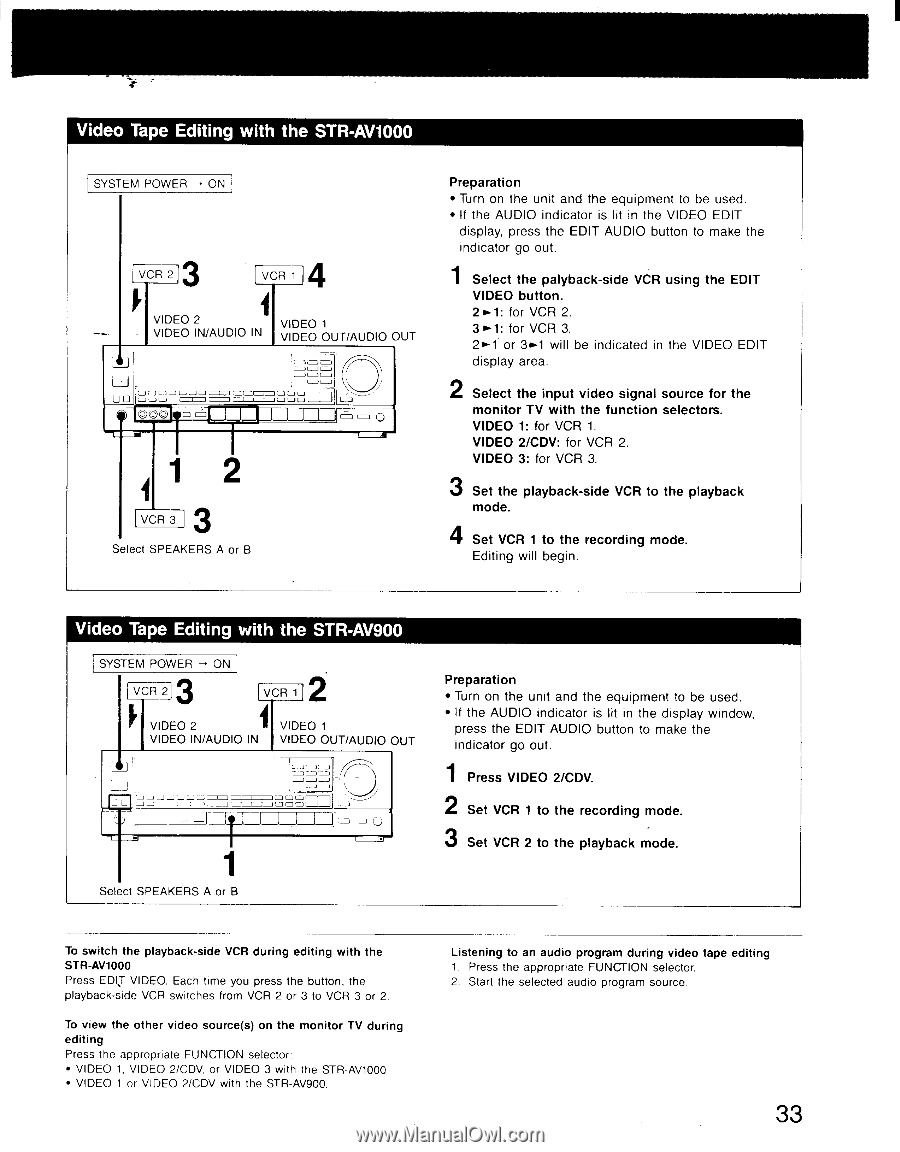
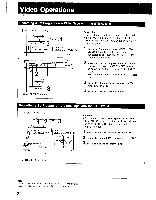
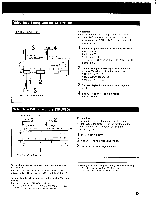
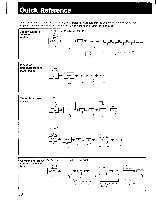
Video Tape Editing with the STR-AV1000 SYSTEM POWER ON] VCR 2 VCR 1 VIDEO 2 VIDEO 1 VIDEO IN/AUDIO IN VIDEO OUT/AUDIO OUT JA C.1 [i oLo LJ mor L-0 ©OO- O O I=1=I 1J .1_1 l_l r lu a um O O- 0 3 VCR 3 Select SPEAKERS A or B Preparation • Turn on the unit and the equipment to be used. • If the AUDIO indicator is lit in the VIDEO EDIT display, press the EDIT AUDIO button to make the indicator go out. 1 Select the palyback-side VCR using the EDIT VIDEO button. 2.1: for VCR 2. 3 for VCR 3. 2.1' or 3.1 will be indicated in the VIDEO EDIT display area. 2 Select the input video signal source for the monitor TV with the function selectors. VIDEO 1: for VCR 1. VIDEO 2/CDV: for VCR 2. VIDEO 3: for VCR 3. 3 Set the playback-side VCR to the playback mode. 4 Set VCR 1 to the recording mode. Editing will begin. Video Tape Editing with the STR-AV900 SYSTEM POWER - ON VCR 2 2 VCR 1 VIDEO 2 VIDEO 1 VIDEO IN/AUDIO IN VIDEO OUT/AUDIO OUT = I ▪I I ,_D I -3 _) (I) 1 Select SPEAKERS A or B Preparation • Turn on the unit and the equipment to be used. • If the AUDIO indicator is lit in the display window, press the EDIT AUDIO button to make the indicator go out. 1 Press VIDEO 2/CDV. 2 Set VCR 1 to the recording mode. 3 Set VCR 2 to the playback mode. To switch the playback-side VCR during editing with the STR-AV1000 Press EDIT VIDEO. Each time you press the button, the playback-side VCR switches from VCR 2 or 3 to VCR 3 or 2. To view the other video source(s) on the monitor TV during editing Press the appropriate FUNCTION selector • VIDEO 1, VIDEO 2/CDV, or VIDEO 3 with the STR-AV1000 • VIDEO 1 or VIDEO 2/CDV with the STR-AV900. Listening to an audio program during video tape editing 1. Press the appropriate FUNCTION selector. 2. Start the selected audio program source. 33
-
 1
1 -
2
-
3
-
4
-
5
-
6
-
7
-
8
-
9
-
10
-
11
-
12
-
13
-
14
-
15
-
16
-
17
-
18
-
19
-
20
-
21
-
22
-
23
-
24
-
25
-
26
-
27
-
 28
28 -
 29
29 -
 30
30 -
 31
31 -
 32
32 -
 33
33 -
 34
34 -
 35
35 -
 36
36 -
 37
37 -
 38
38 -
39
-
40
-
41
-
42
 |
 |