Sony STR-ZA2100ES Installation Guide - Page 20
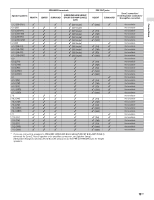
Updating the software via the network, Updating the software with a USB flash drive
 |
View all Sony STR-ZA2100ES manuals
Add to My Manuals
Save this manual to your list of manuals |
Page 20 highlights
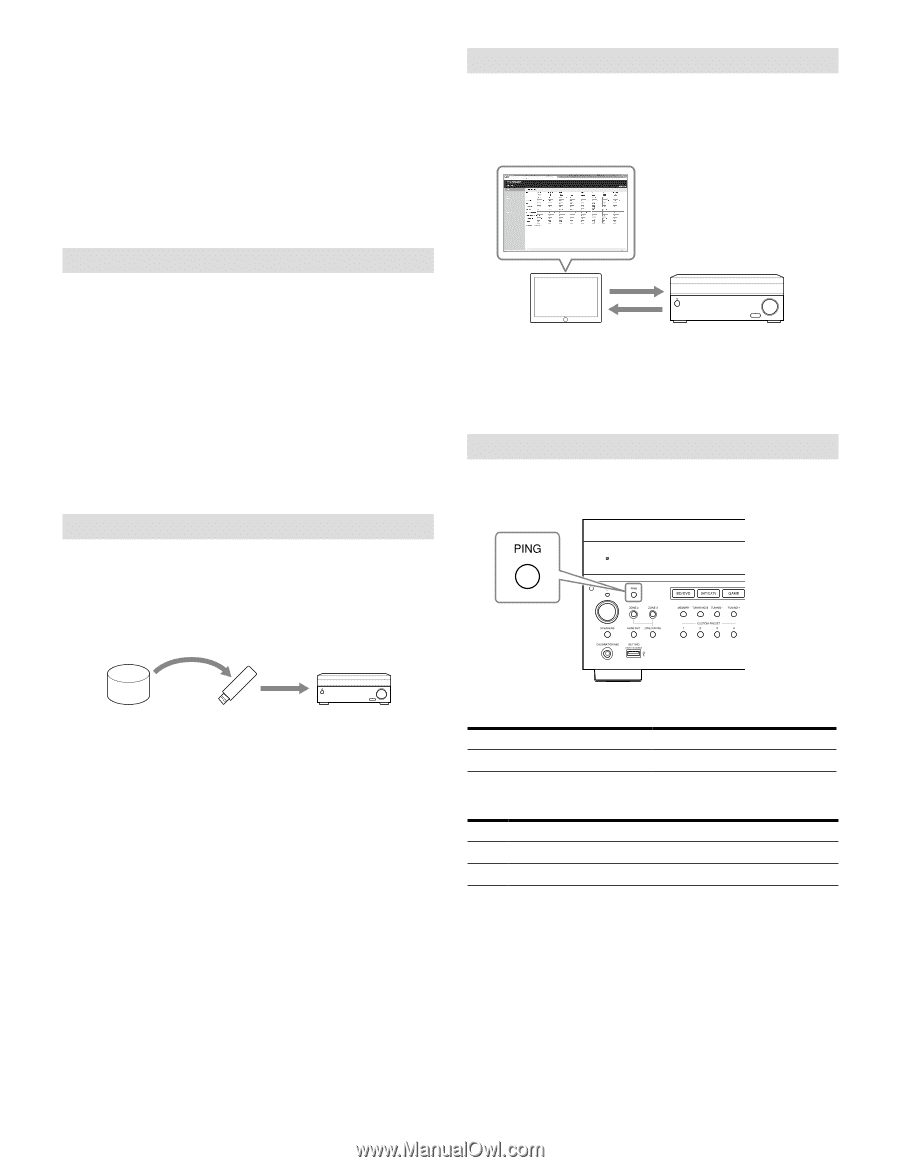
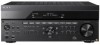
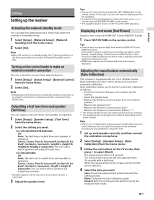
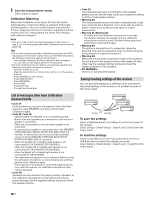
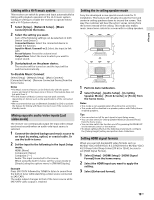
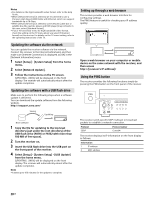
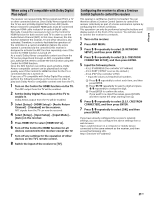
Notes • For details on the high bandwidth video format, refer to the Help Guide. • When [Enhanced format] is selected, we recommend to use a Premium High Speed HDMI Cable with Ethernet, which can support bandwidth up to 18 Gbps. • When [Enhanced format] is selected, some devices (cable box or satellite box, Blu-ray Disc player, and DVD player) may not work. In this case, select [Standard format]. • If your TV has similar menu for high bandwidth video format, check the setting on the TV menu when you select [Enhanced format] on this receiver. For details on the TV menu setting, refer to the operating instructions of the TV. Updating the software via the network You can update the receiver software via the network. Connect the receiver to the Internet beforehand, and then make sure [Internet Connection] is displayed as [OK] in the [Network Information] menu. 1 Select [Setup] - [System Setup] from the home menu. 2 Select [Network Update]. 3 Follow the instructions on the TV screen. [UPDATING...XXX%] will be displayed on the front display. The receiver will automatically reboot after the update completes. Updating the software with a USB flash drive Make sure to perform the following steps when a software update is delivered. You can download the update software from the following website. http://esupport.sony.com/ Saving Updating New software 1 Copy the file for updating to the top level directory (just under the root directory) of the USB flash drive (FAT16 or FAT32 with more than 100 MB of free space). 2 Turn the receiver on. 3 Insert the USB flash drive into the USB port on the front panel of the receiver. 4 Select [Setup] - [System Setup] - [USB Update] from the home menu. [UPDATING...XXX%] will be displayed on the front display. The receiver will automatically reboot after the update completes. Note • It takes up to 100 minutes for the update to complete. Setting up through a web browser The receiver provides a web browser interface for configuring settings. The PING feature is useful for checking your IP address quickly. Open a web browser on your computer or mobile device on the same network with the receiver, and then access http://[receiver's IP address]/ Using the PING button The receiver provides the following functions simply by pressing the PING button on the front panel of the receiver. The receiver sends specific UDP multicast or broadcast packets to establish a network connection. Protocol SDDP Protocol owner Control4 The receiver displays its IP information on the front display as follows. Information 1 IP address 2 MAC address 20US
-
 1
1 -
2
-
3
-
4
-
5
-
6
-
7
-
8
-
9
-
10
-
11
-
12
-
13
-
14
-
 15
15 -
 16
16 -
 17
17 -
 18
18 -
 19
19 -
 20
20 -
 21
21 -
 22
22 -
 23
23 -
 24
24 -
 25
25 -
26
-
27
-
28
-
29
-
30
-
31
-
32
-
33
-
34
-
35
-
36
-
37
-
38
-
39
-
40
-
41
-
42
-
43
-
44
-
45
-
46
-
47
-
48
-
49
-
50
-
51
-
52
-
53
-
54
-
55
-
56
-
57
-
58
-
59
-
60
-
61
-
62
-
63
-
64
-
65
-
66
-
67
-
68
-
69
-
70
-
71
-
72
-
73
-
74
-
75
-
76
-
77
 |
 |