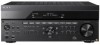
Sony STR-ZA2100ES Installation Guide - Page 21
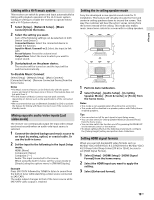
When using a TV compatible with Dolby Digital Plus output
 |
View all Sony STR-ZA2100ES manuals
Add to My Manuals
Save this manual to your list of manuals |
Page 21 highlights
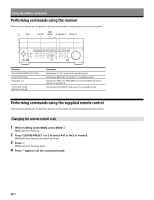
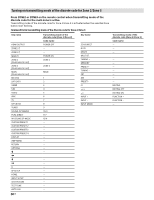
Settings When using a TV compatible with Dolby Digital Plus output The receiver can receive Dolby Atmos signals sent from a TV or other connected devices. Since Dolby Atmos signals from the TV are sent in Dolby Digital Plus format, ARC (Audio Return Channel)-compatible HDMI jacks must be connected using an HDMI cable instead of an optical digital cable. Normally, it would be necessary to turn on the Control for HDMI function for both receiver and TV in order to use the Audio Return Channel (ARC). In this case, however, the link function between the receiver, TV and other devices is also activated. Therefore, in order to facilitate the operation of the controller in a custom installation (where the entire system is controlled via the controller), this receiver is designed to activate the ARC function separately, even if the Control for HDMI function is turned off. As a result, Dolby Atmos-compatible content sent from the TV can be played back through an ARC-compatible HDMI jack, without the need to activate the link function using the Control for HDMI function. Since the ARC function can still be used as before, Dolby Atmos-compatible content can be played back in high quality, even if the Control for HDMI function for the TV or connected devices is turned on. If you use a TV compatible with Dolby Digital Plus output, perform the following settings on the receiver in order to play back Dolby Atmos-compatible content sent from the TV. 1 Turn on the Control for HDMI function on the TV. The ARC output from the TV will be enabled. 2 Set the Dolby Digital Plus output of the TV to enable it. Dolby Atmos output from the TV will be enabled. 3 Select [Setup] - [HDMI Setup] - [Audio Return Channel] - [Standard] on the receiver. ARC signals from the TV can now be received. 4 Select [Setup] - [Input Setup] - [Input Mode] - [Auto] on the receiver. 5 Press HDMI OUT to select [HDMI OUT A]. 6 Turn off the Control for HDMI function for all devices connected to the receiver except the TV. 7 Turn off any settings for the operation of other devices on the TV's remote control. 8 Switch the input of the receiver to [TV]. Configuring the receiver to allow a Crestron Control System to control the receiver This receiver is certified as Crestron Connected. You can therefore allow a Crestron Control System to control the receiver collectively as part of a home automation system by configuring the receiver as follows. This operation can only be performed using the buttons and display panel on the front of the receiver. You will also need to connect the receiver to a network. 1 Turn on the receiver. 2 Press AMP MENU. 3 Press / repeatedly to select [3. NETWORK SETUP], and then press ENTER. 4 Press / repeatedly to select [3.5. CRESTRON CONNECTED SETUP], and then press ENTER. 5 Input the following items. --3.5.2. IP ADDRESS (the controller's IP address) --3.5.3. PORT ("41794" is set as the default.) --3.5.4. IPID* (the controller's IPID) * Input the values as hexadecimal numbers. Press / repeatedly to select each item, and then press ENTER. Press / repeatedly to select a digit and press / repeatedly to change the digit. Press ENTER to confirm the value. If you want to re-input the values, press RETURN and then repeat the steps starting from . 6 Press / repeatedly to select [3.5.1. CRESTRON CONNECTED], and then press ENTER. 7 Press / repeatedly to select [ON], and then press ENTER. If you have already configured the receiver's network settings, you can also configure the above settings from a web browser. Open a web browser on a computer or mobile device connected to the same network as the receiver, and then access the following URL. http://[receiver's IP address]/ 21US
-
 1
1 -
2
-
3
-
4
-
5
-
6
-
7
-
8
-
9
-
10
-
11
-
12
-
13
-
14
-
15
-
 16
16 -
 17
17 -
 18
18 -
 19
19 -
 20
20 -
 21
21 -
 22
22 -
 23
23 -
 24
24 -
 25
25 -
 26
26 -
27
-
28
-
29
-
30
-
31
-
32
-
33
-
34
-
35
-
36
-
37
-
38
-
39
-
40
-
41
-
42
-
43
-
44
-
45
-
46
-
47
-
48
-
49
-
50
-
51
-
52
-
53
-
54
-
55
-
56
-
57
-
58
-
59
-
60
-
61
-
62
-
63
-
64
-
65
-
66
-
67
-
68
-
69
-
70
-
71
-
72
-
73
-
74
-
75
-
76
-
77
 |
 |