Stihl FS 88 Instruction Manual - Page 23
Mounting the Loop Handle, Version
 |
View all Stihl FS 88 manuals
Add to My Manuals
Save this manual to your list of manuals |
Page 23 highlights
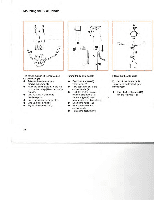
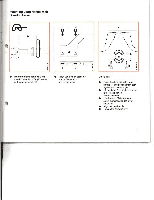
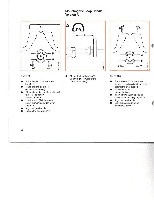
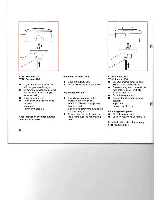
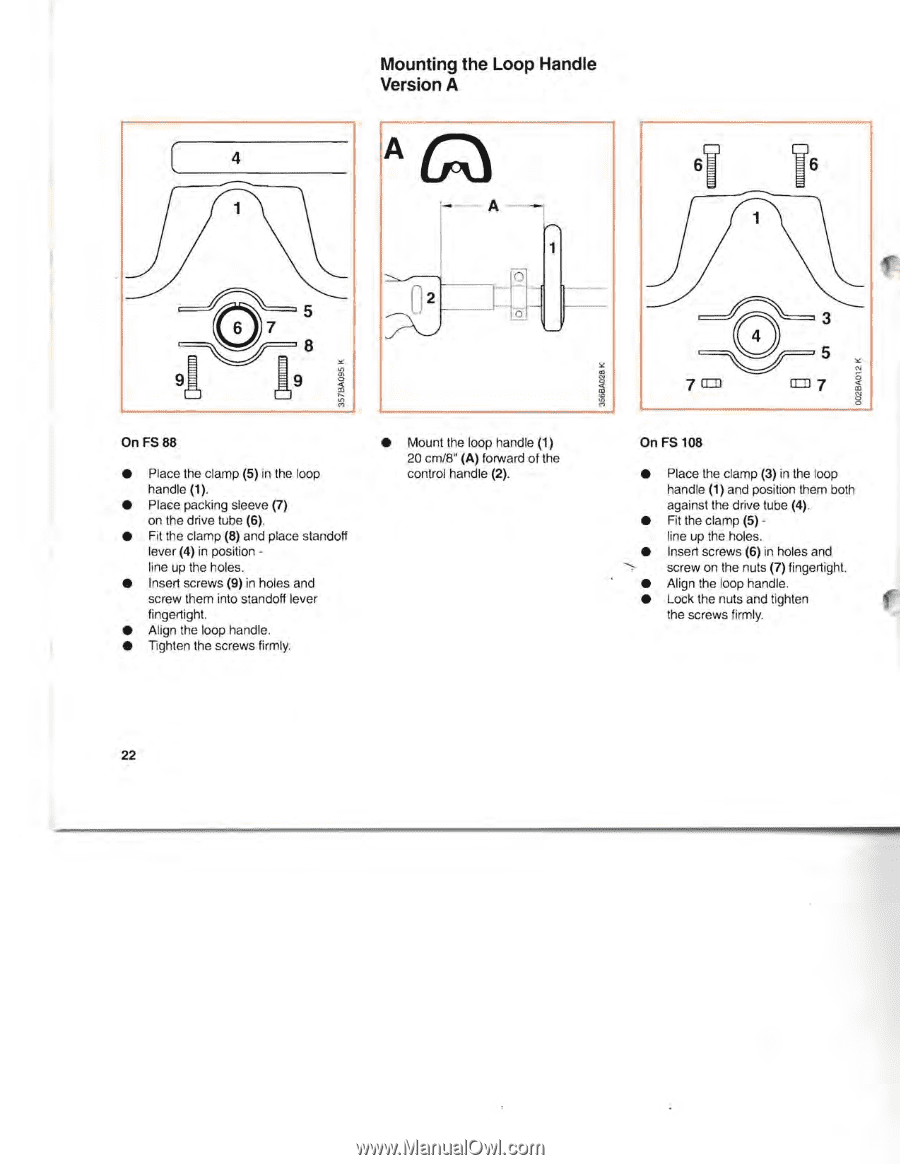
Mounting the Loop Handle Version A 4 At;) A 1 o o On FS 88 • Place the clamp (5) in the loop handle (1). • PlaE:e packing sleeve (7) on the drive tube (6). • Fit the clamp (8) and place standoff lever (4) in position line up the holes. • Insert screws (9) in holes and screw them into standoff lever fingertight. • Align the loop handle. • Tighten the screws firmly. • Mount the loop handle (1) 20 cm/8" (A) forward of the control handle (2). On FS 108 • Place the clamp (3) in the loop handle (1) and position them both against the drive tube (4) • Fit the clamp (5) line up the holes. • Insert screws (6) in holes and ~. screw on the nuts (7) fingertight. • Align the loop handle. • Lock the nuts and tighten the screws firmly. 22
-
 1
1 -
2
-
3
-
4
-
5
-
6
-
7
-
8
-
9
-
10
-
11
-
12
-
13
-
14
-
15
-
16
-
17
-
 18
18 -
 19
19 -
 20
20 -
 21
21 -
 22
22 -
 23
23 -
 24
24 -
 25
25 -
 26
26 -
 27
27 -
 28
28 -
29
-
30
-
31
-
32
-
33
-
34
-
35
-
36
-
37
-
38
-
39
-
40
-
41
-
42
-
43
-
44
-
45
-
46
-
47
-
48
-
49
-
50
-
51
-
52
-
53
-
54
-
55
-
56
-
57
 |
 |
4
On FS 88
•
Place the clamp
(5)
in
the loop
handle (1).
•
PlaE:e
packing sleeve
(7)
on the drive tube (6).
•
Fit the clamp
(8)
and place standoff
lever
(4)
in
position -
line up the holes.
•
Insert screws
(9)
in
holes and
screw them into standoff lever
fingertight.
•
Align the loop handle.
•
Tighten the screws firmly.
22
Mounting the Loop Handle
Version A
At;)
A
1
o
o
•
Mount the loop handle
(1)
20 cm/8"
(A)
forward of the
control handle (2).
On FS 108
•
Place the clamp
(3)
in
the loop
handle
(1)
and position them both
against the drive tube
(4)
•
Fit the clamp
(5)
-
line up the holes.
•
Insert screws
(6)
in
holes and
~.
screw on the nuts
(7)
fingertight.
•
Align the loop handle.
•
Lock the nuts and tighten
the screws firmly.