Stihl FS 88 Instruction Manual - Page 31
Screw mounting nut
 |
View all Stihl FS 88 manuals
Add to My Manuals
Save this manual to your list of manuals |
Page 31 highlights
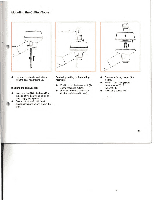
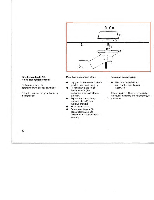
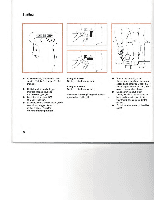
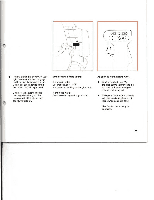
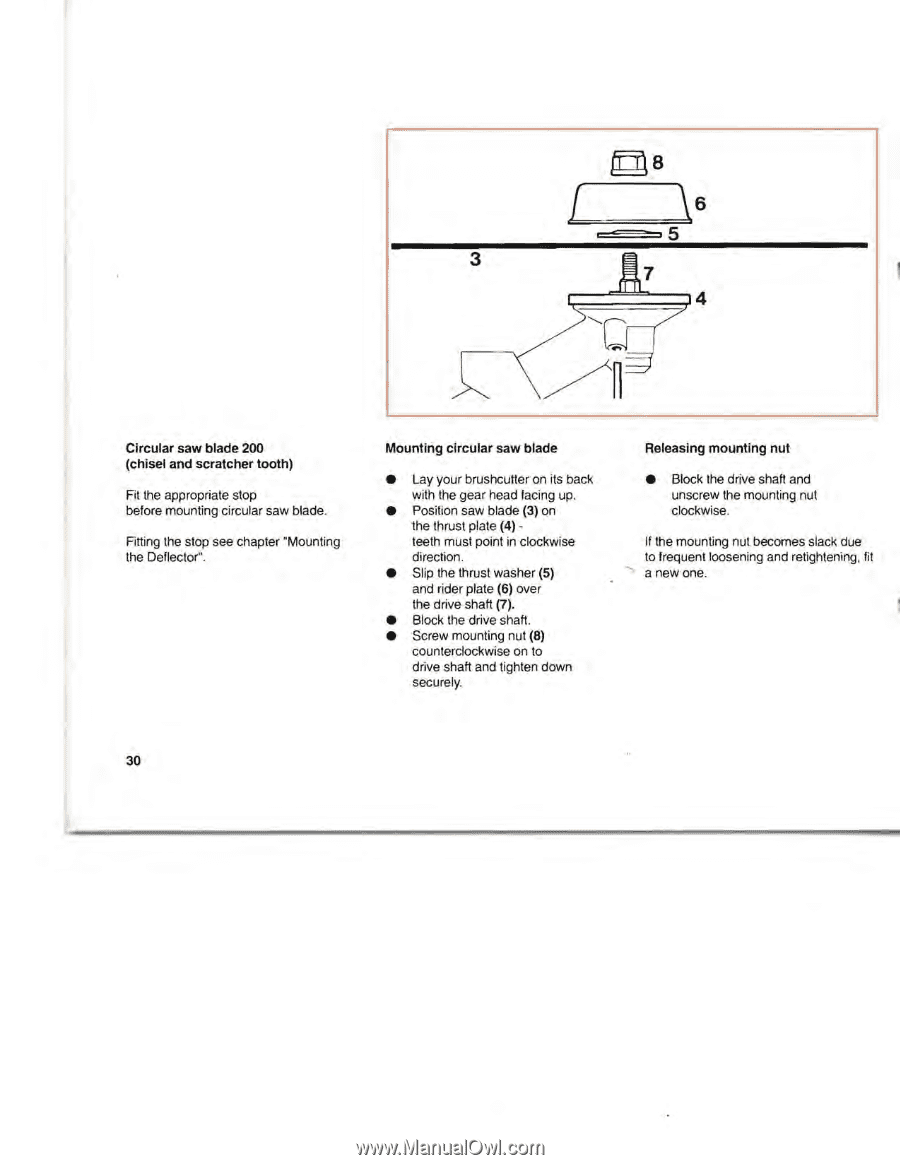
@8 [ \6 ::==::..., 5 3 7 4 Circular saw blade 200 (chisel and scratcher tooth) Fit the appropriate stop before mounting circular saw blade. Fitting the stop see chapter "Mounting the Deflector". Mounting circular saw blade • Lay your brushcutter on its back with the gear head facing up. • Position saw blade (3) on the thrust plate (4) teeth must point in clockwise direction. • Slip the thrust washer (5) and rider plate (6) over the drive shaft (7). • Block the drive shaft. • Screw mounting nut (8) counterclockwise on to drive shaft and tighten down securely. Releasing mounting nut • Block the drive shaft and unscrew the mounting nut clockwise. If the mounting nut becomes slack due to frequent loosening and retightening, fit a new one. 30
-
 1
1 -
2
-
3
-
4
-
5
-
6
-
7
-
8
-
9
-
10
-
11
-
12
-
13
-
14
-
15
-
16
-
17
-
18
-
19
-
20
-
21
-
22
-
23
-
24
-
25
-
 26
26 -
 27
27 -
 28
28 -
 29
29 -
 30
30 -
 31
31 -
 32
32 -
 33
33 -
 34
34 -
 35
35 -
 36
36 -
37
-
38
-
39
-
40
-
41
-
42
-
43
-
44
-
45
-
46
-
47
-
48
-
49
-
50
-
51
-
52
-
53
-
54
-
55
-
56
-
57
 |
 |
@8
[
\6
::==::...,
5
3
7
4
Circular saw blade 200
(chisel and scratcher tooth)
Fit the appropriate stop
before mounting circular saw blade.
Fitting the stop see chapter "Mounting
the Deflector".
30
Mounting circular saw blade
•
Lay your brushcutter on its back
with the gear head facing up.
•
Position saw blade
(3)
on
the thrust plate
(4)
-
teeth must point
in
clockwise
direction.
•
Slip the thrust washer
(5)
and rider plate
(6)
over
the drive shaft
(7).
•
Block the drive shaft.
•
Screw mounting nut
(8)
counterclockwise on to
drive shaft and tighten down
securely.
Releasing mounting nut
•
Block the drive shaft and
unscrew the mounting nut
clockwise.
If
the mounting nut becomes slack due
to frequent loosening and retightening, fit
a new one.