Stihl MS 192 C-E Product Instruction Manual - Page 30
Closing, Checking for proper closure, Misalignment of the cap parts
 |
View all Stihl MS 192 C-E manuals
Add to My Manuals
Save this manual to your list of manuals |
Page 30 highlights
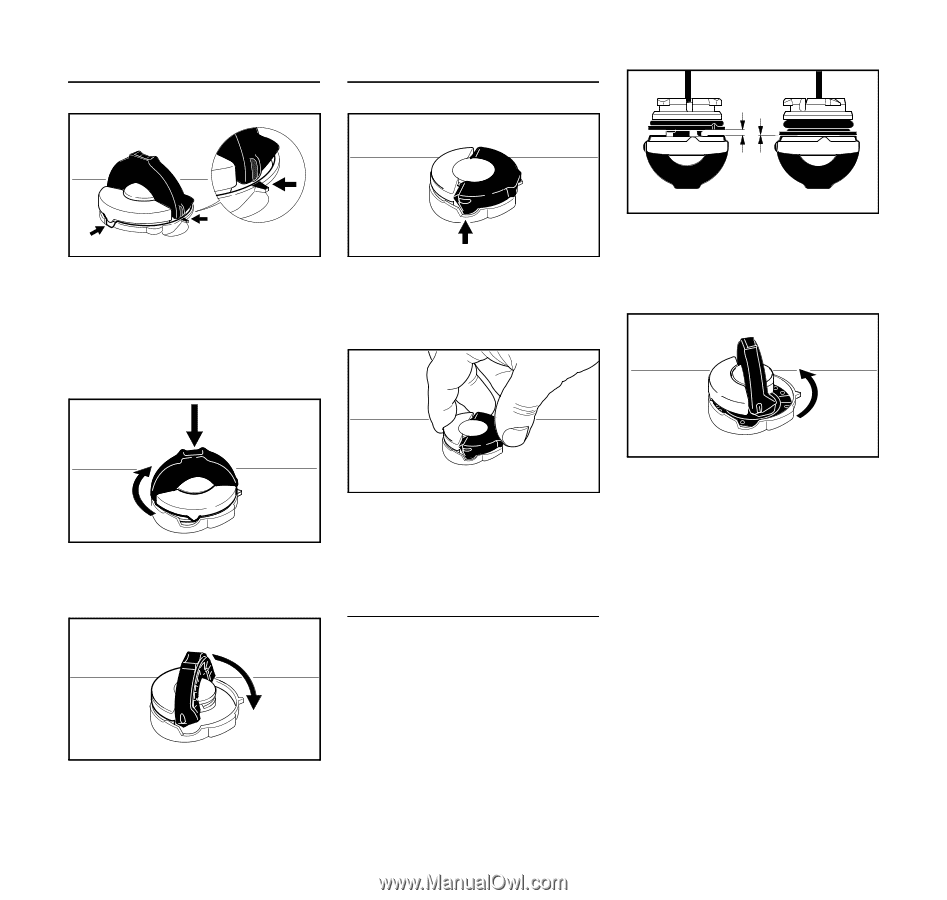
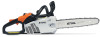
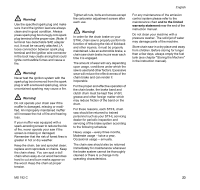
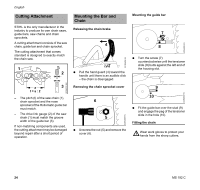
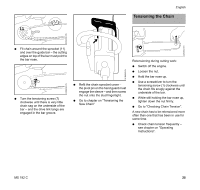
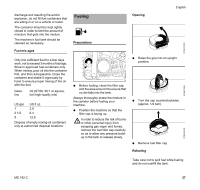
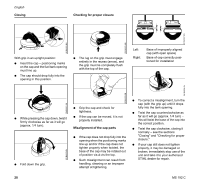
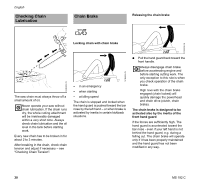
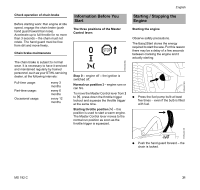
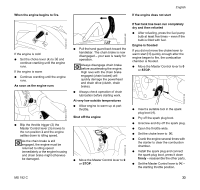
English Closing Checking for proper closure 001BA227 KN 001BA223 KN 001BA220 KN With grip in an upright position: N Insert the cap - positioning marks on the cap and the fuel tank opening must line up. N The cap should drop fully into the opening in this position. N The lug on the grip must engage entirely in the recess (arrow), and the grip must lie completely flush with the top of the cap. Left: Right: Base of improperly aligned cap (with open space) Base of cap correctly positioned for installation 001BA226 KN 001BA225 KN N While pressing the cap down, twist it firmly clockwise as far as it will go (approx. 1/4 turn). N Fold down the grip. 001BA222 KN 001BA221 KN N Grip the cap and check for tightness. N If the cap can be moved, it is not properly installed. Misalignment of the cap parts N If the cap does not drop fully into the opening when the positioning marks line up and/or if the cap does not tighten properly when twisted, the base of the cap may be rotated out of position vis-à-vis the top. N Such misalignment can result from handling, cleaning or an improper attempt at tightening. N To correct a misalignment, turn the cap (with the grip up) until it drops fully into the tank opening. N Twist the cap counterclockwise as far as it will go (approx. 1/4 turn) - this will twist the base of the cap into the correct position. N Twist the cap clockwise, closing it normally - see the sections "Closing" and "Checking for proper closure." N If your cap still does not tighten properly, it may be damaged or broken; immediately stop use of the unit and take it to your authorized STIHL dealer for repair. 28 MS 192 C
-
 1
1 -
2
-
3
-
4
-
5
-
6
-
7
-
8
-
9
-
10
-
11
-
12
-
13
-
14
-
15
-
16
-
17
-
18
-
19
-
20
-
21
-
22
-
23
-
24
-
 25
25 -
 26
26 -
 27
27 -
 28
28 -
 29
29 -
 30
30 -
 31
31 -
 32
32 -
 33
33 -
 34
34 -
 35
35 -
36
-
37
-
38
-
39
-
40
-
41
-
42
-
43
-
44
-
45
-
46
-
47
-
48
-
49
-
50
-
51
-
52
-
53
-
54
-
55
-
56
-
57
-
58
-
59
-
60
-
61
-
62
-
63
-
64
-
65
-
66
-
67
-
68
-
69
-
70
-
71
-
72
-
73
-
74
-
75
-
76
-
77
-
78
-
79
-
80
-
81
-
82
-
83
-
84
-
85
-
86
-
87
-
88
-
89
-
90
-
91
-
92
-
93
-
94
-
95
-
96
-
97
-
98
-
99
-
100
-
101
-
102
-
103
-
104
-
105
-
106
-
107
-
108
-
109
-
110
-
111
-
112
-
113
-
114
-
115
-
116
-
117
-
118
-
119
-
120
-
121
-
122
-
123
-
124
 |
 |