TASCAM DP-006 Owners Manual - Page 23
Recording Vocals On Track 1, Input A Level, Track 3 Level, Pan [bal], Master Level, Volume
 |
View all TASCAM DP-006 manuals
Add to My Manuals
Save this manual to your list of manuals |
Page 23 highlights
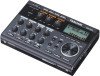
2 - Quick Start Guides 7. As necessary, use the INPUT A LEVEL, TRACK 3 LEVEL and PAN [BAL] knobs and MASTER LEVEL knob, along with the VOLUME dial on the left side of the unit to adjust the monitoring levels and balance. Recording vocals on TRACK 1 1. Press the HOME button to reopen the Home Screen. 2. Press the TRACK 1 REC button to put the track into recording standby. The REC indicator blinks when in standby. 8. When you are done listening to the recording, press the Stop (8) button to stop playback. 9. After returning to the start of the song (00h00m00s00f ), press the Play (7) button while pressing and holding the Record (0) button to start recording, and play the lead guitar part. The Record (0) indicator lights and the TRACK 2 REC indicator stops blinking and stays lit. 10. When you are done playing, press the Stop (8) button to stop recording. 11. Press the TRACK 2 REC button to end recording standby. The REC indicator becomes unlit. NOTE If the OL indicator continues to light even when the LEVEL knob is turned down, the guitar signal itself is too loud. In this case, if the input setting is GUITAR/LINE H, change it to GUITAR/LINE Mor GUITAR/LINE. If the input setting is GUITAR/LINE M, change it to GUITAR/LINE. If the OL indicator continues to light even when set to GUITAR/LINE, lower the guitar's output volume. TRACK 1 REC indicator 3. Use the INPUT A LEVEL knob to adjust the input level of the internal mic. Set the LEVEL knob so that the loudest sounds do not cause the INPUT A OL indicator to light. OL indicator 23 TASCAM DP-006
-
 1
1 -
2
-
3
-
4
-
5
-
6
-
7
-
8
-
9
-
10
-
11
-
12
-
13
-
14
-
15
-
16
-
17
-
 18
18 -
 19
19 -
 20
20 -
 21
21 -
 22
22 -
 23
23 -
 24
24 -
 25
25 -
 26
26 -
 27
27 -
 28
28 -
29
-
30
-
31
-
32
-
33
-
34
-
35
-
36
-
37
-
38
-
39
-
40
-
41
-
42
-
43
-
44
-
45
-
46
-
47
-
48
-
49
-
50
-
51
-
52
-
53
-
54
-
55
-
56
-
57
-
58
-
59
-
60
-
61
-
62
-
63
-
64
-
65
-
66
-
67
-
68
-
69
-
70
-
71
-
72
-
73
-
74
-
75
-
76
-
77
-
78
-
79
-
80
-
81
-
82
-
83
-
84
-
85
-
86
-
87
-
88
-
89
-
90
-
91
-
92
-
93
-
94
-
95
-
96
-
97
-
98
-
99
-
100
-
101
-
102
-
103
-
104
 |
 |
