TASCAM DP-006 Owners Manual - Page 25
Creating a stereo master track, TRACK 1-3 LEVEL, MASTER LEVEL, TRACK 1-2 PAN, TRACK 3 PAN BAL, IN/OUT
 |
View all TASCAM DP-006 manuals
Add to My Manuals
Save this manual to your list of manuals |
Page 25 highlights
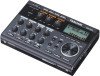
Creating a stereo master track After you finish recording, the next step is to mix down the tracks and make a stereo master track. 1. Use the TRACK 1-3 LEVEL knobs to adjust the levels of the tracks and the balance between them. Use the MASTER LEVEL knob to adjust the overall level. 2 - Quick Start Guides 3. Press the IN/OUT button to open the I/O SETTINGscreen. 2. Use the TRACK 1-2 PAN knobs and TRACK 3 PAN (BAL) knob to adjust the stereo positioning of the tracks. Watch the (left channel) and (right channel) meters on the display as you make these adjustments. 4. Set the IN point. The time between the IN and OUT points will be included in the stereo master track. Press the Play (7) button to start playback, and press the F3 [IN] button at the point where you want to start the stereo master track. A SET IN!pop-up message appears. The point when you pressed the F3 [IN] button will be set as the IN point and used as the starting point for making the stereo master track. 25 TASCAM DP-006
-
 1
1 -
2
-
3
-
4
-
5
-
6
-
7
-
8
-
9
-
10
-
11
-
12
-
13
-
14
-
15
-
16
-
17
-
18
-
19
-
 20
20 -
 21
21 -
 22
22 -
 23
23 -
 24
24 -
 25
25 -
 26
26 -
 27
27 -
 28
28 -
 29
29 -
 30
30 -
31
-
32
-
33
-
34
-
35
-
36
-
37
-
38
-
39
-
40
-
41
-
42
-
43
-
44
-
45
-
46
-
47
-
48
-
49
-
50
-
51
-
52
-
53
-
54
-
55
-
56
-
57
-
58
-
59
-
60
-
61
-
62
-
63
-
64
-
65
-
66
-
67
-
68
-
69
-
70
-
71
-
72
-
73
-
74
-
75
-
76
-
77
-
78
-
79
-
80
-
81
-
82
-
83
-
84
-
85
-
86
-
87
-
88
-
89
-
90
-
91
-
92
-
93
-
94
-
95
-
96
-
97
-
98
-
99
-
100
-
101
-
102
-
103
-
104
 |
 |
