TASCAM DP-006 Owners Manual - Page 53
OL indicators and level meters, Input level meters A/B, TRACK level meters 1-4
 |
View all TASCAM DP-006 manuals
Add to My Manuals
Save this manual to your list of manuals |
Page 53 highlights
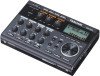
6 - Basic Recording OL indicators and level meters The audio levels of this unit can be checked using the INPUT A/B OL indicators and the level meters on the display. The level meters allow the signal levels to be checked, and they can also be used to confirm whether signals are being input into the unit. For example, if the and level meters are moving a signal is being input into the unit even if you cannot hear anything when you are monitoring with headphones or an external monitoring system (powered monitor speakers or an amplifier and speakers). In this case, something other than this unit is probably the reason that sound is not being output. As shown below, if a "-" appears at the top of a level meter, the input is overloading (these "-" indicators will automatically disappear after a while). In this case, the sound might be distorted, so lower the level until the "-" stops appearing. If an OL indicator lights, the input source signal could be too loud or the LEVEL knob set too high. If the OL indicator lights even if the LEVEL knob is set to MIN, the input source signal is too high, so lower the volume on the input source. Overload indicators 88Input level meters (A/B) The and level meters on the display show the input levels of this unit's INPUT A and INPUT B. Use the INPUT A/B LEVEL knobs, INPUT SETTINGscreen settings and the output volume controls of the input sound source to adjust the levels. NOTE If an INPUT A/B OL indicator lights even though the INPUT A/B level meters shows a suitable level, the input signal is too strong and the sound is distorted. Lower the output volume of the input sound source. 88TRACK level meters (1-4) These meters show either playback signal levels or the track input signal levels, depending on the operation status, as shown below. REC indicator Unlit Blinking (recording standby) Lit (recording) Transport status Playing back Playing back Stopped Recording Signals shown by level meters Track playback Track playback Track input Track input NOTE When the playback signal is shown, the level of the recorded signal of the track is shown, so the level shown by the meters cannot be changed. When the input signal is being shown, the INPUT A/B LEVEL knobs can change the levels shown by the level meters. 88Stereo level meters (L/R) These show the stereo bus output level of this unit. Adjust the output level with the MASTER LEVEL knob. NOTE When an input source is a built-in mic, if the REC indicator is not lit on a track that has the built-in mic as its recording source, the input sound cannot be heard. 53 TASCAM DP-006
-
 1
1 -
2
-
3
-
4
-
5
-
6
-
7
-
8
-
9
-
10
-
11
-
12
-
13
-
14
-
15
-
16
-
17
-
18
-
19
-
20
-
21
-
22
-
23
-
24
-
25
-
26
-
27
-
28
-
29
-
30
-
31
-
32
-
33
-
34
-
35
-
36
-
37
-
38
-
39
-
40
-
41
-
42
-
43
-
44
-
45
-
46
-
47
-
 48
48 -
 49
49 -
 50
50 -
 51
51 -
 52
52 -
 53
53 -
 54
54 -
 55
55 -
 56
56 -
 57
57 -
 58
58 -
59
-
60
-
61
-
62
-
63
-
64
-
65
-
66
-
67
-
68
-
69
-
70
-
71
-
72
-
73
-
74
-
75
-
76
-
77
-
78
-
79
-
80
-
81
-
82
-
83
-
84
-
85
-
86
-
87
-
88
-
89
-
90
-
91
-
92
-
93
-
94
-
95
-
96
-
97
-
98
-
99
-
100
-
101
-
102
-
103
-
104
 |
 |
