TP-Link RE205 RE205EU V1 User Guide - Page 26
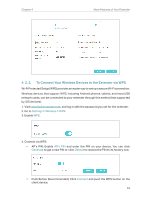
To Connect Your Wireless Devices to the Extender via WPS, Push Button Recommended: Click
 |
View all TP-Link RE205 manuals
Add to My Manuals
Save this manual to your list of manuals |
Page 26 highlights
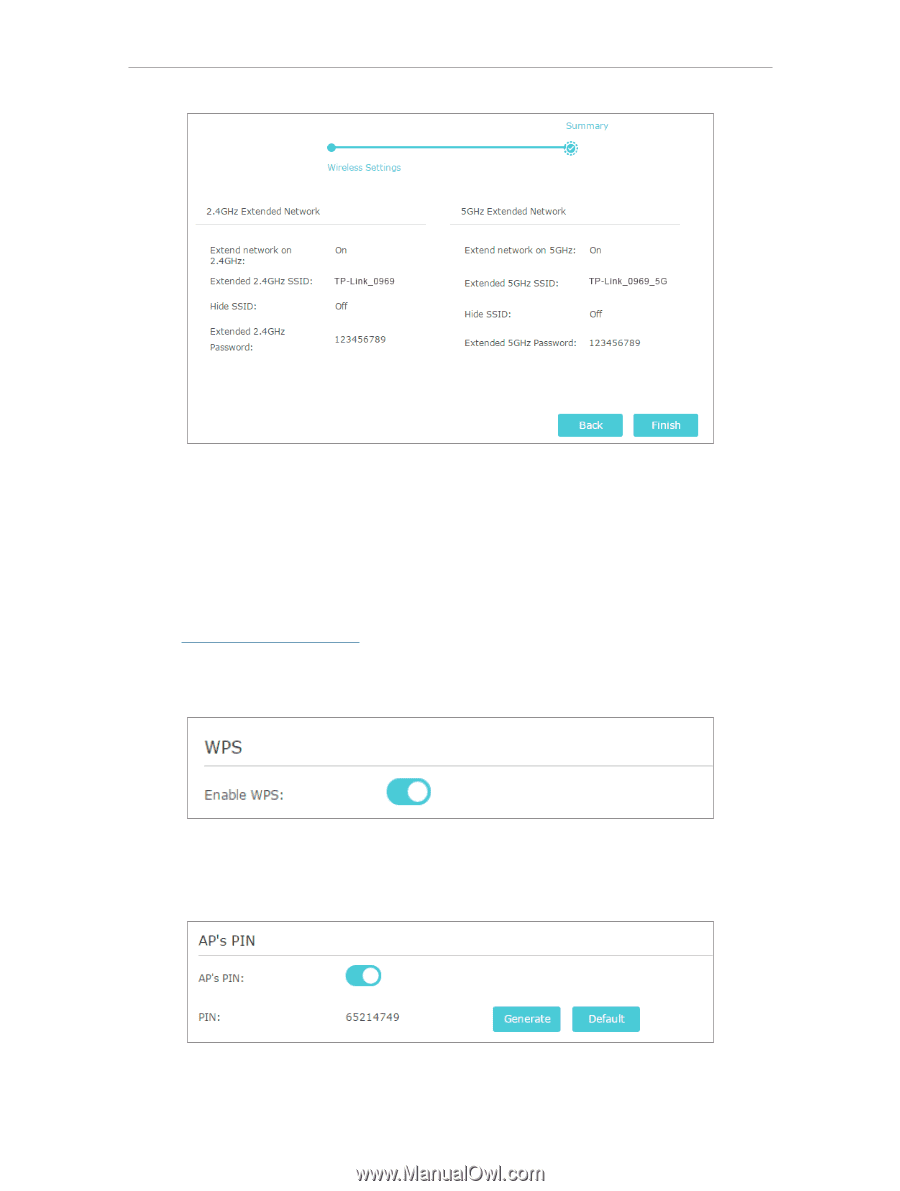
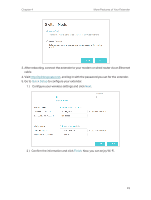
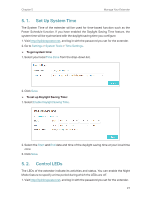
Chapter 4 More Features of Your Extender 4. 2. 2. To Connect Your Wireless Devices to the Extender via WPS Wi-Fi Protected Setup (WPS) provides an easier way to set up a secure Wi-Fi connection. Wireless devices that support WPS, including Android phones, tablets, and most USB network cards, can be connected to your extender through this method (not supported by iOS devices). 1. Visit http://tplinkrepeater.net, and log in with the password you set for the extender. 2. Go to Settings > Wireless > WPS. 3. Enable WPS. 4. Connect via WPS: • AP's PIN: Enable AP's PIN and enter the PIN on your device. You can click Generate to get a new PIN or click Default to restore the PIN to its factory one. • Push Button (Recommended): Click Connect and push the WPS button on the client device. 24
-
 1
1 -
2
-
3
-
4
-
5
-
6
-
7
-
8
-
9
-
10
-
11
-
12
-
13
-
14
-
15
-
16
-
17
-
18
-
19
-
20
-
 21
21 -
 22
22 -
 23
23 -
 24
24 -
 25
25 -
 26
26 -
 27
27 -
 28
28 -
 29
29 -
 30
30 -
 31
31 -
32
-
33
-
34
-
35
-
36
-
37
-
38
-
39
-
40
-
41
-
42
 |
 |