TP-Link TL-PS310U Instruction Manual - Page 12
Connecting to an USB Printer or Multi-functional Printer, Connect Device - usb storage and mfp server
 |
UPC - 845973031060
View all TP-Link TL-PS310U manuals
Add to My Manuals
Save this manual to your list of manuals |
Page 12 highlights
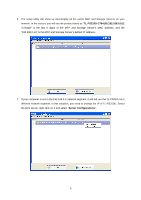
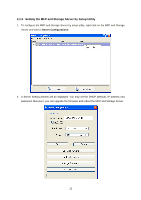
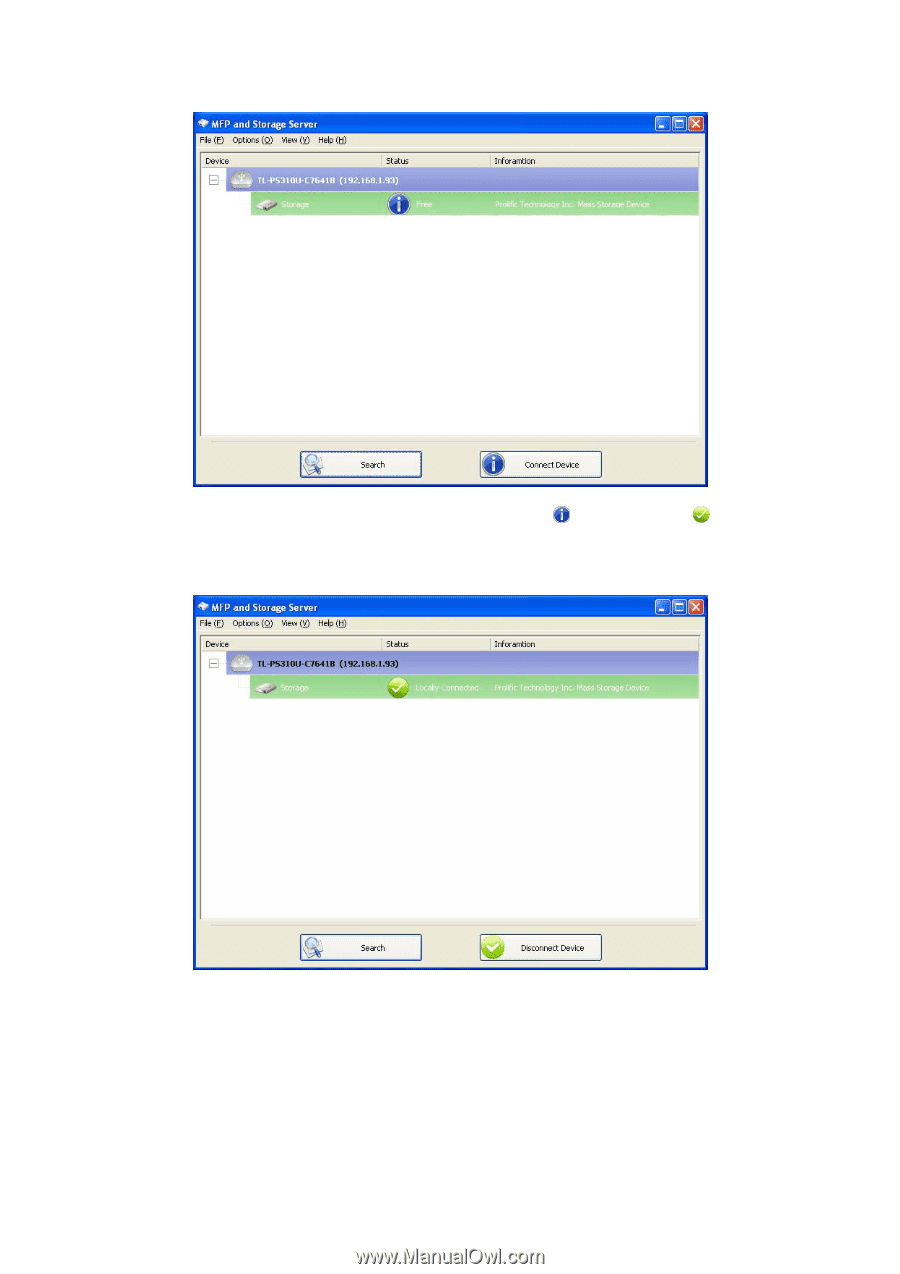
3. Once the USB device has been connected, the blue icon ( ) will turn green ( ) to indicate that the connection has been established. The USB device now becomes available on your computer, and you can use this USB device as if it was directly connected to your computer. 2.1.2 Connecting to an USB Printer or Multi-functional Printer 1. Connect the USB cable on your printer or multi-functional printer to the MFP and Storage Server and make sure your printer is powered on. You will then see the connected printer show up in the MFP and Storage Server setup utility. Select the printer from the list and click on the Connect Device button. 8
-
 1
1 -
2
-
3
-
4
-
5
-
6
-
 7
7 -
 8
8 -
 9
9 -
 10
10 -
 11
11 -
 12
12 -
 13
13 -
 14
14 -
 15
15 -
 16
16 -
 17
17 -
18
-
19
-
20
-
21
-
22
-
23
-
24
-
25
-
26
-
27
-
28
-
29
 |
 |
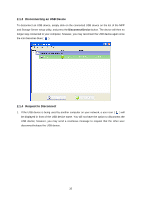
8
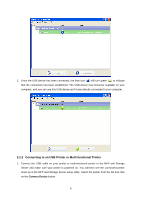
3.
Once the USB device has been connected, the blue icon (
) will turn green (
) to indicate
that the connection has been established. The USB device now becomes available on your
computer, and you can use this USB device as if it was directly connected to your computer.
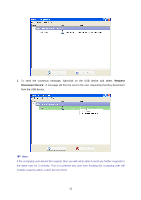
2.1.2 Connecting to an USB Printer or Multi-functional Printer
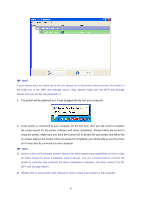
1. Connect the USB cable on your printer or multi-functional printer to the MFP and Storage
Server and make sure your printer is powered on. You will then see the connected printer
show up in the MFP and Storage Server setup utility. Select the printer from the list and click
on the
Connect Device
button.