TRENDnet TEW-673GRU User's Guide
TRENDnet TEW-673GRU Manual
 |
UPC - 710931600445
View all TRENDnet TEW-673GRU manuals
Add to My Manuals
Save this manual to your list of manuals |
TRENDnet TEW-673GRU manual content summary:
- TRENDnet TEW-673GRU | User's Guide - Page 1
i - TRENDnet TEW-673GRU | User's Guide - Page 2
tested in accordance with the instructions, may cause harmful interference antenna or transmitter. The availability of some specific channels and/or operational frequency bands are country dependent and are firmware programmed at the factory to match the intended destination. The firmware setting - TRENDnet TEW-673GRU | User's Guide - Page 3
EC. The following test methods have been stations for wireless telecommunication systems with GHz ISM band and using wide band modulation techniques setting up outdoor radio links and/or for supplying public access to telecommunications and/or network services. This device may not be used for setting - TRENDnet TEW-673GRU | User's Guide - Page 4
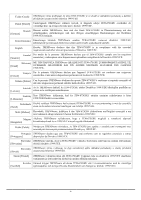
essentiële [Dutch] eisen en de andere relevante bepalingen van richtlijn 1999/5/EG. Malti [Maltese] Hawnhekk, TRENDware, jiddikjara li dan TEW-673GRU jikkonforma mal-ħtiġijiet essenzjali u ma provvedimenti oħrajn relevanti li hemm fid-Dirrettiva 1999/5/EC. Magyar Alulírott, TRENDware nyilatkozom - TRENDnet TEW-673GRU | User's Guide - Page 5
TCP/IP SETTING 10 Windows 95/98/ME ...10 Windows 2000 ...11 Windows XP / Vista...12 CONFIGURATION 13 Login to the WLAN Router through Wireless LAN...13 Login to the WLAN Router ...13 Using the Web Browser ...13 Setup Wizard...14 Main configuration...24 LAN & DHCP Server ...24 WAN ...25 Password - TRENDnet TEW-673GRU | User's Guide - Page 6
57 Wireless ...57 Wired ...58 Performance Menu...58 Settings Menu ...59 Restart ...60 Reset...60 Date/Time ...61 Connected Devices...61 WPS Menu ...62 WPS ...62 Current PIN ...64 USB CONTROL CENTER UTILITY 65 Utility ...65 System...65 Configure Server ...66 Print Sharing ...66 Auto Connect Printer - TRENDnet TEW-673GRU | User's Guide - Page 7
manual discusses how to install the 300Mbps Wireless N Dual Band Gigabit Router with USB Port. Terms/Usage In this guide, the term "the WLAN Router" refers to your 300Mbps Wireless N Dual Band Gigabit Router with USB Port. Overview of this User's Guide Introduction: Describes the 300Mbps Wireless - TRENDnet TEW-673GRU | User's Guide - Page 8
300Mbps Concurrent Dual Band Wireless N Gigabit Router The 300Mbps Concurrent Dual Band Wireless N Gigabit Router (model TEW673GRU) delivers unsurpassed Dual Band wireless speed, coverage, and reliability with up to 14x the speed and 6x the coverage of a wireless g connection*. Concurrent Dual Band - TRENDnet TEW-673GRU | User's Guide - Page 9
-speed data rates up to 300Mbps using an IEEE 802.11n connection ¾ Network a USB flash drive, hard drive, or printer using software utility ¾ 2 detachable antennas provide high-speed performance and expansive wireless coverage ¾ Advanced firewall protection with Network Address Translation (NAT) and - TRENDnet TEW-673GRU | User's Guide - Page 10
the IEEE 300Mbps Wireless N Dual Band Gigabit Router with USB Port. Unpacking Open the box of the WLAN Router and carefully unpack it. The box should contain the following items: ‹ TEW-673GRU 300Mbps Wireless N Dual Band Gigabit Router with USB Port ‹ CD ROM (Utility/User's Guide) ‹ Multi-Language - TRENDnet TEW-673GRU | User's Guide - Page 11
even furniture may block or degrade the signal. 4. Antenna orientation can also have a large impact on your wireless signal. Use the wireless adapter's site survey tool to determine the best antenna orientation for your wireless devices. 5. Interference from devices that produce RF (radio frequency - TRENDnet TEW-673GRU | User's Guide - Page 12
HARDWARE INSTALLATION Front Panel and Top Panel The figure below shows the front panel of the 300Mbps Wireless N Dual Band Gigabit Router with USB Port. Front Panel POWER LED: This indicator lights green when the hub is receives power, otherwise it is off. LCD Screen: The LED screen displays - TRENDnet TEW-673GRU | User's Guide - Page 13
Rear Panel The figure below shows the rear panel of the 300Mbps Wireless N Dual Band Gigabit Router with USB Port. Rear Panel Antenna: There are two 2dBi gain antennas on the rear panel for wireless connection. LAN (1-4): Four 10/100/1000Mbps Auto-MDIX LAN port for connecting 10Mbps, 100Mbps - TRENDnet TEW-673GRU | User's Guide - Page 14
Side Panel The figure below shows the side panel of the 300Mbps Wireless N Dual Band Gigabit Router with USB Port. WPS (side panel): Push this button to execute the Wi-Fi Protected Setup process. 8 - TRENDnet TEW-673GRU | User's Guide - Page 15
. Since the IEEE 300Mbps Wireless N Dual Band Gigabit Router with USB Port has four ports, you can connect up to four computers directly to the unit. Then you do not have to buy a switch to connect these computers since one WLAN Router functions both as a connection-sharing unit and as a switch - TRENDnet TEW-673GRU | User's Guide - Page 16
the "Network neighborhood" icon found on the desktop. 2. Click the right mouse button and a context menu will be show. 3. Select "Properties" to enter the TCP/IP setting screen. 4. Select "Obtain an IP address automatically" on the "IP address" field. 5. Select "Disable DNS" in the "DNS" field. 10 - TRENDnet TEW-673GRU | User's Guide - Page 17
. Double click on the "Local area network connection" icon. Select "Properties" to enter the TCP/IP setting window. 1. In the "Local area network status" window, click on "Properties." 2. In the "Local area network connection" window, first select TCP/IP setting and then select "Properties." 11 - TRENDnet TEW-673GRU | User's Guide - Page 18
3. Set both "IP address" and "DNS" to Automatic configuration. Windows XP / Vista Point the cursor and click the right button on the "My Network Place" icon. Select "properties" to enter the TCP/IP setting window. 1. Set "IP address" to "Obtain an IP address automatically." 2. Set "DNS" to "Obtain - TRENDnet TEW-673GRU | User's Guide - Page 19
Internet browser. 2. Enter IP address http://192.168.10.1 (the factory-default IP address setting) to the URL web address location. 3. When the following dialog box appears, enter the user name and password to login to the main configuration window, the default username and password is "admin". 13 - TRENDnet TEW-673GRU | User's Guide - Page 20
process to get the wireless Router configuration ready to run in 6 easy steps by clicking on` the "Wizard" button on the function menu. The following screen will appear. Please click "Next" to continue. Step 1: Set your new password Set a new admin password of the WLAN Router. Please click "Next" to - TRENDnet TEW-673GRU | User's Guide - Page 21
LAN connection and DHCP server Set user's IP address and mask. The default IP is 192.168.10.1. If the user chooses to enable DHCP, please click "Enable". DHCP enabled is able to automatically assign IP addresses. Please assign the range of IP addresses in the fields of "Range start" and "Range end - TRENDnet TEW-673GRU | User's Guide - Page 22
Fixed IP Address: If the Internet Service Provider (ISP) assigns a fixed IP address, choose this option and enter the assigned WAN IP Address, WAN Subnet Mask, WAN Gateway Address and DNS Server Addresses for the WLAN Router. PPPoE to obtain IP automatically: 16 - TRENDnet TEW-673GRU | User's Guide - Page 23
to the Internet using a PPPoE (Dial-up xDSL) connection, and the ISP provides a User Name and Password, then choose this option and enter the required information. PPPoE with a fixed IP address: If connected to the Internet using a PPPoE (Dial-up xDSL) connection, and the ISP provides a User - TRENDnet TEW-673GRU | User's Guide - Page 24
PPTP: If connected to the Internet using a PPTP xDSL connection, enter your IP, Subnet Mask, Gateway, Server IP, PPTP Account and PPTP Password. 18 - TRENDnet TEW-673GRU | User's Guide - Page 25
L2TP: If connected to the Internet using a L2TP (Dial-up xDSL) connection and the ISP provides a Server IP, Account and Password information, choose this option and enter the required information. 19 - TRENDnet TEW-673GRU | User's Guide - Page 26
provide a User Name, Password, Authentication Server and Login Server IP (Optional). Choose this option and enter the required information. Russia PPPoE: If your ISP is Russian PPPoE, the ISP will provide a User Name, Password. If you have a Static IP WAN Physical IP Address, WAN Physical Subnet - TRENDnet TEW-673GRU | User's Guide - Page 27
Gateway IP Address will be required. Choose this option and enter the required information. Russia PPTP: If connected to the Internet using Russian PPTP xDSL connection, enter your server IP, PPTP Account and Password. If using Static IP you must enter your IP, Subnet Mask, Gateway, Server IP, PPTP - TRENDnet TEW-673GRU | User's Guide - Page 28
If connected to the Internet using Russian L2TP (Dial-up xDSL) enter your server IP, PPTP Account and Password. If using Static IP you must enter your IP, Subnet Mask, Gateway, Server IP, PPTP Account and PPTP Password. 22 - TRENDnet TEW-673GRU | User's Guide - Page 29
LAN. If user enables the Wireless LAN, type the SSID in the text box and select a channel. The SSID and channel must be the same as wireless devices attempting to connect to the WLAN Router. Step 6: Setup completed The Setup wizard is now completed. The new settings will be effective after the WLAN - TRENDnet TEW-673GRU | User's Guide - Page 30
. The host name is required by some ISPs. The default host name is "TEW-673GRU" IP Address: This is the IP address of the WLAN Router. The default IP address is 192.168.10.1. Subnet Mask: Type the subnet mask for the WLAN Router in the text box. The default subnet mask is 255.255.255.0. DHCP Server - TRENDnet TEW-673GRU | User's Guide - Page 31
that will be using the static IP address. IP Address: Type an IP address to assign a LAN client. MAC Address: Enter the MAC address of the specific LAN client that will be using the IP address. Static DHCP List: List all static IP address assigned on the WLAN router. Dynamic DHCP List: List all - TRENDnet TEW-673GRU | User's Guide - Page 32
: Select whether user wants to specify an IP address manually, or want to obtain an IP address automatically. When Specify IP is selected, type the IP address, subnet mask, and default gateway in the text boxes. User's ISP will provide with this information. DNS 1-2: Type up to 2 DNS numbers in the - TRENDnet TEW-673GRU | User's Guide - Page 33
clock to the global Internet through the SNTP Server. Specify the NTP domain name or IP address in the text box. Set the time: Manually setting the WLAN Router system time, press the Set Time button to update the system time. Daylight Saving: Enables users to enable or disable daylight saving time - TRENDnet TEW-673GRU | User's Guide - Page 34
your current Public IP address when you are online. First, you need to register your preferred DNS with the DDNS provider. Then, please select the DDNS address in the Server Address and fill the related information in the below fields: Host Name, User Name and Password. Wireless Basic This section - TRENDnet TEW-673GRU | User's Guide - Page 35
if you are using both 802.11n and non-802.11n wireless devices. z 20MHz - This is the default setting with single channel support required by Wi-Fi regulations. SSID Broadcast: While SSID Broadcast is enabled, all wireless clients will be able to view the WLAN Router's SSID. For security purposes - TRENDnet TEW-673GRU | User's Guide - Page 36
Select if you are using both 5GHz 802.11a and 802.11n wireless clients. Channel Width: Select the Channel Width: z Auto 20/40 - Select if you are using both 802.11n and non-802.11n wireless devices. z 20MHz - This is the default setting with single channel support required by Wi-Fi regulations. SSID - TRENDnet TEW-673GRU | User's Guide - Page 37
Security This page allows users to set the wireless security of the WLAN router for a secure wireless communication. Authentication Type: The authentication type is set to Disable by default. There are four options: Disabled, WEP, WPA, WPA2 and WPA-Auto. WEP Encryption 31 - TRENDnet TEW-673GRU | User's Guide - Page 38
other wireless clients that have the same WEP key. Mode: Select the key type: ASCII or HEX WEP Key: Select the level of encryption from the drop-down list. The WLAN Router supports, 64 and 128-bit encryption. Key 1 ~ Key 4: Enables users to create up to 4 different WEP keys. Manually enter a set of - TRENDnet TEW-673GRU | User's Guide - Page 39
by the Primary Radius Server. 2. Enter the IP address, Port used and Shared Secret by the Secondary Radius Server. (optional) WPA-PSK/WPA2-PSK Security If WPA, WPA2 or WPA-Auto PSK is selected the below screen will show. Cipher Type: Select the cipher type for TKIP or AES encryption, Select Auto for - TRENDnet TEW-673GRU | User's Guide - Page 40
wireless functions. Beacon Interval: Type the beacon interval in the text box. User can specify a value from 25 to 1000. The default beacon interval is 100. RTS Threshold: Type . (NOTE: set this fragmentation threshold value may diminish system performance. DTIM Interval: Type a DTIM (Delivery - TRENDnet TEW-673GRU | User's Guide - Page 41
. WPS: Enable or Disable the WPS (Wi-Fi Protected Setup) function Status: Displays the state (Un-configured State/Configured State) information of WPS. Self-PIN Number: Display the default PIN number of the WLAN Router. Client PIN Number: Type Client PIN number that the client uses to negotiate with - TRENDnet TEW-673GRU | User's Guide - Page 42
. After updating the firmware in Tools - Firmware, check this to ensure that the firmware was successfully updated. WAN: This section displays the WAN interface configuration including the MAC address, Connection status, DHCP client status, IP address, Subnet mask, Default gateway, and DNS. Wireless - TRENDnet TEW-673GRU | User's Guide - Page 43
Router LAN interface. Click "DHCP Release" to release all IP addresses assigned to client stations connected to the WAN via the WLAN Router. Click "DHCP Renew" to reassign IP addresses : Displays the time and date that the log entry was created. Message: Displays summary information about the log entry. - TRENDnet TEW-673GRU | User's Guide - Page 44
Password: If the SMTP Authentication enabled, fill in the password of the SMTP account here. SMTP Server: Type your SMTP server address here. Send to: Type an email address : Type the IP address of the Syslog Server if user wants the WLAN Router to listen and receive incoming Syslog messages. 38 - TRENDnet TEW-673GRU | User's Guide - Page 45
Log Type: Enables users to select what items will be included in the log: System Activity: Displays information related to WLAN Router rate of packet transmission via the WLAN Router's LAN, WAN ports and Wireless 2.4G/5G (in bytes per second). Click "Reset" to erase all statistics and begin - TRENDnet TEW-673GRU | User's Guide - Page 46
that displays the network interconnection topology. Static It enables users to set parameters by which the WLAN Router forwards data to its destination if the network has a static IP address. Network Address: Type the static IP address the network uses to access the Internet. Contact the ISP or - TRENDnet TEW-673GRU | User's Guide - Page 47
network mask defaults to 255.255.255.0. Contact the ISP or network administrator for this information. Gateway Address: Type the gateway address of configuration to the static IP address table at the bottom of the page. Update: Select one of the entries in the static IP address table at the bottom - TRENDnet TEW-673GRU | User's Guide - Page 48
(subnet) mask of the connected node. Gateway Address: Displays the gateway address of the connected node. Interface: Displays whether the node is connected via a WAN or LAN. Metric: Displays the metric of the connected node. Type: Displays whether the node has a static or dynamic IP address 42 - TRENDnet TEW-673GRU | User's Guide - Page 49
and set firewall rules. Filter Using filters to deny or allow the users to access. Five types of filters to select: MAC, URL blocking, IP, Protocol the MAC Table access through the WLAN router. Select Deny: Denied computers will not have access through the WLAN Router and will not be able to access - TRENDnet TEW-673GRU | User's Guide - Page 50
Update: Click to update information for the user, if you have changed any of the fields. Delete: Select a user from the table at the bottom of the list and - TRENDnet TEW-673GRU | User's Guide - Page 51
port range of the protocol. IP Range: Type the IP range. IP addresses falling between this value and the Range End are not allowed to access the Internet. Add: Click to add the IP range to the table at the bottom of the screen. Update: Click to update information for the range if you have selected - TRENDnet TEW-673GRU | User's Guide - Page 52
used to provide access to the virtual server. LAN Server: Type the LAN IP address that will be assigned to the virtual server. Add: Click to add the virtual server to the table at the bottom of the screen. Update: Click to update information for the virtual server if the user has selected a listed - TRENDnet TEW-673GRU | User's Guide - Page 53
, users will be able to connect to the application via the WLAN Router's WAN connection. Click "Disabled" on a profile to prevent users from accessing the application on the WAN connection. Name: Type a descriptive name for the application. Trigger: Defines the outgoing communication that determines - TRENDnet TEW-673GRU | User's Guide - Page 54
the WLAN Router and associated security settings. Note: Any clients added to the DMZ exposes the clients to security risks such as viruses and unauthorized access. Enable: Click to enable or disable the DMZ. DMZ Host IP: Type a host IP address for the DMZ. The computer with this IP address acts as - TRENDnet TEW-673GRU | User's Guide - Page 55
to. ● IP Range End: Type the end IP address that the rule is applied to. ● Protocol: Select the protocol (TCP, UDP, or ICMP) of the destination. ● Port Range: Select the port range. Add: Click to add the rule profile to the table at the bottom of the screen. Update: Click to update information for - TRENDnet TEW-673GRU | User's Guide - Page 56
increasing or decreasing the priority of a rule, click "Update Priority" to save the changes. QoS The QoS Engine option helps improve your network gaming performance by prioritizing applications. By default the QoS Engine settings are disabled and application priority is not classified automatically - TRENDnet TEW-673GRU | User's Guide - Page 57
configured through the WAN via a Web browser. A user name and password are required to perform remote management. HTTP: Enables users to set up HTTP access for remote management. Allow to Ping WAN Port: Type a range of Router IP addresses that can be pinged from remote locations UPnP Enable: UPnP is - TRENDnet TEW-673GRU | User's Guide - Page 58
This page enables users to restart the system, save and load different settings as profiles, restore factory default settings, run a setup wizard to configure WLAN Router settings, upgrade the firmware, and ping remote IP addresses. Restart Click "Restart" to restart the system in the event the - TRENDnet TEW-673GRU | User's Guide - Page 59
the location of the downloaded unzipped firmware file. Select the file and click "Upgrade" to update the firmware to the latest release. Ping The ping test enables users to determine whether an IP address or host is present on the Internet. Type the host name or IP address in the text box and click - TRENDnet TEW-673GRU | User's Guide - Page 60
54 - TRENDnet TEW-673GRU | User's Guide - Page 61
about the router, Internet, wireless, and wired connection. See page 56. 2 Performance Provides performance data. See page 58. 3 Settings Provides information on setting values, and options to restart and reset the router. See page 59. 4 WPS Helps to initiate Wi-Fi Protected Setup. See page - TRENDnet TEW-673GRU | User's Guide - Page 62
wired connection, including hardware/firmware version, router uptime, WAN type, radio band, security, IP address, etc. To enter the Device Info menu, press ▼ to highlight the Device Info icon on the Main Menu screen. Four options are available: General, Internet, Wireless, and Wired. General 1. To - TRENDnet TEW-673GRU | User's Guide - Page 63
the Main Menu screen, press ▲ repeatedly until the desired menu or screen is reached. Wireless 1. To select Wireless, press ▼ and ► to highlight Wireless on the Device Info menu. 2. Press ▼ to enter the Wireless screen. Information about SSID name, MAC address, radio band, channel, and security are - TRENDnet TEW-673GRU | User's Guide - Page 64
Information about IP address, subnet, DHCP server, MAC address, and LAN status are displayed. 3. To go back to the Device Info menu or the Main Menu screen, press ▲ repeatedly until the Performance icon on the Main Menu screen. Four options are available: 2.4GHz, 5GHz, Wired, and Internet. 58 - TRENDnet TEW-673GRU | User's Guide - Page 65
menu provides information on date, time, and connected devices. In addition, the menu also provides options to restart and reset the router. To enter the Settings menu, press ▼ and ► to highlight the Settings icon on the Main Menu screen. Four options are available: Restart, Reset, Date/Time, and - TRENDnet TEW-673GRU | User's Guide - Page 66
to the previous screen. 4. Press ▼ to apply. Reset 1. To select Reset, press ▼ and ► to highlight Reset on the Settings menu. 2. Press ▼. A confirmation message appears. 3. Press ◄ or ► to select Yes or No. • Select Yes to reset the device to factory defaults. • Select No to return to the previous - TRENDnet TEW-673GRU | User's Guide - Page 67
devices is displayed. NOTE: ▼ Next ▼ indicates that more pages are available, press ▼ to view the next page. If ▲ Back ▲ appears at the top of the page, press ▲ to view the previous page. 3. To go back to the Settings menu, press ▲ repeatedly until the desired menu is reached. 4. To go back to the - TRENDnet TEW-673GRU | User's Guide - Page 68
-step instructions are provided to go through the procedure. To enter the WPS menu, press ▼ and ► to highlight the WPS icon on the Main Menu screen. Two options are available: WPS and Current PIN. WPS To use WPS, ensure that the device that you want to connect with the router has a wireless adapter - TRENDnet TEW-673GRU | User's Guide - Page 69
5. Press the WPS button of the router, which is located on the right side. 6. Press ▼ to go to the next step. NOTE: You have to wait for a few minutes to establish the connection. 7. If the connection succeeds, a success message appears. The Device IP and MAC address are displayed. If the connection - TRENDnet TEW-673GRU | User's Guide - Page 70
Current PIN 1. To select Current PIN, press ▼ and ► to highlight Current PIN on the WPS menu. 2. Press ▼. A confirmation message appears. 3. Press ◄ or ► to select Yes or No: • Select Yes to refresh the PIN number. After few seconds, the new PIN number appears on the screen. • Select No to return to - TRENDnet TEW-673GRU | User's Guide - Page 71
Center Utility is used to connect your computer to USB devices connected to the WLAN Router. The utility allows you to use USB devices as if they were connected directly to your PC through the Wireless N Gigabit Router with USB port (TEW-673GRU). System Select this feature to completely close and - TRENDnet TEW-673GRU | User's Guide - Page 72
. Configure Server Click this button to configure the USB server and to log into the user interface of the Wireless N Gigabit Router with USB port (TEW-673GRU). Print Sharing This section describes how to use a USB printer through the WLAN Router. Note: For proper installation it is recommended that - TRENDnet TEW-673GRU | User's Guide - Page 73
Set Auto-Connect Printer Provides a list of installed printers on your computer. Select the printer you would like to add into the Auto-Connect Printer Lists. Network Scanner This section describes the usage of a scanner through the Wireless N Gigabit Router with USB port. Once you click on the - TRENDnet TEW-673GRU | User's Guide - Page 74
Name: Type the name of the folder you would like to have the scanned images stored in. File Format: Select the file format Save Location: Click Click to return to be previous screen. Next: Click to begin scanning Cancel: Click to cancel scanning job and to return to back to the USB Utility. 68 - TRENDnet TEW-673GRU | User's Guide - Page 75
describes the how to use the utility when connecting to USB storage device through the WLAN Router. Connect Click this button to establish connection to the selected USB device that is not configured to Auto-Connect, like USB storage devices. Disconnect Click this button to properly disconnect your - TRENDnet TEW-673GRU | User's Guide - Page 76
Note: Only a single user can establish connection to a USB device. Once the "Request to Connect" is approved, the connection to the USB device will automatically transfer to the requested user. 70 - TRENDnet TEW-673GRU | User's Guide - Page 77
, wired switch ports, and Internet connection), device status (2.4GHz, 5GHz, wired switch ports, and Internet connection), management controls (router restart, factory reset, date/time, connected device information), WPS setup, and current PIN information LED Indicator Power Power Adapter 12V DC - TRENDnet TEW-673GRU | User's Guide - Page 78
normal use and service, for the following lengths of time from the date of purchase. TEW‐673GRU - 3 Years Warranty AC/DC Power Adapter, Cooling Fan, and Power Supply carry 1 year warranty. If a product does not operate as warranted during the applicable warranty period, TRENDnet shall reserve the - TRENDnet TEW-673GRU | User's Guide - Page 79
.com/gpl or http://www.trendnet.com Download section and look for the desired TRENDnet product to access to the GPL Code or LGPL Code. These codes are distributed WITHOUT WARRANTY and are subject to the copyrights of the developers. TRENDnet does not provide technical support for these codes. Please - TRENDnet TEW-673GRU | User's Guide - Page 80
74
-
 1
1 -
 2
2 -
 3
3 -
 4
4 -
 5
5 -
 6
6 -
 7
7 -
8
-
9
-
10
-
11
-
12
-
13
-
14
-
15
-
16
-
17
-
18
-
19
-
20
-
21
-
22
-
23
-
24
-
25
-
26
-
27
-
28
-
29
-
30
-
31
-
32
-
33
-
34
-
35
-
36
-
37
-
38
-
39
-
40
-
41
-
42
-
43
-
44
-
45
-
46
-
47
-
48
-
49
-
50
-
51
-
52
-
53
-
54
-
55
-
56
-
57
-
58
-
59
-
60
-
61
-
62
-
63
-
64
-
65
-
66
-
67
-
68
-
69
-
70
-
71
-
72
-
73
-
74
-
75
-
76
-
77
-
78
-
79
-
80
 |
 |

i