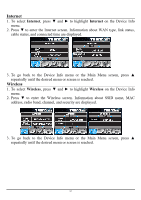
TRENDnet TEW-673GRU User's Guide - Page 68
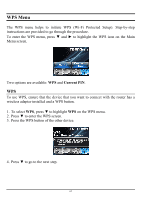
WPS Menu, WPS, Current PIN
 |
UPC - 710931600445
View all TRENDnet TEW-673GRU manuals
Add to My Manuals
Save this manual to your list of manuals |
Page 68 highlights
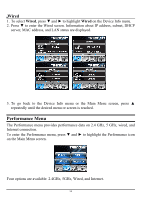
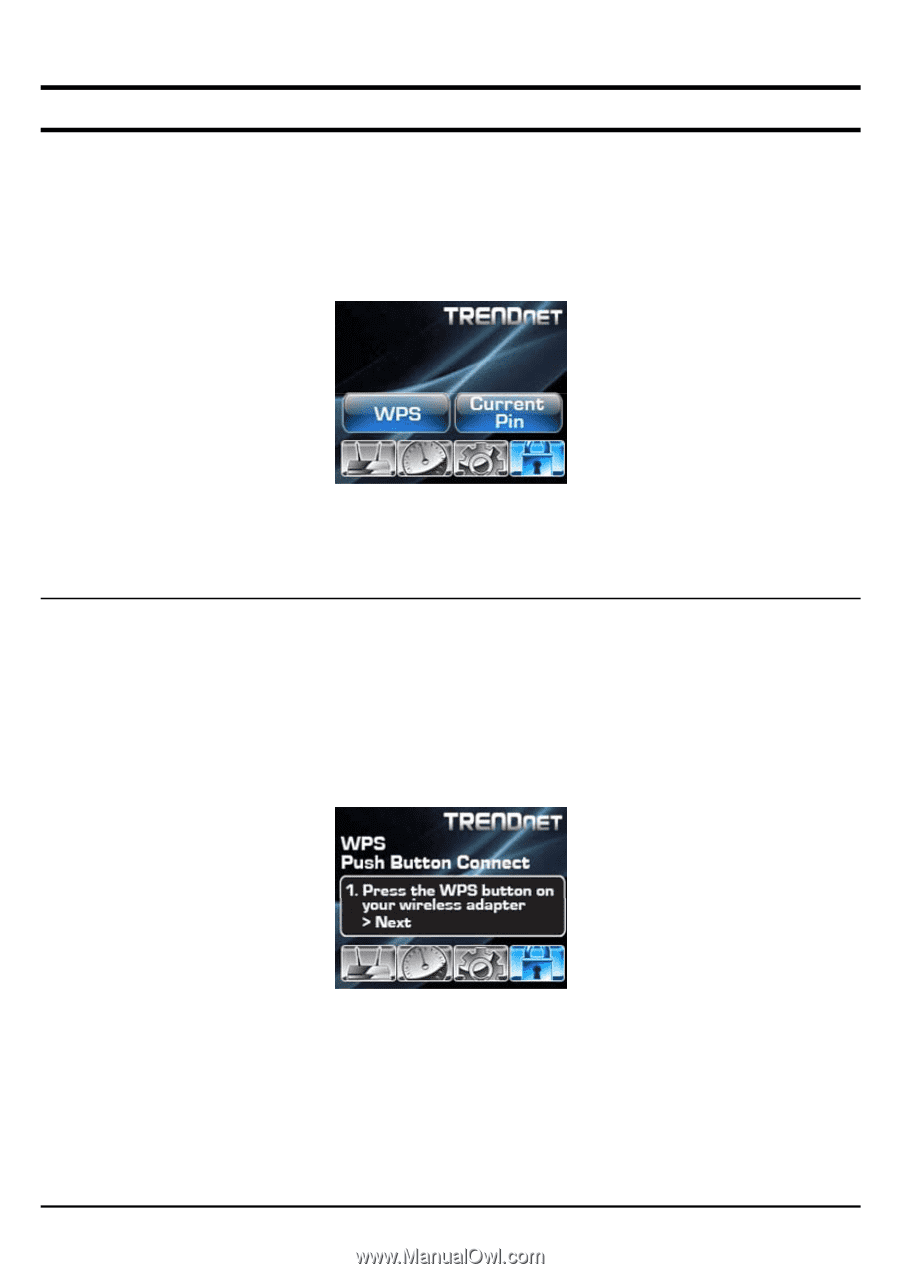
WPS Menu The WPS menu helps to initiate WPS (Wi-Fi Protected Setup). Step-by-step instructions are provided to go through the procedure. To enter the WPS menu, press ▼ and ► to highlight the WPS icon on the Main Menu screen. Two options are available: WPS and Current PIN. WPS To use WPS, ensure that the device that you want to connect with the router has a wireless adapter installed and a WPS button. 1. To select WPS, press ▼ to highlight WPS on the WPS menu. 2. Press ▼ to enter the WPS screen. 3. Press the WPS button of the other device. 4. Press ▼ to go to the next step. 62
-
 1
1 -
2
-
3
-
4
-
5
-
6
-
7
-
8
-
9
-
10
-
11
-
12
-
13
-
14
-
15
-
16
-
17
-
18
-
19
-
20
-
21
-
22
-
23
-
24
-
25
-
26
-
27
-
28
-
29
-
30
-
31
-
32
-
33
-
34
-
35
-
36
-
37
-
38
-
39
-
40
-
41
-
42
-
43
-
44
-
45
-
46
-
47
-
48
-
49
-
50
-
51
-
52
-
53
-
54
-
55
-
56
-
57
-
58
-
59
-
60
-
61
-
62
-
 63
63 -
 64
64 -
 65
65 -
 66
66 -
 67
67 -
 68
68 -
 69
69 -
 70
70 -
 71
71 -
 72
72 -
 73
73 -
74
-
75
-
76
-
77
-
78
-
79
-
80
 |
 |
62
WPS Menu
The WPS menu helps to initiate WPS (Wi-Fi Protected Setup). Step-by-step
instructions are provided to go through the procedure.
To enter the WPS menu, press
▼
and
►
to highlight the WPS icon on the Main
Menu screen.
Two options are available:
WPS
and
Current PIN
.
WPS
To use WPS, ensure that the device that you want to connect with the router has a
wireless adapter installed and a WPS button.
1.
To select
WPS
, press
▼
to highlight
WPS
on the WPS menu.
2.
Press
▼
to enter the WPS screen.
3.
Press the WPS button of the other device.
4.
Press
▼
to go to the next step.