TRENDnet TV-IP851WIC User's Guide - Page 12
to return to the, Follow the instructions in the next screen
 |
View all TRENDnet TV-IP851WIC manuals
Add to My Manuals
Save this manual to your list of manuals |
Page 12 highlights
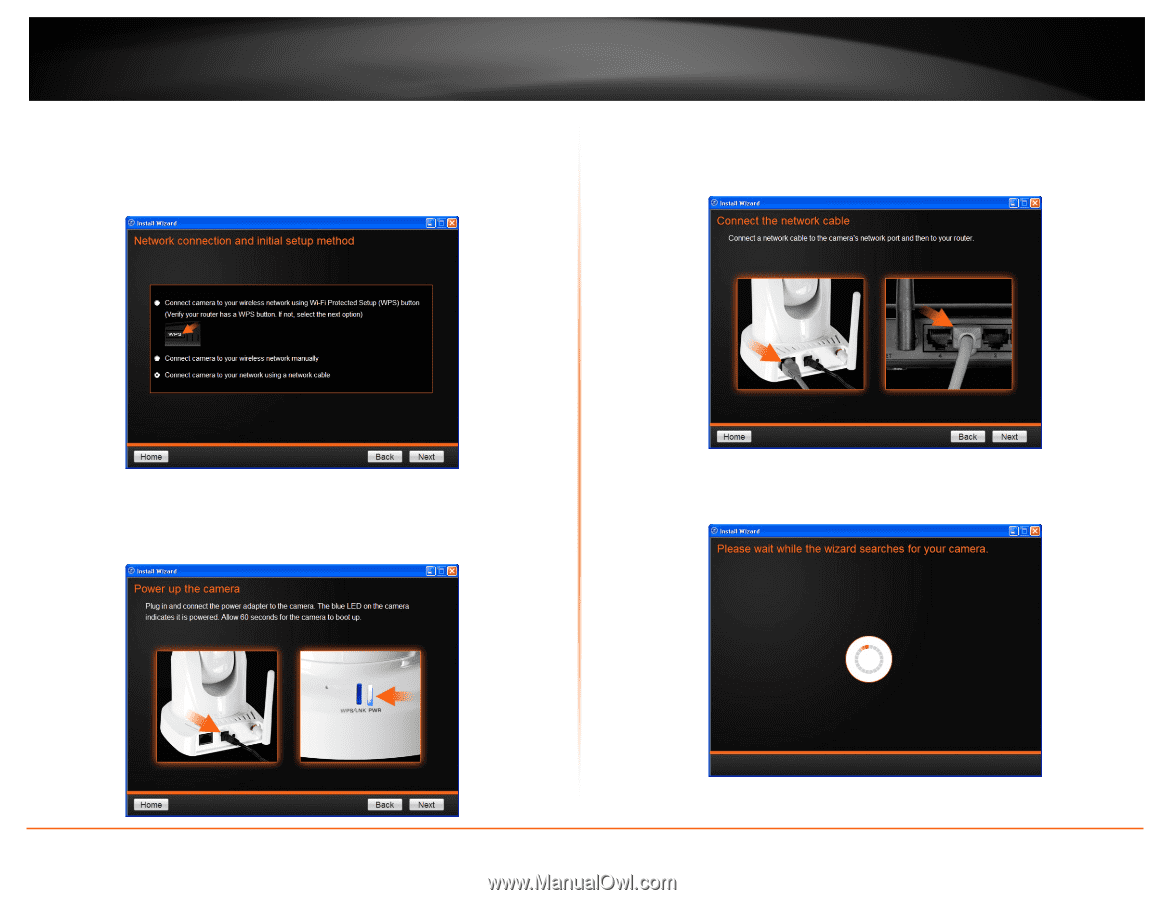
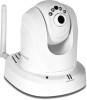
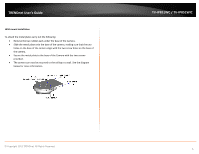
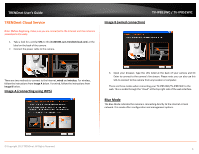
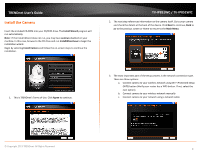
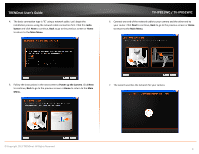
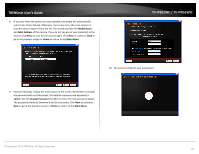
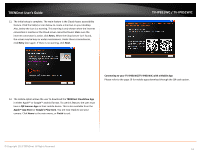
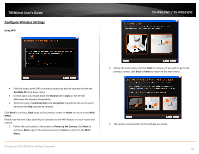
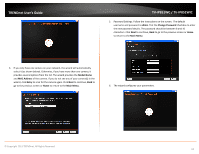
TRENDnet User's Guide 4. The basic connection type is "C" using a network cable. Let's begin the installation process using the network cable connection first. Click this radio button and click Next to continue, Back to go to the previous screen or Home to return to the Main Menu. TV-IP851WC / TV-IP851WIC 6. Connect one end of the network cable to your camera and the other end to your router. Click Next to continue, Back to go to the previous screen or Home to return to the Main Menu. 5. Follow the instructions in the next screen to Power up the Camera. Click Next to continue, Back to go to the previous screen or Home to return to the Main Menu. 7. The wizard searches the network for your camera. © Copyright 2013 TRENDnet. All Rights Reserved. 9
-
 1
1 -
2
-
3
-
4
-
5
-
6
-
 7
7 -
 8
8 -
 9
9 -
 10
10 -
 11
11 -
 12
12 -
 13
13 -
 14
14 -
 15
15 -
 16
16 -
 17
17 -
18
-
19
-
20
-
21
-
22
-
23
-
24
-
25
-
26
-
27
-
28
-
29
-
30
-
31
-
32
-
33
-
34
-
35
-
36
-
37
-
38
-
39
-
40
-
41
-
42
-
43
-
44
-
45
-
46
-
47
-
48
-
49
-
50
-
51
 |
 |