TRENDnet TV-IP851WIC User's Guide - Page 15
Con Wireless Settings, Using WPS, Available AP, Channel, authentication, encryption, Menu.
 |
View all TRENDnet TV-IP851WIC manuals
Add to My Manuals
Save this manual to your list of manuals |
Page 15 highlights
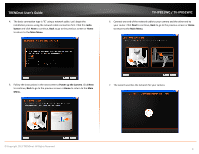
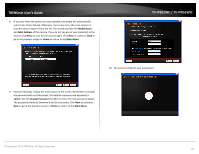
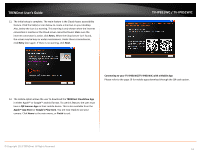
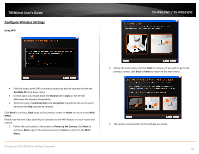
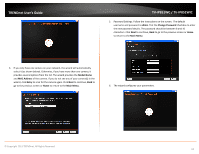
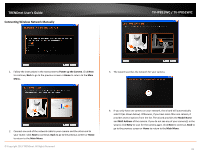
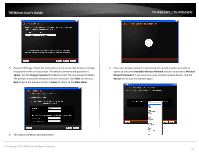
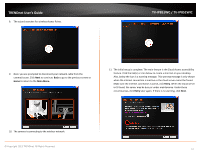
TRENDnet User's Guide Configure Wireless Settings Using WPS TV-IP851WC / TV-IP851WIC 2. Follow the instructions and click Next to continue. If you wish to go to the previous screen, click Back or Home to return to the main menu. • Find the access point (AP) or wireless router you wish to connect to from the Available AP drop down menu. • In most cases you should leave the Channel set to Auto as the AP will determine the channel of operation. • Select the type of authentication and encryption required by the access point and enter the Key required to connect. Click Next to continue, Back to go to the previous screen or Home to return to the Main Menu. Please read the next steps carefully as it pertains to the WPS feature on your router and camera. 1. Follow the instructions in the screen to Power up the Camera. Click Next to continue, Back to go to the previous screen or Home to return to the Main Menu. 3. The camera now searches for the settings you chose. © Copyright 2013 TRENDnet. All Rights Reserved. 12
-
 1
1 -
2
-
3
-
4
-
5
-
6
-
7
-
8
-
9
-
 10
10 -
 11
11 -
 12
12 -
 13
13 -
 14
14 -
 15
15 -
 16
16 -
 17
17 -
 18
18 -
 19
19 -
 20
20 -
21
-
22
-
23
-
24
-
25
-
26
-
27
-
28
-
29
-
30
-
31
-
32
-
33
-
34
-
35
-
36
-
37
-
38
-
39
-
40
-
41
-
42
-
43
-
44
-
45
-
46
-
47
-
48
-
49
-
50
-
51
 |
 |
