Thermador PCG366W Instructions for Use - Page 14
Using the rangetop - cooktop
 |
View all Thermador PCG366W manuals
Add to My Manuals
Save this manual to your list of manuals |
Page 14 highlights
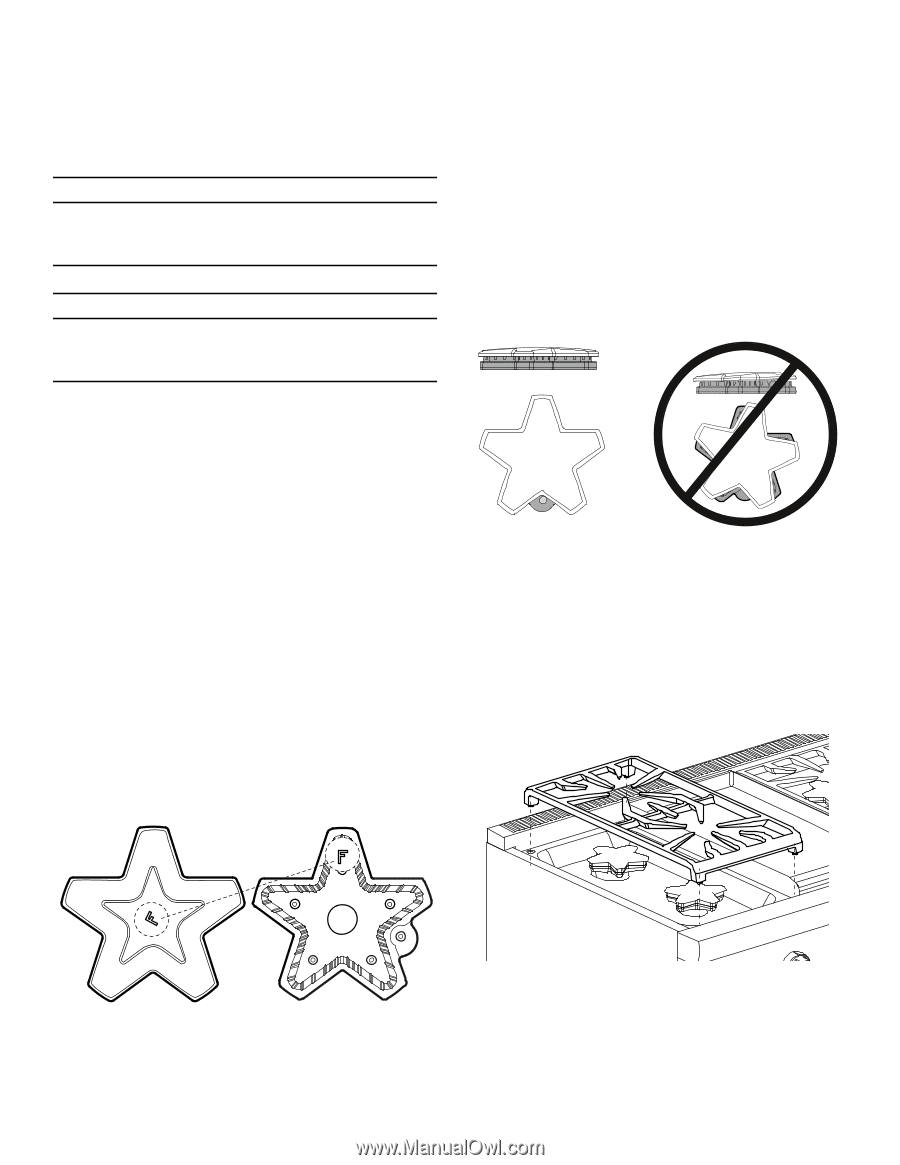
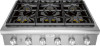
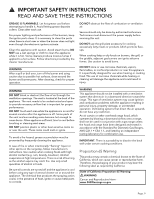
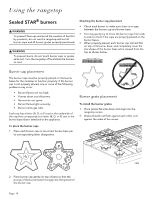
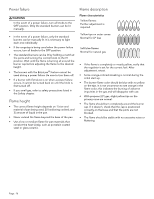
Using the rangetop Sealed STAR® burners 9 WARNING To prevent flare-ups and avoid the creation of harmful by-products, do not use the rangetop without all burner caps and all burner grates properly positioned. 9 WARNING To prevent burns, do not touch burner caps or grates while hot. Turn the rangetop off and allow the burners to cool. Checking the burner cap placement • Check each burner to make sure there is no gap between the burner cap and burner base. • You may gently try to move the burner caps from side to side to check if the caps are properly placed on the burner bases. • When properly placed, each burner cap will rest flat on top of its burner base, and completely cover the star-shape of the burner base when viewed from the top as shown below. Burner cap placement The burner caps must be properly placed on the burner bases for the cooktop to function properly. If the burner cap is not properly placed, one or more of the following problems may occur: • Burner flames are too high. • Flames shoot out of burners. • Burners do not ignite. • Burner flames light unevenly. • Burner emits gas odor. Each cap has a letter (B, D, or F) cast in the underside of the cap that corresponds to a letter (B, D, or F) cast in the burner base that is attached to the appliance. To place the burner caps 1. Place each burner cap on its correct burner base per its corresponding letter designation. Burner grate placement To install the burner grates 1. Place grates flat-side down and align into the rangetop recess. 2. Grates should rest flush against each other and against the sides of the recess. 2. Place burner cap gently on top of base so that the prongs of the burner base fit snugly into the groove of the burner cap. Page. 14
-
 1
1 -
2
-
3
-
4
-
5
-
6
-
7
-
8
-
 9
9 -
 10
10 -
 11
11 -
 12
12 -
 13
13 -
 14
14 -
 15
15 -
 16
16 -
 17
17 -
 18
18 -
 19
19 -
20
-
21
-
22
-
23
-
24
-
25
-
26
-
27
-
28
-
29
-
30
-
31
-
32
-
33
-
34
-
35
-
36
-
37
-
38
-
39
-
40
-
41
-
42
-
43
-
44
-
45
-
46
-
47
-
48
-
49
-
50
-
51
-
52
-
53
-
54
-
55
-
56
-
57
-
58
-
59
-
60
-
61
-
62
-
63
-
64
-
65
-
66
-
67
-
68
-
69
-
70
-
71
-
72
-
73
-
74
-
75
-
76
-
77
-
78
-
79
-
80
-
81
-
82
-
83
-
84
-
85
-
86
-
87
-
88
-
89
-
90
-
91
-
92
-
93
-
94
-
95
-
96
 |
 |