Toshiba 40UX600U User Manual - Page 10
Introduction - remote
 |
View all Toshiba 40UX600U manuals
Add to My Manuals
Save this manual to your list of manuals |
Page 10 highlights
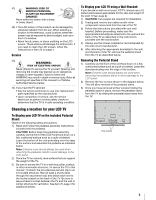
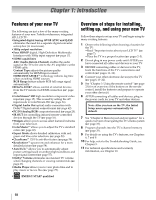
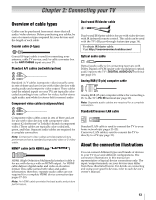
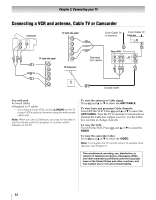
Chapter 1: Introduction Features of your new TV The following are just a few of the many exciting features of your new Toshiba widescreen, integrated HD, LCD TV: •Integrated digital tuning (8VSB ATSC and QAM) eliminates the need for a separate digital converter set-top box (in most cases). •1080p output resolution. •Four HDMI® digital, High-Definition Multimedia Interfaces with 1080p input support (- page 17). •HDMI capabilities ARC (Audio Return Channel) enables the audio signal of the TV to be sent to the AV amplifier via the HDMI cable. Content Type adjusts the picture quality automatically for HDMI input content. HDMI INSTAPORT™ technology reduces lag time when switching HDMI sources. RGB Range feature adjusts RGB full range signal automatically. •REGZA-LINK® allows control of external devices from the TV remote via HDMI connection (- page 47). •ColorStream® HD high-resolution component video input (- page 15). This is used by setting the AV input mode to ColorStream HD (- page 36). •Digital Audio Out optical audio connection with Dolby® Digital optical output format (- page 62). •PC IN (Analog RGB) computer terminal (- page 20). •IR OUT for controlling infrared remote-controlled devices through the TV (- page 16). •Widgets allows you to access select featured websites from your television. •ColorMaster™ allows you to adjust the TV's standard colors (- page 60). •Expert Mode allows detailed calibration with red, green and blue color selections (- page 59). •ClearFrame™ 120 Hz anti-blur feature (-page 59). •Resolution+™ upconverts and enhances for a more detailed picture (- page 58). •AutoView™ allows you to automatically adjust picture settings based on ambient light conditions and input signal content (- page 57). •Dolby® Volume eliminates inconsistent TV volume when changing channels or viewing commercials (page 63). •Media Player allows you to view photo files and to play music or movie files (- page 75). • ENERGY STAR® qualified Overview of steps for installing, setting up, and using your new TV Follow these steps to set up your TV and begin using its many exciting features. 1 Observe the following when choosing a location for the TV: •Read "Important notes about your LCD TV" (- page 7). •Place the TV in a proper location (- pages 2-5). 2 Do not plug in any power cords until AFTER you have connected all cables and devices to your TV. 3 BEFORE connecting cables or devices to the TV, learn the functions of the TV's connections and controls (- pages 11-12). 4 Connect your other electronic device(s) to the TV (- pages 13-22). 5 See "Chapter 3: Using the remote control" (- page 23) for an overview of the buttons on the remote control, install the batteries and prepare to operate your other device(s). 6 AFTER connecting all cables and devices, plug in the power cords for your TV and other devices. Note: After you turn on the TV, the Initial Setup menu appears automatically by default. 7 See "Chapter 4: Menu layout and navigation" for a quick overview of navigating the TV's menu system (- page 32). 8 Program channels into the TV's channel memory (- page 35). 9 For details on using the TV's features, see Chapters 6, 7 and 8. 10 For help, refer to the Troubleshooting Guide, see Chapter 9. 11 For technical specifications and warranty information, see Chapter 10. 10
-
 1
1 -
2
-
3
-
4
-
 5
5 -
 6
6 -
 7
7 -
 8
8 -
 9
9 -
 10
10 -
 11
11 -
 12
12 -
 13
13 -
 14
14 -
 15
15 -
16
-
17
-
18
-
19
-
20
-
21
-
22
-
23
-
24
-
25
-
26
-
27
-
28
-
29
-
30
-
31
-
32
-
33
-
34
-
35
-
36
-
37
-
38
-
39
-
40
-
41
-
42
-
43
-
44
-
45
-
46
-
47
-
48
-
49
-
50
-
51
-
52
-
53
-
54
-
55
-
56
-
57
-
58
-
59
-
60
-
61
-
62
-
63
-
64
-
65
-
66
-
67
-
68
-
69
-
70
-
71
-
72
-
73
-
74
-
75
-
76
-
77
-
78
-
79
-
80
-
81
-
82
-
83
-
84
-
85
-
86
-
87
-
88
-
89
-
90
-
91
-
92
-
93
-
94
-
95
-
96
-
97
-
98
-
99
-
100
 |
 |