Toshiba 40UX600U User Manual - Page 11
TV front and side panel - led tv
 |
View all Toshiba 40UX600U manuals
Add to My Manuals
Save this manual to your list of manuals |
Page 11 highlights
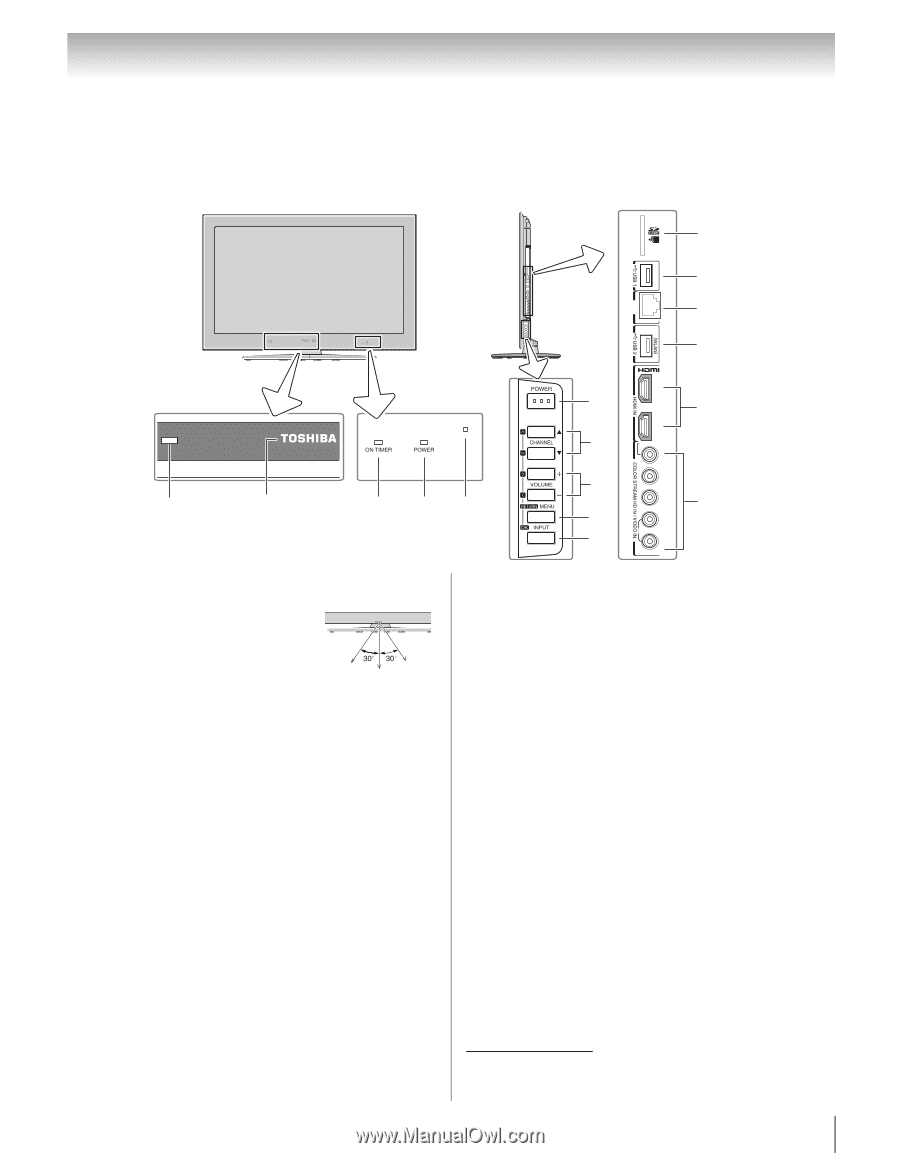
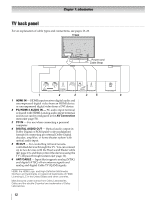
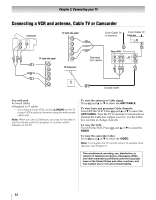
Chapter 1: Introduction TV front and side panel Model 40UX600U is used in this manual for illustration purposes. TV front LAN Right side panel 11 12 13 14 1 2 34 1 Remote sensor - Point the remote control toward this remote sensor. Effective range: 2 TOSHIBA Illumination 16.4 ft (5m) See "TOSHIBA Illumination" on page 52 for additional information. 3 On Timer LED See "Setting the On Timer" on page 51. 4 Power On/Standby LED See "LED indications" on page 85 for additional information. 5 Auto Brightness Sensor - This sensor will detect the ambient light conditions to optimize the backlighting levels (- page 60). 6 POWER - Press to turn the TV on and off. If the TV stops responding to the controls on the remote control or TV control panel and you cannot turn off the TV, press and hold the POWER button on the TV control panel for 5 or more seconds to reset the TV. 7 CHANNEL Bb - When no menu is on-screen, these buttons change the channel (programmed channels only; - page 35). ARROWS U u - When a menu is on-screen, these buttons function as up/down menu navigation buttons. 3 6 4 7 Y/VIDEO 15 PB 8 PR 5 L/MONO 16 9 AUDIO 10 R 8 VOLUME+ - - These buttons adjust the volume level. ARROWS I i - When a menu is on-screen, these buttons function as left/right menu navigation buttons. 9 MENU/RETURN - Press to access the menu system (- page 33). When a menu is on-screen, the MENU button on the TV's control panel functions as the RETURN button. 10 INPUT/OK - Repeatedly press to change the source you are viewing. When a menu is on-screen, the INPUT button on the TV's control panel functions as the OK button. 11 SD card slot - For use when inserting an SD Memory Card. 12 USB 1 - For use when inserting a USB device. 13 LAN port - For use when connecting to DLNA Certified products, Widgets, VUDU and YouTube. 14 USB 2 - For use when using WLAN with Dual Band WLAN Adapter.* 15 HDMI IN - HDMI input receives digital audio and uncompressed digital video from an HDMI device or uncompressed digital video from a DVI device. 16 COLOR STREAM HD IN/VIDEO IN - These include standard A/V connections. These are switched by AV input mode. (- page 36). * About the device restrictions of the wireless LAN (- pages 6 and 64). 11
-
 1
1 -
2
-
3
-
4
-
5
-
 6
6 -
 7
7 -
 8
8 -
 9
9 -
 10
10 -
 11
11 -
 12
12 -
 13
13 -
 14
14 -
 15
15 -
 16
16 -
17
-
18
-
19
-
20
-
21
-
22
-
23
-
24
-
25
-
26
-
27
-
28
-
29
-
30
-
31
-
32
-
33
-
34
-
35
-
36
-
37
-
38
-
39
-
40
-
41
-
42
-
43
-
44
-
45
-
46
-
47
-
48
-
49
-
50
-
51
-
52
-
53
-
54
-
55
-
56
-
57
-
58
-
59
-
60
-
61
-
62
-
63
-
64
-
65
-
66
-
67
-
68
-
69
-
70
-
71
-
72
-
73
-
74
-
75
-
76
-
77
-
78
-
79
-
80
-
81
-
82
-
83
-
84
-
85
-
86
-
87
-
88
-
89
-
90
-
91
-
92
-
93
-
94
-
95
-
96
-
97
-
98
-
99
-
100
 |
 |