Toshiba 40UX600U User Manual - Page 59
Expert Mode, ClearFrame, feature, MPEG NR
 |
View all Toshiba 40UX600U manuals
Add to My Manuals
Save this manual to your list of manuals |
Page 59 highlights
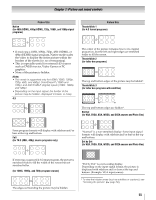
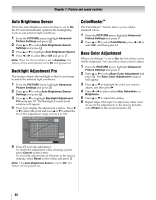
Chapter 7: Picture and sound controls Expert Mode This feature individually enables/disables the Red, Green, and Blue components of the picture to allow for more accurate adjustment of each color. 1 From the PICTURE menu, highlight Advanced Picture Settings and press . OK 2 Press B or b to select Expert Mode, and then press . OK 3 Press B or b to select either Red, Green or Blue. 4 Press C or c to select On. 5 Press b to select Color or Tint, press C or c to adjust, and then press . EXIT Note: • When the Picture Mode is set to AutoView, this feature will be grayed out. • When the Expert Mode menu is exited, the On/Off modes of Red, Green and Blue are no longer valid. • It is not possible to turn off all three colors at the same time. ClearFrame™ feature The ClearFrame 120 Hz anti-blur technology doubles the frame rate from 60 frames per second to 120 frames per second, virtually eliminating motion blur without adding flicker or reducing image brightness. 1 From the PICTURE menu, highlight Advanced Picture Settings and press . OK 2 Press B or b to select ClearFrame. 3 Press C or c to select On, and then press . EXIT Note: If the Picture Mode is set to Game, this feature will be grayed out. MPEG NR The MPEG noise reduction feature allows you to reduce visible interference caused by MPEG compression. 1 From the PICTURE menu, highlight Advanced Picture Settings and press . OK 2 Press B or b to select Noise Reduction and press . OK 3 Press B or b to highlight MPEG NR. 4 Press C or c to select either Low, Middle, High or Off and press . OK Note: If the Picture Mode is set to Game or PC, this feature will be grayed out. DNR DNR enables you to "soften" the screen representation of a weak signal to reduce the noise effect. 1 From the PICTURE menu, highlight Advanced Picture Settings and press . OK 2 Press B or b to select Noise Reduction and press . OK 3 Press B or b to select DNR. 4 Press C or c to select Low, Middle, High, Auto or Off and press . OK Note: • If the Picture Mode is set to Game or PC, this feature will be grayed out. • The differences may not always be noticeable (for the best result use lower settings as picture quality can be lost if the setting is too high). 59
-
 1
1 -
2
-
3
-
4
-
5
-
6
-
7
-
8
-
9
-
10
-
11
-
12
-
13
-
14
-
15
-
16
-
17
-
18
-
19
-
20
-
21
-
22
-
23
-
24
-
25
-
26
-
27
-
28
-
29
-
30
-
31
-
32
-
33
-
34
-
35
-
36
-
37
-
38
-
39
-
40
-
41
-
42
-
43
-
44
-
45
-
46
-
47
-
48
-
49
-
50
-
51
-
52
-
53
-
 54
54 -
 55
55 -
 56
56 -
 57
57 -
 58
58 -
 59
59 -
 60
60 -
 61
61 -
 62
62 -
 63
63 -
 64
64 -
65
-
66
-
67
-
68
-
69
-
70
-
71
-
72
-
73
-
74
-
75
-
76
-
77
-
78
-
79
-
80
-
81
-
82
-
83
-
84
-
85
-
86
-
87
-
88
-
89
-
90
-
91
-
92
-
93
-
94
-
95
-
96
-
97
-
98
-
99
-
100
 |
 |