Toshiba 42HP66 Owner's Manual - English
Toshiba 42HP66 - 42" Plasma TV Manual
 |
UPC - 022265300237
View all Toshiba 42HP66 manuals
Add to My Manuals
Save this manual to your list of manuals |
Toshiba 42HP66 manual content summary:
- Toshiba 42HP66 | Owner's Manual - English - Page 1
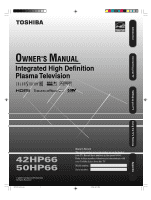
Introduction Connecting your TV Integrated High Definition Plasma Television Setting up your TV Using the TV's Features Appendix 42HP66 50HP66 3X70701A_En_cov 1 3/7/06, 6:23 PM - Toshiba 42HP66 | Owner's Manual - English - Page 2
instructions contained in this manual before you attempt to use this product in order to avoid potential hazards that could cause bodily injury or property damage or could damage your Plasma Television. We hope that you are completely satisfied with your Toshiba Plasma television and that it will - Toshiba 42HP66 | Owner's Manual - English - Page 3
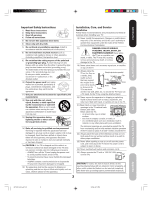
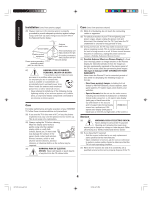
as short as possible) Clip stable surface that can support the weight of the Hooks Screw unit. Use a sturdy Band tie between the TV's rear hook TV side TV top and the rear wall, pillar, etc., to secure the TV. If you use a TV stand, fix the TV by using the attached band. 20) Never expose - Toshiba 42HP66 | Owner's Manual - English - Page 4
, the TV may make occasional snapping or popping sounds. This is normal, especially when the unit is being turned on or off. If these sounds become frequent or continuous, unplug the power cord and contact a Toshiba Authorized Service Center. 34) Possible Adverse Effects on Plasma Display If a fixed - Toshiba 42HP66 | Owner's Manual - English - Page 5
sides of the screen.) occasionally some parts of the screen may be missing picture elements and/or have luminous spots. To minimize the potential for the occurrence of phosphor burn-in, Toshiba recommends the following: 4) You can enjoy playing video games on this Plasma TV; • Display a moving - Toshiba 42HP66 | Owner's Manual - English - Page 6
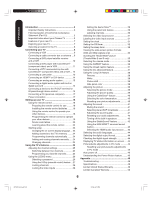
Connecting a digital audio system with built-in digital surround 15 Connecting a device to the IR OUT terminal for IR pass-through device control 16 Connecting a PC (personal computer 17 Power connection 17 Setting up your TV 18 Using the remote control 18 Preparing the remote control for use - Toshiba 42HP66 | Owner's Manual - English - Page 7
to use the TV as a computer monitor. • Two HDMI digital, High-Definition Multimedia Interface connections. • Two sets of ColorStream® HD high-resolution component video inputs. • Dolby* Digital and SRS WOW™ audio technologies. • Digital Audio Out optical audio connection. • CableClear® picture noise - Toshiba 42HP66 | Owner's Manual - English - Page 8
Coaxial Cable AUDIO Cables VIDEO Cable S-Video Cable Component video Cables HDMI Cable IR blaster Cable Optical Cable Coaxial Cable • IR blaster cable is for use with video device with IR (infrared) remote control. • Optical/Coaxial cable is for use with AV amplifier with built-in digital surround - Toshiba 42HP66 | Owner's Manual - English - Page 9
or antenna IN from ANT OUT to TV CH 3 CH 4 Stereo VCR TV back panel IN OUT VIDEO L R AUDIO You will need: • two coaxial cables • one set of standard A/V cables Note: If using a mono VCR, connect L/Mono to VCR Audio OUT using only one audio cable. For better picture quality, if your VCR has - Toshiba 42HP66 | Owner's Manual - English - Page 10
to TV VIDEO OUT L AUDIO R S-VIDEO IN from ANT OUT to TV CH 3 CH 4 Stereo VCR IN OUT VIDEO L AUDIO R You will need: • three coaxial cables • two sets of standard A/V cables • one S-video cable Note: You can use a standard video cable instead of the S-video cable, but the picture quality will - Toshiba 42HP66 | Owner's Manual - English - Page 11
enhance picture quality and performance. DVD player with Component video OUT L S-VIDEO R AUDIO VIDEO OUT COMPONENT VIDEO Y From antenna Stereo VCR IN from ANT OUT to TV CH 3 CH 4 IN OUT VIDEO L R AUDIO You will need: • two coaxial cables • one set of standard A/V cables • one set of - Toshiba 42HP66 | Owner's Manual - English - Page 12
video can greatly enhance picture quality and realism. From Antenna Stereo VCR IN from ANT OUT to TV CH 3 CH 4 IN OUT VIDEO L AUDIO R From DTV Antenna Y S-VIDEO COMPONENT VIDEO AUDIO OUT LR VIDEO L R OUT DTV Receiver with Component video You will need: • three coaxial cables • two sets - Toshiba 42HP66 | Owner's Manual - English - Page 13
. VHS Camcorder You will need: • one set of standard AV cables VIDEO AUDIO L R OUT TV right side panel S-VHS Camcorder VIDEO S-VIDEO AUDIO L R OUT TV right side panel You will need: • one S-video cable • one pair of standard audio cables Note: For better picture quality, if your camcorder - Toshiba 42HP66 | Owner's Manual - English - Page 14
HDMI audio input setting to "HDMI" in the AUDIO menu (see page 43.) Some CDVs (Video CDs) may not output digital audio signals. In that case, you may hear sound by connecting analog audio cables. If you do use analog audio cables for this reason, you will need to set the HDMI audio input setting to - Toshiba 42HP66 | Owner's Manual - English - Page 15
IN OR Optical digital Audio Coaxial digital Audio Front Speaker (Left) Connect either Optical audio cable Coaxial audio cable TV back panel You will need: • one optical audio cable or coaxial audio cable. Note: Refer to the Owner's manual of the audio amplifier as well. Front TV Subwoofer - Toshiba 42HP66 | Owner's Manual - English - Page 16
would need to be visible to operate it remotely. Front of IR-controlled device Infrared sensor IR blaster cable wand (approx. 1 inch from device) TV back panel You will need: • one IR blaster (IR emitter) cable (3.5mm mono mini plug) • other audio/video cables as required to connect the device - Toshiba 42HP66 | Owner's Manual - English - Page 17
" on page 45.) TV back panel Computer Audio output Audio cable Conversion adapter (if necessary) Power connection To use AC power 1. Connect the AC cord into the TV's AC inlet. 2. Connect the AC cord into a wall outlet. 1 To AC inlet AC cord (supplied) 2 AC 120V, 60Hz 17 You will need: • one - Toshiba 42HP66 | Owner's Manual - English - Page 18
the remote control until the lock snaps. Note: The TV remote control may not operate your VCR, DVD player, or cable TV converter. Refer to the owner's manual supplied with your other devices to see which features may be available. Additionally, the remote control for this TV may not support certain - Toshiba 42HP66 | Owner's Manual - English - Page 19
your TV Setting up your TV To control a DVD player: Program the remote control to recognize the brand of your DVD player (see "Programming the remote control to operate your other devices" below.) The buttons shown at right will then control the DVD player. Press "DVD" first. Power Input (TV - Toshiba 42HP66 | Owner's Manual - English - Page 20
Setting up your TV Device code tables [For CBL/SAT Mode] CABLE Box Brand Code 016, 021, 022, 023, 057, 064, 068, 070, 071, 079 Brand Fuji Funai Garrard GE Go Video Goldstar Gradiente Harman Kardon Hitachi JBL JC Penney Jensen JVC Kenwood Kodak LG Lloyds Logik LXI Magnasonic Magnavox Code 004, - Toshiba 42HP66 | Owner's Manual - English - Page 21
Signature Signature 2000 Singer Sony STS Sylvania Symphonic Tandy TV/VCR Combo Brand Action GE Goldstar Panasonic Code 078 007 Brand Code Tashiko Tatung Teac Technics Teknika Toshiba Totevision Unitec Unitech Vector Research Video Concepts Wards White Westinghouse XR-1000 Yamaha Zenith - Toshiba 42HP66 | Owner's Manual - English - Page 22
Setting up your TV Learning about the remote control INPUT selects the video input source (page 31) DISPLAY displays status information on-screen (page 44) MUTE turns off the sound (page 41) POWER turns the TV on and off CHANNEL NUMBERS allow direct access to channels (page 25) CH RTN (Channel - Toshiba 42HP66 | Owner's Manual - English - Page 23
to complete, depending on your regional cable service. • To cancel the AUTO SETUP and return to the regular TV screen, press EXIT. After you have installed the batteries and programmed the remote control, you need to set some preferences on the TV using the menu system. You can access the - Toshiba 42HP66 | Owner's Manual - English - Page 24
a "dash" (e.g., 85-002.) These digital channel numbers may not match the numbers in the channel line-up provided by your cable company. This is not a malfunction. Note: If the remote control does not operate your TV, press the "TV" button on the remote control and try again. 3X70701A_En_p18-25 24 - Toshiba 42HP66 | Owner's Manual - English - Page 25
up to 12 channel. FAVORITE CH SET / CLEAR 0 0 0 0 0 0 0 0 RETURN : CH 2 TV CABLE 0 0 0 0 SELECT ADJUST ENTER:SET To select your favorite channels: Press the FAV ▲ / ▼ buttons on the remote control to select your favorite channels. The FAV ▲ / ▼ buttons will not work until you have - Toshiba 42HP66 | Owner's Manual - English - Page 26
. See "Using the V-Chip (parental control) feature" (page 27), "Locking channels" (page 28), "Locking the video inputs" (page 28), "Setting the GameTimerTM" (page 29) or "Using the panel lock feature" (page 29.) To change your password: 1. Press TV to select the TV mode. 2. Press MENU, then press - Toshiba 42HP66 | Owner's Manual - English - Page 27
885 Note: • If the remote control does not operate your TV, press the "TV" button on the remote control and try again. • You can use V-CHIP SET (DTV) function when the digital broadcasting with a new rating system is received on the TV. 27 Using the TV's Features Appendix 3X70701A_En_p26-31 27 - Toshiba 42HP66 | Owner's Manual - English - Page 28
before turning off the television. INPUT DISPLAY Input Channel Numbers TV Menu/Enter Exit Note: After programming VIDEO LOCK, change channels or press INPUT before turning off the television. Note: If the remote control does not operate your TV, press the "TV" button on the remote control and - Toshiba 42HP66 | Owner's Manual - English - Page 29
enjoy playing video games on this Plasma TV; however, certain video games that utilize so-called "light gun" joysticks for shooting at on-screen targets may not work with this Plasma TV. INPUT DISPLAY Channel Numbers TV Menu/Enter Exit TV right side panel VOLUME Note: If the remote control does - Toshiba 42HP66 | Owner's Manual - English - Page 30
CH LABEL menu. SET/CLEAR will be highlighted. 6. Press or to highlight CLEAR. 7. Press ENTER. 8. Repeat steps 1-7 to erase other channel labels. INPUT DISPLAY CT-885 Channel Numbers TV Menu/Enter Exit Using the TV's Features 3X70701A_En_p26-31 30 Note: If the remote control does not operate - Toshiba 42HP66 | Owner's Manual - English - Page 31
/Enter Exit CT-885 Note: After a power failure or disconnection of the power, the clock settings will be lost. Note: If the remote control does not operate your TV, press the "TV" button on the remote control and try again. Using the TV's Features Appendix 3X70701A_En_p26-31 31 3/7/06, 6:25 - Toshiba 42HP66 | Owner's Manual - English - Page 32
. Note: After a power failure or disconnection of the power, the timer settings will be lost. INPUT DISPLAY TV Menu/ Enter ON TIMER turn off the TV at a set time. To set the sleep timer: Repeatedly press SLEEP on the remote control to set the length of time until the TV turns off. The clock will - Toshiba 42HP66 | Owner's Manual - English - Page 33
in any of the picture sizes will vary depending on the format of the program you are viewing. Select the picture size that displays the current program the way that looks best to you. Selecting the picture size 1. Press TV to select the TV mode. 2. Press PIC SIZE on the remote control. 3. Press the - Toshiba 42HP66 | Owner's Manual - English - Page 34
display for extended periods of time. Fixed (non-moving) patterns or images (including but not limited to PIP/ POP windows, closed captions, video game patterns, TV station logos, stock tickers, websites, and special formats that do not use the entire screen) can become permanently ingrained in the - Toshiba 42HP66 | Owner's Manual - English - Page 35
the picture in TheaterWide 2 and TheaterWide 3 only. The scroll amounts are as follows: • 480i/480p signal source: Wide 1 : Not adjustable Wide 2 : -10 to +20 Wide 3 : -10 to +10 Setting up your TV Using the TV's Features Appendix 3X70701A_En_p32-41 35 35 Note: If the remote control does - Toshiba 42HP66 | Owner's Manual - English - Page 36
METER REVERSE WHITE PICTURE SHIFT SIDE PANEL COLOR SELECT FILM ON / OFF ON G R AY ADJUST 4. Press or to highlight ON. 5. Press EXIT to return to normal viewing. INPUT DISPLAY CT-885 TV Menu/Enter Exit Using the TV's Features 3X70701A_En_p32-41 36 Note: If the remote control does not operate - Toshiba 42HP66 | Owner's Manual - English - Page 37
video game patterns, TV station logos, stock tickers, websites, and special formats that do not use the entire screen) can become permanently ingrained in the Plasma display and cause subtle but permanent ghost images. This type of damage is NOT COVERED BY YOUR WARRANTY. Note: If the remote control - Toshiba 42HP66 | Owner's Manual - English - Page 38
use the entire screen) can become permanently ingrained in the Plasma display and cause subtle but permanent ghost images. This type of damage is NOT COVERED BY YOUR WARRANTY. Note: SIDE PANEL COLOR is fixed to GRAY in PC input mode. Note: If the remote control does not operate your TV, press the - Toshiba 42HP66 | Owner's Manual - English - Page 39
greenish sharper 5. Press EXIT to return to normal viewing. INPUT DISPLAY CT-885 TV Menu/Enter Exit Note: If the remote control does not operate your TV, press the "TV" button on the remote control and try again. 39 Using the TV's Features Appendix 3X70701A_En_p32-41 39 3/7/06, 6:25 PM - Toshiba 42HP66 | Owner's Manual - English - Page 40
RESET, and then press . PICTURE CableClear COLOR TEMPERATURE RESET SELECT ON COOL ADJUST 40 INPUT DISPLAY TV Menu/Enter Exit CT-885 Note: If the remote control does not operate your TV, press the "TV" button on the remote control and try again. Using the TV's Features 3X70701A_En_p32-41 40 - Toshiba 42HP66 | Owner's Manual - English - Page 41
audio will be output; however, occasionally there is no sound at all in SAP mode. If this happens, set the MTS feature to STEREO mode. Note: Adjusting the sound quality (bass, treble, and balance) does not affect the sound that is output from the variable audio OUT jack. Note: If the remote control - Toshiba 42HP66 | Owner's Manual - English - Page 42
BALANCE STABLE SOUND SPEAKERS STEREO 25 25 0 ON / OFF ON SELECT ADJUST 4. Press or to highlight ON. 5. Press EXIT to return to normal viewing. To turn off the StableSound® feature: Highlight OFF in step 4, above. 42 INPUT DISPLAY TV Menu/Enter Exit CT-885 Note: If the remote control does not - Toshiba 42HP66 | Owner's Manual - English - Page 43
Introduction Connecting your TV Setting up your TV Using the SRS WOW™ surround sound feature WOW is a special combination of SRS Labs audio technologies that creates a thrilling surround sound experience with deep, rich bass from stereo sound sources. Your TV's audio will sound fuller, richer, - Toshiba 42HP66 | Owner's Manual - English - Page 44
status will display on the screen for approx. 4 seconds. • Digital channel status will display on the screen for approx. 10 seconds. Press RECALL again, the analog channel status will display. Note: If the remote control does not operate your TV, press the "TV" button on the remote control and - Toshiba 42HP66 | Owner's Manual - English - Page 45
on the PC Monitor screen. Each video standard will re- quire a different value for this setting. PHASE: This must be adjusted after the frequency has been set to optimize picture quality. CLOCK: To minimize any vertical bars or stripes visible on the screen background. RED/GREEN/BLUE: To - Toshiba 42HP66 | Owner's Manual - English - Page 46
Solution Black box on screen • Select OFF in the Closed Caption menu to turn off the Closed Caption Text mode. TV will not turn on • Make sure the power cord is plugged in, then press POWER. • The remote control batteries may be dead. Replace the batteries. No picture, no sound • Check - Toshiba 42HP66 | Owner's Manual - English - Page 47
mode is set properly on the remote control. • Remove all obstructions between the remote control and the TV. • The remote control batteries may be dead. Replace the batteries. The side panel buttons do not operate • Check the PANEL LOCK feature. Digital broadcasting screen problem • Check the - Toshiba 42HP66 | Owner's Manual - English - Page 48
may be added in the future. Model 42HP66 50HP66 PDP size Pixel Television system Channel coverage Power source Power consumption Operating temperature Operating humidity Audio power Speaker type Video/Audio terminals Dimensions Weight Supplied accessories 42.32 in. diagonal (1,074.9 mm) (approx - Toshiba 42HP66 | Owner's Manual - English - Page 49
Card Read this owner's manual thoroughly before operating this Plasma Television. Complete and mail the enclosed product registration card or register your Plasma Television online at www.tacp.toshiba.com/service as soon as possible. By registering your Plasma Television you will enable TACP to - Toshiba 42HP66 | Owner's Manual - English - Page 50
, ETC.). YOU MUST READ AND FOLLOW ALL SET-UP AND USAGE INSTRUCTIONS IN THE APPLICABLE USER GUIDES AND/OR MANUALS. IF YOU FAIL TO DO SO, THIS TELEVISION MAY NOT FUNCTION PROPERLY AND YOU MAY SUFFER DAMAGE. THIS WARRANTY WILL NOT COVER ANY SERVICE THAT IS REQUIRED, IN PART OR IN WHOLE, AS A RESULT OF - Toshiba 42HP66 | Owner's Manual - English - Page 51
for Toshiba Brand Plasma Television Models (continued from previous page) IF THE TELEVISION FAILS TO WORK AS WARRANTED ABOVE, YOUR SOLE AND EXCLUSIVE REMEDY SHALL BE REPAIR OR REPLACEMENT OF THE DEFECTIVE PART. IN NO EVENT WILL TCL, TOSHIBA CORPORATION, THEIR AFFILIATES, ADRs OR AUTHORIZED SERVICE - Toshiba 42HP66 | Owner's Manual - English - Page 52
National Service Division CableClear, ColorStream, TheaterWide and StableSound are registered trademarks of Toshiba America Consumer Products, L.L.C. GameTimer is a trademark of Toshiba America Consumer Products, L.L.C. J3X70701A SH 06/03 N 3X70701A_En_p46-bc 52 PRINTED IN THAILAND 3/7/06, 6:26
-
 1
1 -
 2
2 -
 3
3 -
 4
4 -
 5
5 -
 6
6 -
 7
7 -
8
-
9
-
10
-
11
-
12
-
13
-
14
-
15
-
16
-
17
-
18
-
19
-
20
-
21
-
22
-
23
-
24
-
25
-
26
-
27
-
28
-
29
-
30
-
31
-
32
-
33
-
34
-
35
-
36
-
37
-
38
-
39
-
40
-
41
-
42
-
43
-
44
-
45
-
46
-
47
-
48
-
49
-
50
-
51
-
52
 |
 |
42HP66
50HP66
Integrated High Definition
Plasma Television
Introduction
Connecting your TV
Setting up your TV
Using the TV’s Features
Appendix
3X70701A_En_cov
3/7/06, 6:23 PM
1