Toshiba 46SL417U User Manual - Page 30
Labeling channels, Labeling video inputs, Configuring shared inputs, Side Shared Audio
 |
View all Toshiba 46SL417U manuals
Add to My Manuals
Save this manual to your list of manuals |
Page 30 highlights
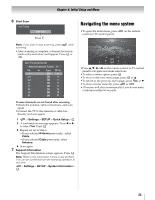
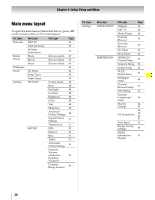
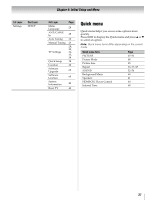
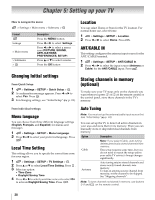
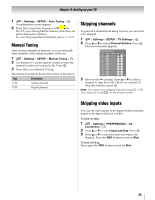
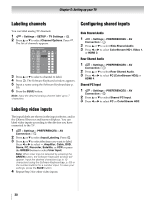
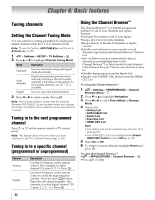
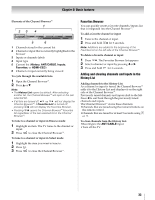
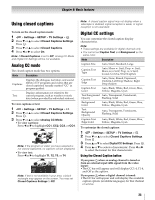
Chapter 5: Setting up your TV Labeling channels Configuring shared inputs You can label analog TV channels. 1 > Settings > SETUP > TV Settings > . OK 2 Press B or b to select Channel Options. Press . OK The list of channels appears. Channel Options Ch. Type Label 5-1 DTV 6 ATV 6-1 DTV 8 ATV 9 ATV 10 ATV 11 ATV 12 ATV 3 Press B or b to select a channel to label. 4 Press OK . The Software Keyboard window appears. 5 Input a name using the Software Keyboard (- p. 59). 6 Press the BLUE button. Note: Input the desired analog channel label up to 7 characters. Side Shared Audio 1 > Settings > PREFERENCES > AV Connection > . OK 2 Press B or b to select Side Shared Audio. 3 Press C or c to select ColorStream HD1, Video 1, or HDMI 3. Rear Shared Audio 1 > Settings > PREFERENCES > AV Connection > . OK 2 Press B or b to select Rear Shared Audio. 3 Press C or c to select PC (ColorStream HD2) or HDMI 4. Shared PC Input 1 > Settings > PREFERENCES > AV Connection > . OK 2 Press B or b to select Shared PC Input. 3 Press C or c to select PC or ColorStream HD2. Labeling video inputs The input labels are shown in the input selector, and in the Channel Browser and banner displays. You can label video inputs according to the devices you have connected to the TV. 1 > Settings > PREFERENCES > AV Connection > . OK 2 Press B or b to select Input Labeling. Press . OK 3 Press B or b to select the item you want to label. Press C or c to select --, Amplifier, Cable, DVD, Game, PC, Recorder, Satellite, or VCR or press the GREEN button to select User Input. Note: When User Input is selected by pressing the GREEN button, the Software Keyboard window will appear. Input the desired characters (up to 10 characters) using the Software Keyboard (- p. 59) or the number buttons for a number input. To save your settings, press the BLUE button. 4 Repeat Step 3 for other video inputs. 30
-
 1
1 -
2
-
3
-
4
-
5
-
6
-
7
-
8
-
9
-
10
-
11
-
12
-
13
-
14
-
15
-
16
-
17
-
18
-
19
-
20
-
21
-
22
-
23
-
24
-
 25
25 -
 26
26 -
 27
27 -
 28
28 -
 29
29 -
 30
30 -
 31
31 -
 32
32 -
 33
33 -
 34
34 -
 35
35 -
36
-
37
-
38
-
39
-
40
-
41
-
42
-
43
-
44
-
45
-
46
-
47
-
48
-
49
-
50
-
51
-
52
-
53
-
54
-
55
-
56
-
57
-
58
-
59
-
60
-
61
-
62
-
63
-
64
-
65
-
66
-
67
-
68
-
69
-
70
-
71
-
72
-
73
-
74
-
75
-
76
-
77
-
78
-
79
-
80
-
81
-
82
-
83
-
84
-
85
-
86
-
87
-
88
-
89
-
90
-
91
-
92
-
93
 |
 |
