Toshiba A7 PTA71C-LL001E Users Manual Canada; English - Page 117
Using the microphone
 |
View all Toshiba A7 PTA71C-LL001E manuals
Add to My Manuals
Save this manual to your list of manuals |
Page 117 highlights
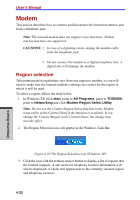
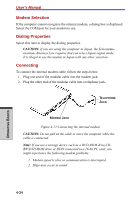
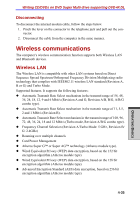
Writing CD/DVDs on DVD Super Multi driUvessinugppthoretimngicDrVoDp+hRonDeL DVD. If necessary, use a cloth dampened in water or a neutral cleaner. Do not use benzine, thinner or similar cleaner. Diskettes 1. Store your diskettes in the container they came in to protect them and keep them clean. If a diskette is dirty, do not use cleaning fluid. Clean it with a soft damp cloth. 2. Do not slide back the diskette's protective metal covering or touch the diskette's magnetic surface. Fingerprints may prevent the diskette drive from reading data from the diskette. 3. Data may be lost if the diskette is twisted; bent; or exposed to direct sunlight, extreme heat or cold. 4. Do not place heavy objects on your diskettes. 5. Do not eat, smoke, or use erasers near your diskettes. Foreign particles inside the diskette's jacket can damage the magnetic surface. 6. Magnetic energy can destroy the data on your diskettes. Keep your diskettes away from speakers, radios, television sets and other sources of magnetic fields. Using the microphone Your computer has a built-in microphone that can be used to record monaural sounds into your applications. It can also be used to issue voice commands to applications that support such functions (Built-in microphone is provided with some models.) Since your computer has a built-in microphone and speaker, "feedback" may be heard under certain conditions. Feedback occurs when sound from the speaker is picked up in the microphone and amplified back to the speaker, which amplifies it again to the microphone. This feedback occurs repeatedly and causes a very loud, high-pitched noise. It is a common phenomenon that occurs in any sound system when the microphone input is output to the speaker (throughput) and the speaker volume is too loud or too close to the microphone. You can control throughput by adjusting the volume of your speaker or through the Mute function in the Master Volume panel. Refer to your Windows documentation for details on using the Master Volume panel. 4-31 OPERATING BASICS
-
 1
1 -
2
-
3
-
4
-
5
-
6
-
7
-
8
-
9
-
10
-
11
-
12
-
13
-
14
-
15
-
16
-
17
-
18
-
19
-
20
-
21
-
22
-
23
-
24
-
25
-
26
-
27
-
28
-
29
-
30
-
31
-
32
-
33
-
34
-
35
-
36
-
37
-
38
-
39
-
40
-
41
-
42
-
43
-
44
-
45
-
46
-
47
-
48
-
49
-
50
-
51
-
52
-
53
-
54
-
55
-
56
-
57
-
58
-
59
-
60
-
61
-
62
-
63
-
64
-
65
-
66
-
67
-
68
-
69
-
70
-
71
-
72
-
73
-
74
-
75
-
76
-
77
-
78
-
79
-
80
-
81
-
82
-
83
-
84
-
85
-
86
-
87
-
88
-
89
-
90
-
91
-
92
-
93
-
94
-
95
-
96
-
97
-
98
-
99
-
100
-
101
-
102
-
103
-
104
-
105
-
106
-
107
-
108
-
109
-
110
-
111
-
 112
112 -
 113
113 -
 114
114 -
 115
115 -
 116
116 -
 117
117 -
 118
118 -
 119
119 -
 120
120 -
 121
121 -
 122
122 -
123
-
124
-
125
-
126
-
127
-
128
-
129
-
130
-
131
-
132
-
133
-
134
-
135
-
136
-
137
-
138
-
139
-
140
-
141
-
142
-
143
-
144
-
145
-
146
-
147
-
148
-
149
-
150
-
151
-
152
-
153
-
154
-
155
-
156
-
157
-
158
-
159
-
160
-
161
-
162
-
163
-
164
-
165
-
166
-
167
-
168
-
169
-
170
-
171
-
172
-
173
-
174
-
175
-
176
-
177
-
178
-
179
-
180
-
181
-
182
-
183
-
184
-
185
-
186
-
187
-
188
-
189
-
190
-
191
-
192
-
193
-
194
-
195
-
196
-
197
-
198
-
199
-
200
-
201
-
202
-
203
-
204
-
205
-
206
-
207
-
208
-
209
-
210
-
211
-
212
-
213
-
214
-
215
-
216
-
217
-
218
-
219
-
220
-
221
-
222
-
223
-
224
-
225
-
226
-
227
-
228
-
229
-
230
-
231
-
232
-
233
-
234
-
235
-
236
-
237
-
238
-
239
-
240
-
241
-
242
-
243
-
244
-
245
-
246
-
247
-
248
-
249
-
250
-
251
-
252
-
253
-
254
-
255
-
256
-
257
-
258
-
259
-
260
-
261
-
262
-
263
-
264
-
265
-
266
-
267
-
268
-
269
-
270
-
271
-
272
-
273
-
274
-
275
-
276
 |
 |