Toshiba M7 PTM71C-GH10TE Users Manual Canada; English - Page 99
Removing the Tablet PC Pen, Pen actions
 |
View all Toshiba M7 PTM71C-GH10TE manuals
Add to My Manuals
Save this manual to your list of manuals |
Page 99 highlights
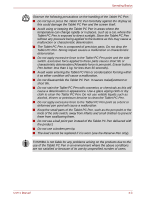
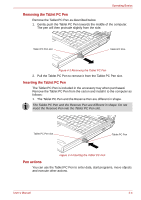
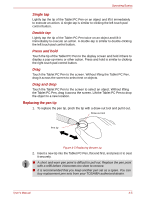
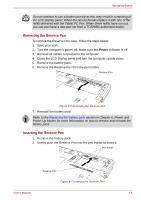
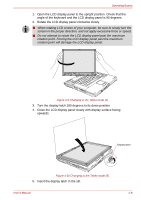
Operating Basics Removing the Tablet PC Pen Remove the Tablet PC Pen as described below. 1. Gently push the Tablet PC Pen towards the middle of the computer. The pen will then protrude slightly from the side. Tablet PC Pen slot Tablet PC Pen Figure 4-3 Removing the Tablet PC Pen 2. Pull the Tablet PC Pen to remove it from the Tablet PC Pen slot. Inserting the Tablet PC Pen The Tablet PC Pen is included in the accessory tray when purchased. Remove the Tablet PC Pen from the carton and install it to the computer as follows: 1. The Tablet PC Pen and the Reserve Pen are different in shape. The Tablet PC Pen and the Reserve Pen are different in shape. Do not insert the Reserve Pen into the Tablet PC Pen slot. Tablet PC Pen slot Tablet PC Pen Figure 4-4 Inserting the Tablet PC Pen Pen actions You can use the Tablet PC Pen to enter data, start programs, move objects and execute other actions. User's Manual 4-4
-
 1
1 -
2
-
3
-
4
-
5
-
6
-
7
-
8
-
9
-
10
-
11
-
12
-
13
-
14
-
15
-
16
-
17
-
18
-
19
-
20
-
21
-
22
-
23
-
24
-
25
-
26
-
27
-
28
-
29
-
30
-
31
-
32
-
33
-
34
-
35
-
36
-
37
-
38
-
39
-
40
-
41
-
42
-
43
-
44
-
45
-
46
-
47
-
48
-
49
-
50
-
51
-
52
-
53
-
54
-
55
-
56
-
57
-
58
-
59
-
60
-
61
-
62
-
63
-
64
-
65
-
66
-
67
-
68
-
69
-
70
-
71
-
72
-
73
-
74
-
75
-
76
-
77
-
78
-
79
-
80
-
81
-
82
-
83
-
84
-
85
-
86
-
87
-
88
-
89
-
90
-
91
-
92
-
93
-
 94
94 -
 95
95 -
 96
96 -
 97
97 -
 98
98 -
 99
99 -
 100
100 -
 101
101 -
 102
102 -
 103
103 -
 104
104 -
105
-
106
-
107
-
108
-
109
-
110
-
111
-
112
-
113
-
114
-
115
-
116
-
117
-
118
-
119
-
120
-
121
-
122
-
123
-
124
-
125
-
126
-
127
-
128
-
129
-
130
-
131
-
132
-
133
-
134
-
135
-
136
-
137
-
138
-
139
-
140
-
141
-
142
-
143
-
144
-
145
-
146
-
147
-
148
-
149
-
150
-
151
-
152
-
153
-
154
-
155
-
156
-
157
-
158
-
159
-
160
-
161
-
162
-
163
-
164
-
165
-
166
-
167
-
168
-
169
-
170
-
171
-
172
-
173
-
174
-
175
-
176
-
177
-
178
-
179
-
180
-
181
-
182
-
183
-
184
-
185
-
186
-
187
-
188
-
189
-
190
-
191
-
192
-
193
-
194
-
195
-
196
-
197
-
198
-
199
-
200
-
201
-
202
-
203
-
204
-
205
-
206
-
207
-
208
-
209
-
210
-
211
-
212
-
213
-
214
-
215
-
216
-
217
-
218
-
219
-
220
-
221
-
222
-
223
-
224
-
225
-
226
-
227
-
228
-
229
-
230
-
231
-
232
-
233
-
234
-
235
-
236
-
237
-
238
-
239
-
240
-
241
-
242
-
243
-
244
-
245
-
246
-
247
-
248
-
249
-
250
-
251
-
252
-
253
-
254
-
255
-
256
-
257
-
258
-
259
-
260
-
261
 |
 |
