Toshiba Satellite L510 PSLGJC Users Manual Canada; English - Page 135
Additional battery pack (6 cell and 12 cell), Additional AC adapter, USB FDD Kit, eSATA
 |
View all Toshiba Satellite L510 PSLGJC manuals
Add to My Manuals
Save this manual to your list of manuals |
Page 135 highlights
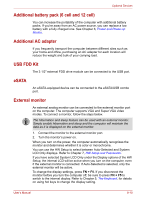
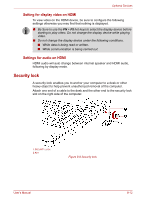
Optional Devices Additional battery pack (6 cell and 12 cell) You can increase the portability of the computer with additional battery packs. If you're away from an AC power source, you can replace a low battery with a fully charged one. See Chapter 6, Power and Power-up Modes. Additional AC adapter If you frequently transport the computer between different sites such as your home and office, purchasing an AC adapter for each location will reduce the weight and bulk of your carrying load. USB FDD Kit The 3 1/2" external FDD drive module can be connected to the USB port. eSATA An eSATA-equipped device can be connected to the eSATA/USB combo port. External monitor An external analog monitor can be connected to the external monitor port on the computer. The computer supports VGA and Super VGA video modes. To connect a monitor, follow the steps below. The hibernation and sleep feature can be used with an external monitor. Simply enable hibernation and sleep and the computer will maintain the data as it is displayed on the external monitor. 1. Connect the monitor to the external monitor port. 2. Turn the monitor's power on. When you turn on the power, the computer automatically recognizes the monitor and determines whether it is color or monochrome. You can use the HW Setup to select between Auto-Selected and System LCD Only displays. Refer to Chapter 7, HW Setup and Passwords. If you have selected System LCD Only under the Display options of the HW Setup, the internal LCD will be active when you turn on the computer, even if the external monitor is connected. If Auto-Selected is selected, only the external monitor will be active. To change the display settings, press FN + F5. If you disconnect the monitor before you turn the computer off, be sure to press FN + F5 to switch to the internal display. Refer to Chapter 5, The Keyboard, for details on using hot keys to change the display setting. User's Manual 8-10
-
 1
1 -
2
-
3
-
4
-
5
-
6
-
7
-
8
-
9
-
10
-
11
-
12
-
13
-
14
-
15
-
16
-
17
-
18
-
19
-
20
-
21
-
22
-
23
-
24
-
25
-
26
-
27
-
28
-
29
-
30
-
31
-
32
-
33
-
34
-
35
-
36
-
37
-
38
-
39
-
40
-
41
-
42
-
43
-
44
-
45
-
46
-
47
-
48
-
49
-
50
-
51
-
52
-
53
-
54
-
55
-
56
-
57
-
58
-
59
-
60
-
61
-
62
-
63
-
64
-
65
-
66
-
67
-
68
-
69
-
70
-
71
-
72
-
73
-
74
-
75
-
76
-
77
-
78
-
79
-
80
-
81
-
82
-
83
-
84
-
85
-
86
-
87
-
88
-
89
-
90
-
91
-
92
-
93
-
94
-
95
-
96
-
97
-
98
-
99
-
100
-
101
-
102
-
103
-
104
-
105
-
106
-
107
-
108
-
109
-
110
-
111
-
112
-
113
-
114
-
115
-
116
-
117
-
118
-
119
-
120
-
121
-
122
-
123
-
124
-
125
-
126
-
127
-
128
-
129
-
 130
130 -
 131
131 -
 132
132 -
 133
133 -
 134
134 -
 135
135 -
 136
136 -
 137
137 -
 138
138 -
 139
139 -
 140
140 -
141
-
142
-
143
-
144
-
145
-
146
-
147
-
148
-
149
-
150
-
151
-
152
-
153
-
154
-
155
-
156
-
157
-
158
-
159
-
160
-
161
-
162
-
163
-
164
-
165
-
166
-
167
-
168
-
169
-
170
-
171
-
172
-
173
-
174
-
175
-
176
-
177
-
178
-
179
-
180
-
181
-
182
-
183
-
184
-
185
-
186
-
187
-
188
-
189
-
190
 |
 |
