Toshiba Satellite P50W-B PSVP2C-001001 Users Manual Canada; English - Page 36
Left side, Wireless, communication, indicator, Wireless communication, DC IN 19V jack
 |
View all Toshiba Satellite P50W-B PSVP2C-001001 manuals
Add to My Manuals
Save this manual to your list of manuals |
Page 36 highlights
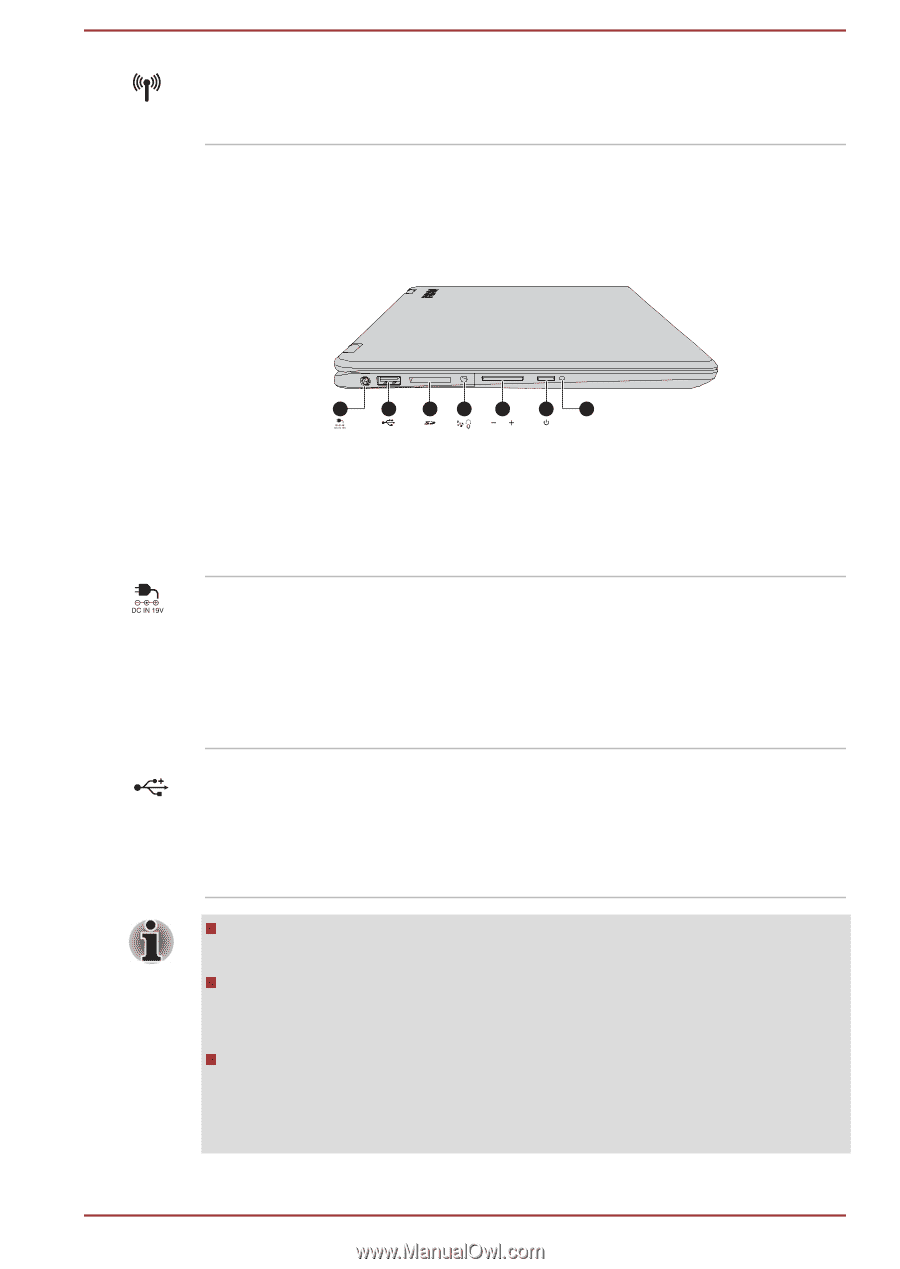
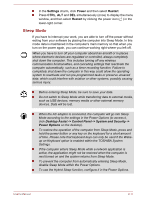
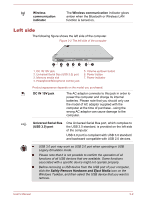
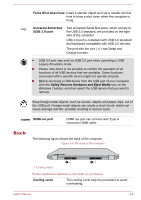
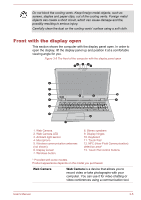
Wireless communication indicator The Wireless communication indicator glows amber when the Bluetooth or Wireless LAN function is turned on. Left side The following figure shows the left side of the computer. Figure 3-2 The left side of the computer 1 2 3 4 5 6 7 1. DC IN 19V jack 2. Universal Serial Bus (USB 3.0) port 3. Memory media slot 4. Headphone/Microphone combo jack 5. Volume up/down button 6. Power button 7. Power indicator Product appearance depends on the model you purchased. DC IN 19V jack The AC adaptor connects to this jack in order to power the computer and charge its internal batteries. Please note that you should only use the model of AC adaptor supplied with the computer at the time of purchase - using the wrong AC adaptor can cause damage to the computer. Universal Serial Bus (USB 3.0) port One Universal Serial Bus port, which complies to the USB 3.0 standard, is provided on the left side of the computer. USB 3.0 port is compliant with USB 3.0 standard and backward compatible with USB 2.0 devices. USB 3.0 port may work as USB 2.0 port when operating in USB Legacy Emulation mode. Please note that it is not possible to confirm the operation of all functions of all USB devices that are available. Some functions associated with a specific device might not operate properly. Before removing a USB device from the USB port of your computer, click the Safely Remove Hardware and Eject Media icon on the Windows Taskbar, and then select the USB device that you want to remove. User's Manual 3-2
-
 1
1 -
2
-
3
-
4
-
5
-
6
-
7
-
8
-
9
-
10
-
11
-
12
-
13
-
14
-
15
-
16
-
17
-
18
-
19
-
20
-
21
-
22
-
23
-
24
-
25
-
26
-
27
-
28
-
29
-
30
-
 31
31 -
 32
32 -
 33
33 -
 34
34 -
 35
35 -
 36
36 -
 37
37 -
 38
38 -
 39
39 -
 40
40 -
 41
41 -
42
-
43
-
44
-
45
-
46
-
47
-
48
-
49
-
50
-
51
-
52
-
53
-
54
-
55
-
56
-
57
-
58
-
59
-
60
-
61
-
62
-
63
-
64
-
65
-
66
-
67
-
68
-
69
-
70
-
71
-
72
-
73
-
74
-
75
-
76
-
77
-
78
-
79
-
80
-
81
-
82
-
83
-
84
-
85
-
86
-
87
-
88
-
89
-
90
-
91
-
92
-
93
-
94
-
95
-
96
-
97
-
98
-
99
-
100
-
101
-
102
-
103
-
104
-
105
-
106
-
107
-
108
-
109
-
110
-
111
-
112
-
113
-
114
-
115
-
116
-
117
-
118
-
119
-
120
-
121
-
122
-
123
 |
 |