Toshiba Satellite W30t User Manual - Page 87
Hardware and system checklist, DC IN/Battery, Advanced option, Key & button operations
 |
View all Toshiba Satellite W30t manuals
Add to My Manuals
Save this manual to your list of manuals |
Page 87 highlights
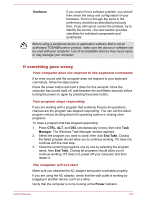
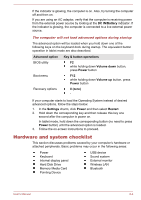
If the indicator is glowing, the computer is on. Also, try turning the computer off and then on. If you are using an AC adaptor, verify that the computer is receiving power from the external power source by looking at the DC IN/Battery indicator. If the indicator is glowing, the computer is connected to a live external power source. The computer will not load advanced options during startup The advanced option will be loaded when you hold down one of the following keys on the keyboard dock during startup. The equivalent button operation in tablet mode are also described. Advanced option Key & button operations BIOS utility F2 while holding down Volume down button, press Power button Boot menu F12 while holding down Volume up button, press Power button Recovery options 0 (zero) - If your computer starts to load the Operating System instead of desired advanced options, follow the steps below: 1. In the Settings charm, click Power and then select Restart. 2. Hold down the corresponding key and then release this key one second after the computer is power on. In tablet mode, hold down the corresponding button (no need to press Power button) until the advanced option is loaded. 3. Follow the on-screen instructions to proceed. Hardware and system checklist This section discusses problems caused by your computer's hardware or attached peripherals. Basic problems may occur in the following areas: Power Keyboard Internal display panel Hard Disk Drive Memory Media Card Pointing Device USB device Sound system External monitor Wireless LAN Bluetooth User's Manual 6-4
-
 1
1 -
2
-
3
-
4
-
5
-
6
-
7
-
8
-
9
-
10
-
11
-
12
-
13
-
14
-
15
-
16
-
17
-
18
-
19
-
20
-
21
-
22
-
23
-
24
-
25
-
26
-
27
-
28
-
29
-
30
-
31
-
32
-
33
-
34
-
35
-
36
-
37
-
38
-
39
-
40
-
41
-
42
-
43
-
44
-
45
-
46
-
47
-
48
-
49
-
50
-
51
-
52
-
53
-
54
-
55
-
56
-
57
-
58
-
59
-
60
-
61
-
62
-
63
-
64
-
65
-
66
-
67
-
68
-
69
-
70
-
71
-
72
-
73
-
74
-
75
-
76
-
77
-
78
-
79
-
80
-
81
-
 82
82 -
 83
83 -
 84
84 -
 85
85 -
 86
86 -
 87
87 -
 88
88 -
 89
89 -
 90
90 -
 91
91 -
 92
92 -
93
-
94
-
95
-
96
-
97
-
98
-
99
-
100
-
101
-
102
-
103
-
104
-
105
-
106
-
107
-
108
-
109
-
110
-
111
-
112
-
113
-
114
 |
 |