ViewSonic PJD5123 PJD5123 User Guide (English) - Page 23
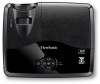
Connecting a Component Video source device, COMPUTER IN 2
 |
UPC - 766907526516
View all ViewSonic PJD5123 manuals
Add to My Manuals
Save this manual to your list of manuals |
Page 23 highlights
Connecting a Component Video source device Examine your Video source device to determine if it has a set of unused Component Video output sockets available: If so, you can continue with this procedure. If not, you will need to reassess which method you can use to connect to the device. To connect the projector to a Component Video source device: 1. Take a VGA (D-Sub) to HDTV (RCA) cable and connect the end with 3 RCA type connectors to the Component Video output sockets of the Video source device. Match the color of the plugs to the color of the sockets; green to green, blue to blue, and red to red. 2. Connect the other end of the cable (with a D-Sub type connector) to the COMPUTER IN 1 or COMPUTER IN 2 socket on the projector. Important If the selected video image is not displayed after the projector is turned on and the correct video source has been selected, check that the Video source device is turned on and operating correctly. Also check that the signal cables have been connected correctly. Connecting an S-Video source device Examine your Video source device to determine if it has an unused S-Video output socket available: If so, you can continue with this procedure. If not, you will need to reassess which method you can use to connect to the device. To connect the projector to an S-Video source device: 1. Take an S-Video cable and connect one end to the S-Video output socket of the Video source device. 2. Connect the other end of the S-Video cable to the S-VIDEO socket on the projector. Important If the selected video image is not displayed after the projector is turned on and the correct video source has been selected, check that the Video source device is turned on and operating correctly. Also check that the signal cables have been connected correctly. If you have already made a Component Video connection between the projector and this S-Video source device using Component Video connections, you need not connect to this device using an S-Video connection as this makes an unnecessary second connection of poorer picture quality. See "Connecting Video source devices" on page 17 for EN-18 18
-
 1
1 -
2
-
3
-
4
-
5
-
6
-
7
-
8
-
9
-
10
-
11
-
12
-
13
-
14
-
15
-
16
-
17
-
 18
18 -
 19
19 -
 20
20 -
 21
21 -
 22
22 -
 23
23 -
 24
24 -
 25
25 -
 26
26 -
 27
27 -
 28
28 -
29
-
30
-
31
-
32
-
33
-
34
-
35
-
36
-
37
-
38
-
39
-
40
-
41
-
42
-
43
-
44
-
45
-
46
-
47
-
48
-
49
-
50
-
51
-
52
-
53
-
54
-
55
 |
 |
