Vivitar DVR 988HD User Manual - Page 33
Installing The Software, Connecting The Camera To The Computer
 |
View all Vivitar DVR 988HD manuals
Add to My Manuals
Save this manual to your list of manuals |
Page 33 highlights
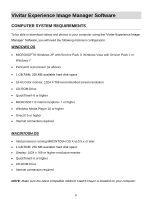
INSTALLING THE SOFTWARE Use the Vivitar Experience Image Manager to upload and manage photos and videos to and from popular social network sites. Create albums, edit photos and use 'Geotagging'. Download and install the Vivitar Experience Image Manager Software via the following online links: WINDOWS OS: http://tinyurl.com/viviwin MAC OS: http://tinyurl.com/vivimac 1. Enter the appropriate URL (shown above) into a web browser on your computer. 2. The file for installing the software automatically begins to download to your computer. Please note that the web page appears empty, however the download automatically begins. 3. Locate the downloaded application files on your computer's 'Downloads' folder once the download is complete: On WINDOWS OS the file name is: vivitargeneric_win.exe ON MAC OS in file name is: vivitargeneric_mac.pkg 4. Double click on the downloaded application file to install the Vivitar Experience Image Manager Software. 5. Follow all instructions 6. Once installation is complete, the Vivitar Experience Image Manager opens automatically. CONNECTING THE CAMERA TO THE COMPUTER 1. Use the supplied USB cable to connect your camera to your computer. 2. Power the camera ON. 'MSDC' appears on the LCD. 3. The first time you connect the device to the computer you may have to wait a few seconds until the computer recognizes the device. 32
-
 1
1 -
2
-
3
-
4
-
5
-
6
-
7
-
8
-
9
-
10
-
11
-
12
-
13
-
14
-
15
-
16
-
17
-
18
-
19
-
20
-
21
-
22
-
23
-
24
-
25
-
26
-
27
-
 28
28 -
 29
29 -
 30
30 -
 31
31 -
 32
32 -
 33
33 -
 34
34 -
 35
35 -
 36
36 -
 37
37 -
 38
38 -
39
-
40
 |
 |